1. اہم حفاظتی معلومات
Please read all instructions carefully before using your VonHaus 600W Corded 2-in-1 Stick Vacuum Cleaner. Retain this manual for future reference.
- Always ensure the appliance is unplugged from the power supply before assembling, disassembling, or cleaning.
- Do not use the appliance on wet surfaces or to pick up liquids.
- بالوں، ڈھیلے کپڑے، انگلیوں اور جسم کے تمام حصوں کو کھلنے اور حرکت کرنے والے حصوں سے دور رکھیں۔
- ایسی کوئی بھی چیز نہ اٹھائیں جو جل رہی ہو یا سگریٹ پی رہی ہو، جیسے سگریٹ، ماچس یا گرم راکھ۔
- صرف اسی طرح استعمال کریں جیسا کہ اس دستی میں بیان کیا گیا ہے۔ صرف مینوفیکچرر کی تجویز کردہ منسلکات استعمال کریں۔
- جگہ پر ڈسٹ کپ اور/یا فلٹرز کے بغیر استعمال نہ کریں۔
- اگر سپلائی کی ہڈی خراب ہو جاتی ہے، تو خطرے سے بچنے کے لیے اسے مینوفیکچرر، اس کے سروس ایجنٹ، یا اسی طرح کے اہل افراد کو تبدیل کرنا چاہیے۔
2. پیکیج کے مشمولات
تصدیق کریں کہ تمام اجزاء موجود ہیں اور اچھی حالت میں ہیں:
- مین ویکیوم یونٹ
- توسیع ہینڈل
- فلور برش ہیڈ
- کریوس ٹول
- برش اٹیچمنٹ
- HEPA فلٹر (پہلے سے نصب)
- Sponge Filter (pre-installed)

شکل 2.1: ورسٹائل صفائی کے لیے شامل لوازمات۔
3. سیٹ اپ اور اسمبلی
Your VonHaus vacuum can be assembled in two configurations: upright stick vacuum or handheld vacuum.
3.1 Upright Stick Vacuum Assembly
- ہینڈل منسلک کریں: Insert the extendable handle into the main vacuum unit until it clicks securely into place.
- Attach the Floor Brush Head: Connect the floor brush head to the main vacuum unit. Ensure it is firmly attached.
- پاور کنکشن: بجلی کی تار کو کسی مناسب برقی آؤٹ لیٹ میں لگائیں۔

Figure 3.1: The VonHaus 2-in-1 Stick Vacuum Cleaner in its two primary configurations.
3.2 Handheld Vacuum Assembly
- Detach Handle and Floor Head: If assembled as an upright vacuum, press the release buttons to detach the extendable handle and the floor brush head from the main unit.
- لوازمات منسلک کریں: Select the desired accessory (crevice tool or brush attachment) and firmly attach it to the main vacuum unit.
- پاور کنکشن: بجلی کی تار کو کسی مناسب برقی آؤٹ لیٹ میں لگائیں۔
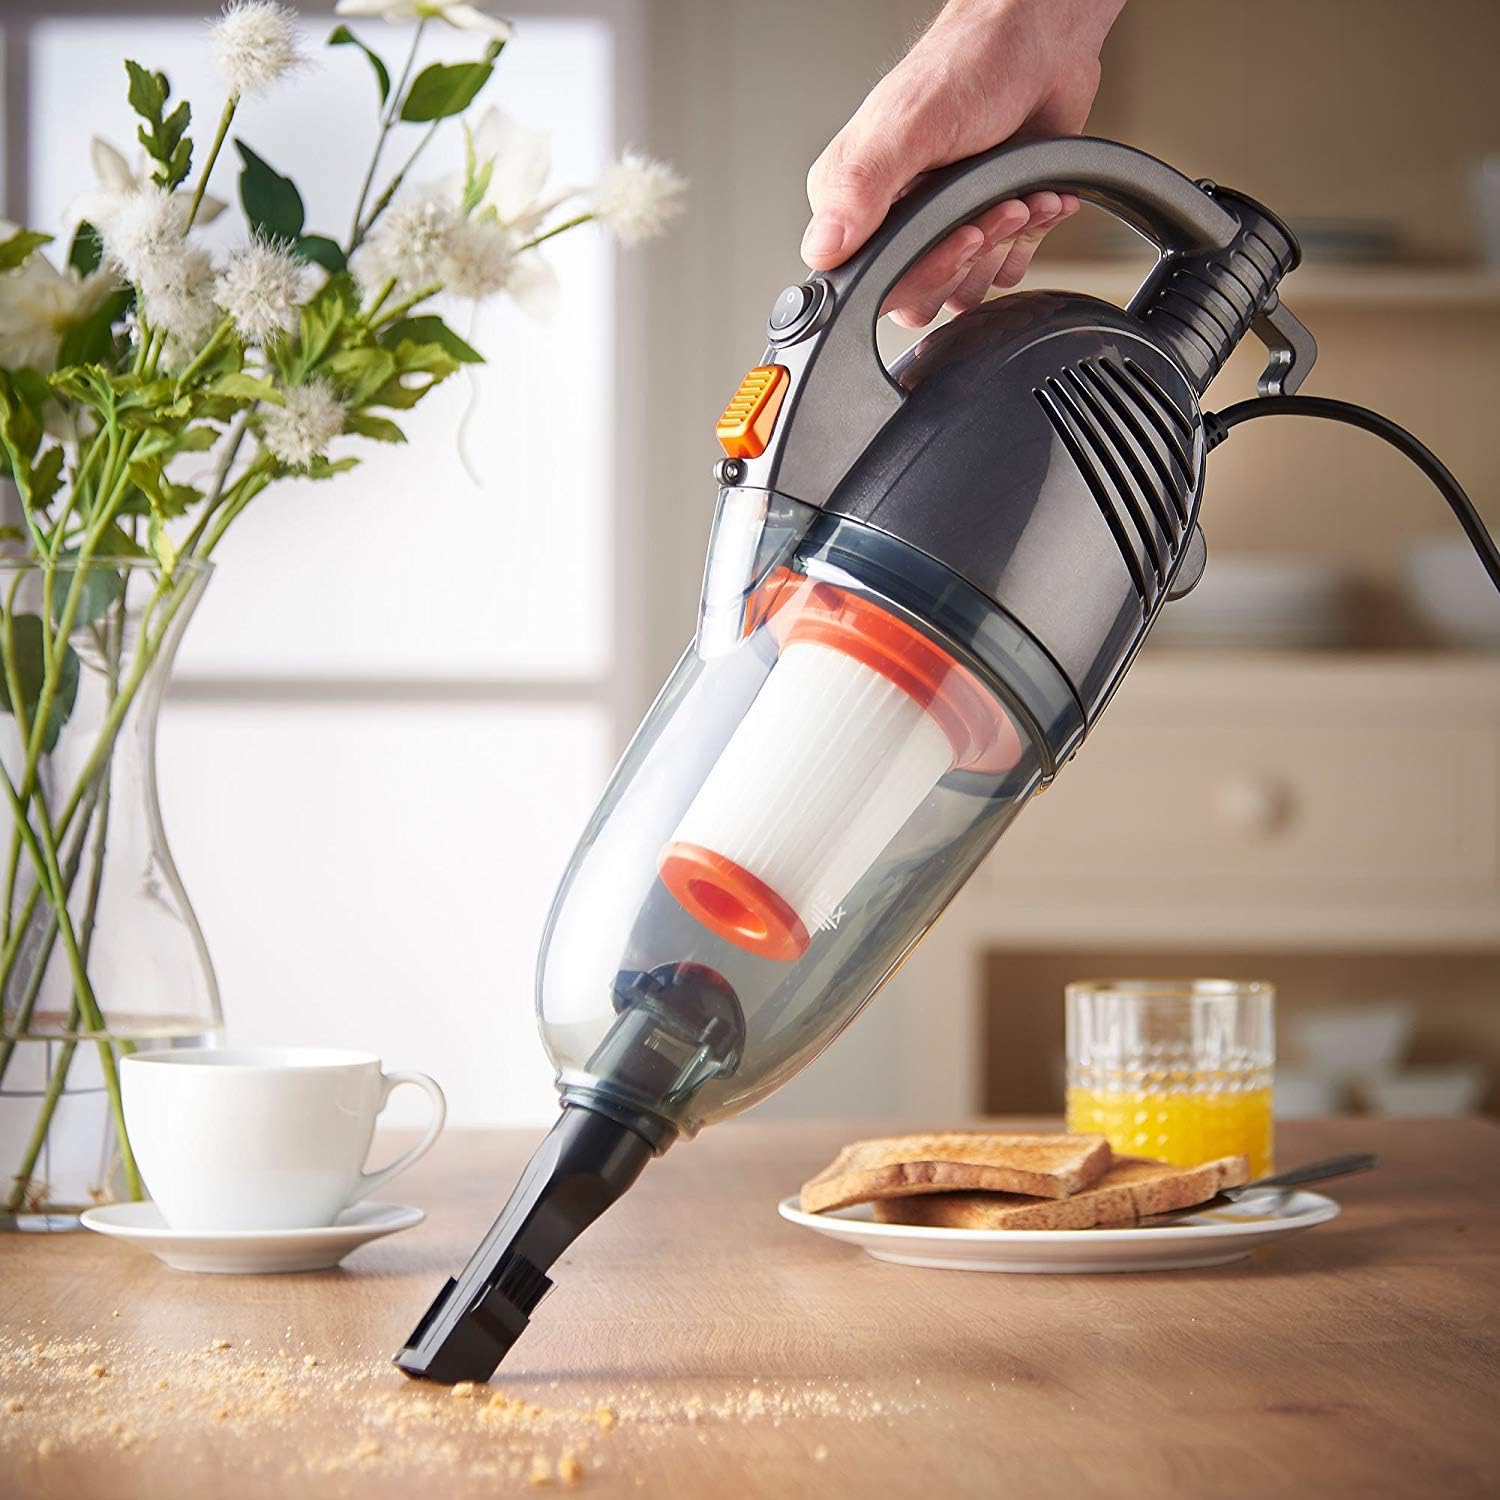
Figure 3.2: Handheld configuration for detailed cleaning tasks.
3.3 بصری سیٹ اپ گائیڈ
For a visual demonstration of the assembly process, please refer to the video below:
Video 3.1: General guide for assembling and operating a stick vacuum. This video demonstrates attaching the handle, floor brush, and accessories, as well as emptying and cleaning the dust cup and filter.
4. آپریٹنگ ہدایات
Once assembled and plugged in, your vacuum is ready for use.
- پاور آن/آف: Locate the power switch on the main unit and slide it to the 'On' position to start vacuuming. Slide to 'Off' to stop.
- Upright Mode: Use the extendable handle and floor brush head for cleaning carpets, hard floors, and tiles. The lightweight design (approximately 0.01 ounces) allows for easy maneuverability.
- ہینڈ ہیلڈ موڈ: For smaller messes, upholstery, car interiors, or hard-to-reach areas, use the main unit with the appropriate attachment.
- منسلکات کا استعمال: The crevice tool is ideal for tight spaces and corners. The brush attachment is suitable for delicate surfaces and upholstery.

Figure 4.1: Effective cleaning of hard floors using the upright stick vacuum.
5 دیکھ بھال
باقاعدگی سے دیکھ بھال بہترین کارکردگی کو یقینی بناتی ہے اور آپ کے ویکیوم کلینر کی زندگی کو بڑھاتی ہے۔
5.1 ڈسٹ کپ کو خالی کرنا
Empty the dust cup regularly, ideally after each use, to maintain strong suction power.
- Detach Dust Cup: Hold the main vacuum unit and press the dust cup release button. Gently pull the dust cup away from the main unit.
- Remove Cyclone Separator: Over a waste bin, gently pull out the cyclone separator from the dust cup.
- خالی مواد: Tip the dust cup to empty all collected debris into the waste bin.
- دوبارہ جوڑنا: Reinsert the cyclone separator, ensuring it aligns correctly. Reattach the dust cup to the main unit until it clicks securely.

Figure 5.1: The 1.3L dust tank and HEPA sponge filtration system.
5.2 HEPA فلٹر کی صفائی
The washable HEPA filtration system helps trap small particles. Clean the filter periodically.
- فلٹر ہٹائیں: After detaching the dust cup, carefully remove the HEPA filter.
- Shake Off Debris: Gently shake the filter over a waste bin to remove loose dirt and debris.
- واش فلٹر: Rinse the filter under running water until clean. Do not use detergents or hot water.
- مکمل طور پر خشک کریں: Allow the filter to air dry completely in a well-ventilated area before reinserting it. Ensure it is completely dry to prevent mold or damage.
- Reinsert Filter: Place the dry filter back into the vacuum, ensuring it is securely sealed.
5.3 Visual Maintenance Guide
For a visual demonstration of emptying the dust cup and washing the filter, please refer to the video below:
Video 5.1: General guide for emptying the dust cup and washing the filter of a stick vacuum.
6 خرابیوں کا سراغ لگانا
اگر آپ کو اپنے ویکیوم کے ساتھ مسائل کا سامنا کرنا پڑتا ہے تو، مندرجہ ذیل عام ٹربل شوٹنگ کے اقدامات سے رجوع کریں:
- کوئی طاقت نہیں:
- اس بات کو یقینی بنائیں کہ پاور کی ہڈی محفوظ طریقے سے ورکنگ آؤٹ لیٹ میں لگی ہوئی ہے۔
- Check the power switch is in the 'On' position.
- سکشن کا نقصان:
- دھول کا کپ خالی کریں۔
- Clean or replace the HEPA and sponge filters.
- Check for blockages in the nozzle, hose, or extension tube.
- غیر معمولی شور:
- Check for any foreign objects caught in the floor brush head or main unit.
- اس بات کو یقینی بنائیں کہ تمام حصوں کو صحیح طریقے سے جمع کیا گیا ہے اور محفوظ طریقے سے باندھا گیا ہے۔
If problems persist after attempting these steps, please contact VonHaus customer support.
7. وضاحتیں
| فیچر | تفصیلات |
|---|---|
| برانڈ | وون ہاس |
| ماڈل کا نام | 2 in 1 Stick Vacuum 600W (07/813) |
| طاقت کا منبع | کورڈڈ الیکٹرک |
| واٹtage | 600 واٹ |
| Ampایجری | 5 Amps |
| صلاحیت | 1.3 لیٹر |
| فلٹر کی قسم | HEPA and Sponge Filtration (Washable) |
| فارم فیکٹر | ہاتھ میں پکڑا ہوا، چھڑی |
| تجویز کردہ استعمال | Carpet, Hard Floor, Tile Floor, Hardwood, Upholstery |
| خصوصی خصوصیات | Compact, HEPA, Lightweight, Wheels |
| شور کی سطح | 80 ڈیسیبل |
| شے کا وزن | 0.01 اونس |
| پیکیج کے طول و عرض | 19.33 x 11.93 x 7.44 انچ |
8. وارنٹی اور سپورٹ
For warranty information, product registration, or technical support, please refer to the documentation included with your purchase or visit the official VonHaus webسائٹ کسی بھی وارنٹی دعووں کے لیے اپنی خریداری کا ثبوت رکھیں۔
For additional assistance, you may contact VonHaus customer service directly.