
تعارف
The RunCam Hybrid 2 is an advanced dual-lens camera system designed for FPV (First Person View) applications and high-definition (HD) video recording. It integrates a 4K HD recording lens with a dedicated analog Phoenix 2 sensor lens, providing both high-quality recorded footage and a clear, low-latency FPV feed. This manual provides essential information for the proper installation, operation, and maintenance of your RunCam Hybrid 2 camera.
پروڈکٹ ختمview
The RunCam Hybrid 2 features a compact, single-board design, making it suitable for micro FPV setups. Its dual-lens configuration ensures that the FPV view closely matches the recorded HD footage, enhancing the piloting experience.
اہم خصوصیات:
- دوہری لینس سسٹم: Combines a 4K HD recording lens (SONY 8MP sensor) with an analog FPV lens (Phoenix 2, SONY 1.3MP sensor).
- Single Board Design: Achieves a compact form factor with both lenses mounted closely on a single PCB.
- آسان تنصیب: 19mm camera module width allows direct mounting in micro FPV frames without adapters.
- QR Code Parameter Settings: Configure camera settings conveniently via a smartphone app by scanning a generated QR code.
- UART کنٹرول: Connects to a flight controller's UART port for remote control of recording functions via your radio transmitter.

Image: Analog Output Upgraded to Phoenix 2. The camera provides an improved FPV image feed.

Image: Single board design for simple installation.
پیکیج کے مشمولات
تصدیق کریں کہ نیچے دی گئی تمام اشیاء آپ کے پیکیج میں شامل ہیں:
- 1x RunCam Hybrid 2 Camera
- 1x Plastic cover
- 1x 3PIN FPV silicone cable (male)
- 1x 3PIN FPV silicone cable (female)
- 1x Set of M2 screws
- 1x دستی

Image: Package contents of the RunCam Hybrid 2.
وضاحتیں
| پیرامیٹر | قدر |
|---|---|
| HD Sensor | SONY 8MP |
| ینالاگ سینسر | SONY 1.3MP (Phoenix 2) |
| کا میدان View (ایف او وی) | HD Recording FOV 145° (FPV FOV 150° @ 4:3) |
| ویڈیو ریزولوشن | 4K@30fps / 2.7K@60fps / 2.7K@50fps / 1080P@120fps / 1080P@100fps / 1080P@60fps / 1080P@50fps |
| ویڈیو File فارمیٹ | MP4 |
| ٹی وی موڈ | NTSC (720 x 480) / PAL (720 x 576) (Switchable) |
| انٹرفیس | HD supports UART remote control; FPV (analog) supports UART firmware upgrade. |
| زیادہ سے زیادہ مائیکرو ایسڈی کارڈ تعاون یافتہ ہے۔ | Up to 128GB (U3 recommended for 2.7K60/1080P120; U1 for others). Must be FAT32 format. |
| بڑھتے ہوئے سوراخ | 20 x 20 ملی میٹر |
| پی سی بی سائز | 29 x 29 ملی میٹر |
| لینس ماڈیول سائز | 19 x 25 ملی میٹر |
| لینس کی تفصیلات | M10 HD Lens and M8 FPV Lens |
| ان پٹ پاور | DC 5-20V (Do not directly power with 4S battery or higher to avoid overvoltagای). |
| ورکنگ کرنٹ | 480mA @ 5V / 140mA @ 12V |
| وزن | 18 گرام |

Image: RunCam Hybrid 2 Dimensions.
سیٹ اپ
Follow these steps to properly set up your RunCam Hybrid 2 camera:
- جسمانی تنصیب: Mount the 19mm camera module into your drone or vehicle frame. The compact design allows for direct integration into micro FPV setups.
- وائرنگ کنکشن: Refer to the wiring diagram below for correct connections.
- VCC+ (5-20V): مخصوص والیوم کے اندر ایک مستحکم DC پاور سورس سے جڑیں۔tagای رینج Warning: Do not directly power with a 4S battery or higher, as this can cause overvoltage and damage the camera.
- GND: زمین سے جڑیں۔
- ویڈیو: Connect to your FPV video transmitter (VTX) for analog video output.
- TX/RX: Connect to a UART port on your flight controller for remote control functionality and firmware updates.
- مائیکرو ایس ڈی کارڈ داخل کرنا: Insert a formatted Micro SD card (FAT32 format, U3 speed class recommended for 2.7K60/1080P120, U1 for other resolutions) into the designated slot. Ensure the card is inserted correctly to avoid data corruption.

Image: RunCam Hybrid 2 PCB Layout and Wiring Diagram.
آپریٹنگ
Once the camera is installed and powered, you can begin operation:
- پاور آن: Apply power to the camera. The FPV feed should appear on your goggles or monitor.
- ریکارڈنگ کنٹرول:
- دستی کنٹرول: Use the Power/Shutter Button on Side A of the PCB to start and stop HD recording.
- UART Remote Control: If connected to a flight controller's UART, configure your Betaflight (or similar) settings to assign a switch on your radio to control recording start/stop.
- موڈ سوئچنگ: Use the Mode Switch Button on Side A to cycle through different camera modes or settings if available.
- QR Code Parameter Settings: For advanced configuration, download the RunCam app on your smartphone. Adjust desired settings within the app, generate a QR code, and then scan this QR code with the RunCam Hybrid 2 camera. The camera will automatically apply the new settings.
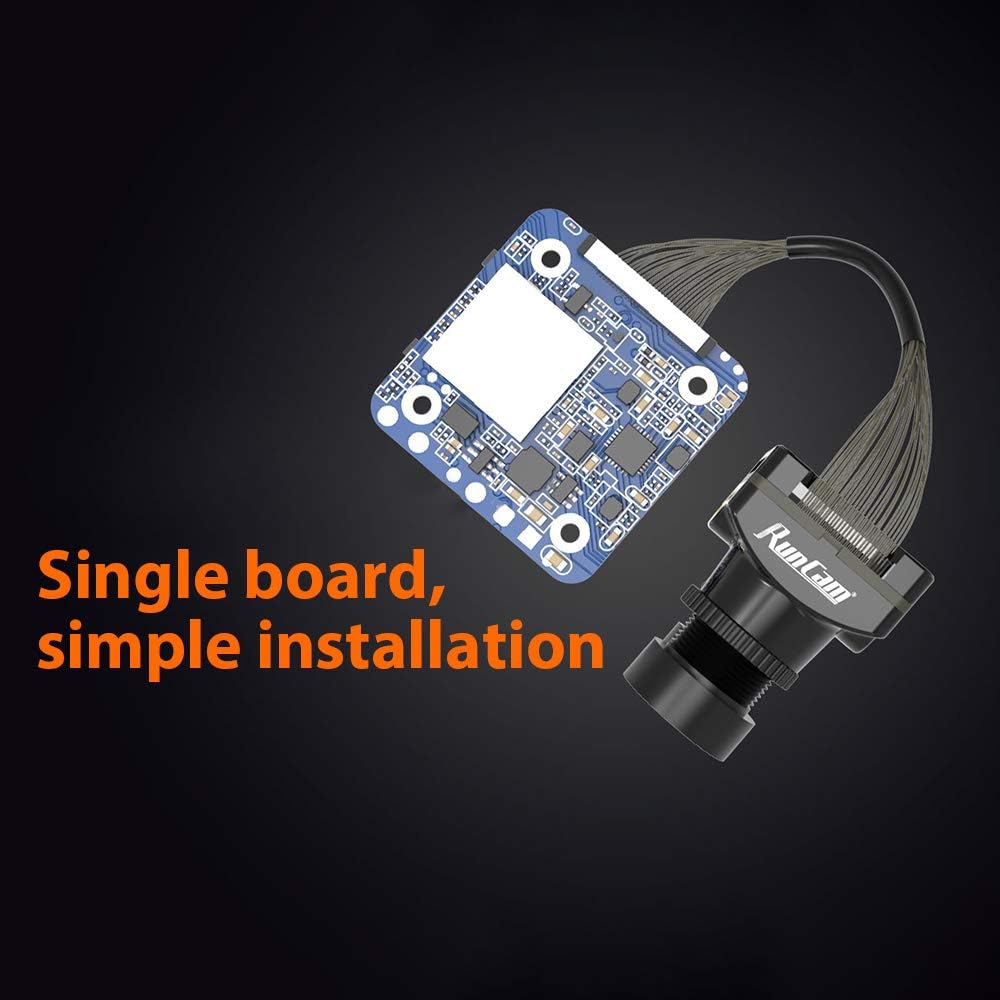
Image: QR Code Parameter Settings via RunCam App.
دیکھ بھال
To ensure optimal performance and longevity of your RunCam Hybrid 2 camera, follow these maintenance guidelines:
- لینس کی صفائی: Regularly clean both the HD and FPV lenses with a soft, lint-free cloth and lens cleaning solution. Avoid abrasive materials that could scratch the lenses.
- بجلی کی فراہمی: Always ensure the camera receives power within the specified DC 5-20V range. Incorrect voltage can cause irreversible damage.
- ایسڈی کارڈ مینجمنٹ: Periodically back up your recorded footage and format the Micro SD card to maintain optimal recording performance and prevent file corruption. Use a high-quality, recommended speed class SD card.
- جسمانی معائنہ: Regularly check for any loose connections, damaged cables, or physical damage to the camera module.
خرابی کا سراغ لگانا
If you encounter issues with your RunCam Hybrid 2, refer to the following common problems and solutions:
- کوئی پاور/کیمرہ آن نہیں ہو رہا ہے:
- Check all power connections (VCC+, GND) for proper wiring and secure contact.
- تصدیق کریں کہ ان پٹ والیومtage is within the DC 5-20V range.
- Ensure no short circuits are present in the wiring.
- No FPV Video Output:
- Check the video signal cable connection from the camera to your VTX and from the VTX to your goggles/monitor.
- Confirm that the TV mode (NTSC/PAL) setting on the camera matches your display device. This can be adjusted via QR code settings.
- Ensure the VTX is powered and functioning correctly.
- Recording Errors / Corrupted Files:
- یقینی بنائیں کہ مائیکرو ایس ڈی کارڈ کو FAT32 پر فارمیٹ کیا گیا ہے۔
- Use a high-speed Micro SD card (U3 or higher for 4K/high frame rate recording).
- Try formatting the SD card again or using a different, known-good SD card.
- Check the SD card slot for any debris or damage.
- QR Code Settings Not Applying:
- Ensure the QR code is clearly visible and well-lit when scanning.
- Hold the QR code steady in front of the camera lens until the settings are confirmed.
- Verify that you are using the official RunCam app for generating QR codes.
- UART Control Not Working:
- Check TX/RX wiring between the camera and the flight controller.
- Verify UART settings in your flight controller firmware (e.g., Betaflight) are correctly configured for camera control.
- Ensure the correct protocol is selected in the flight controller software.