1. پروڈکٹ ختمview
The NEJE JZ-5 is a compact and efficient 500mW USB engraving machine designed for various carving and cutting tasks. It features a unique frame and weak light automatic positioning system for precise and easy image alignment. Capable of 512x512 high-resolution prints, it can produce 3D and gradient effects on soft materials. This engraver offers fast performance, being up to 10 times faster than some alternatives, and can operate offline when connected to a 5V 1A power source via its two USB ports.
The machine is constructed from durable Acrylic, Aluminum, and Stainless Steel, ensuring stability and precision. It supports Windows 7, Windows 8, Windows 10, and Windows XP operating systems.
شکل 1: سامنے view of the NEJE JZ-5 500mW USB Engraver.
2. پیکیج کے مشمولات
براہ کرم تصدیق کریں کہ نیچے دی گئی تمام اشیاء آپ کے پیکیج میں شامل ہیں:
- 1 x NEJE JZ-5 Engraving Machine
- 1 x Protective Glasses
- 1 ایکس ایلن رنچ
- 2 ایکس USB کیبلز
- 1 x 1Gb TF Card (includes User's Manual and installation software)

Figure 2: NEJE JZ-5 Engraver and its accompanying accessories.
3. سیٹ اپ ہدایات
Follow these steps to set up your NEJE JZ-5 engraver:
- اپنے کمپیوٹر کو تیار کریں: Ensure you have a computer running Windows 7, Windows 8, Windows 10, or Windows XP.
- Connect the Engraver: Connect the engraver to your computer using the two provided USB cables. Alternatively, for offline use, connect the two USB ports to a 5V 1A charger or power bank.
- سافٹ ویئر انسٹال کریں: Insert the 1Gb TF card into your computer. Locate and install the engraving software from the card.
- سافٹ ویئر لانچ کریں: Start the engraving software. It should automatically detect and connect to the engraver via the USB port. If not, manually select the connection within the software settings.

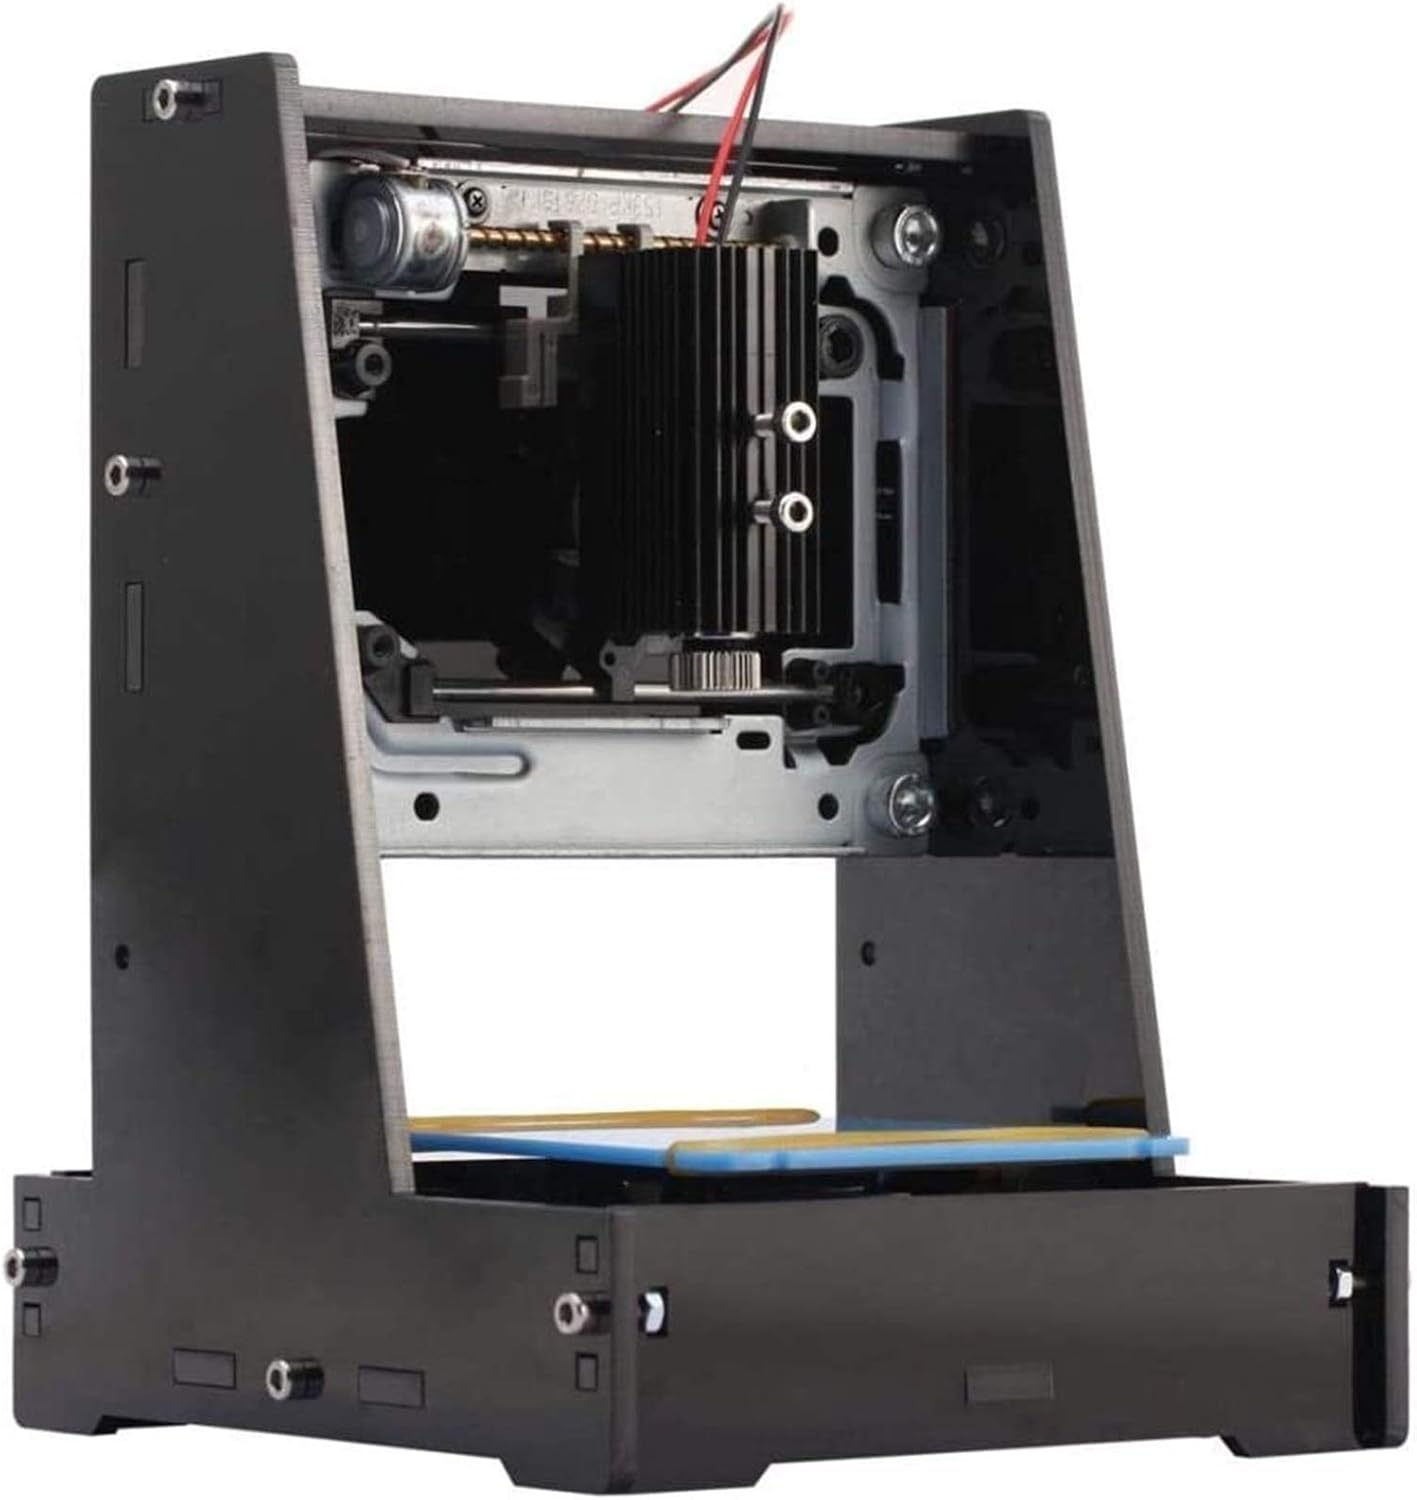
شکل 3: طرف view of the engraver, illustrating its compact design.
4. آپریٹنگ ہدایات
Once the engraver is set up and connected, you can begin your engraving projects:
- Select or Import Image: Within the engraving software, choose an existing image or import your desired image for engraving.
- Edit and Position: Edit the image as needed. Ensure the image is positioned correctly within the print area displayed in the software. The unique frame positioning feature helps in precise alignment.
- Adjust Focal Length: For optimal engraving quality, adjust the focal length of the laser. This is typically done by rotating a knob on the laser module until the laser dot is at its smallest point on the material surface. Always wear the protective glasses when adjusting the focal length or operating the engraver.
- کندہ کاری شروع کریں: Once the image is prepared and the focal length is set, initiate the engraving process from the software.

Figure 4: Adjusting the focal length for precise engraving. Protective glasses must be worn.

Figure 5: The engraving platform where materials are placed for processing.
5 دیکھ بھال
To ensure the longevity and optimal performance of your NEJE JZ-5 engraver, regular maintenance is recommended:
- صفائی: Periodically clean the engraving area and the laser lens to remove dust and debris that may accumulate during operation. Use a soft, dry cloth.
- لیزر ماڈیول: Avoid touching the laser lens directly. If cleaning is necessary, use a specialized lens cleaning solution and cloth.
- ذخیرہ: جب استعمال میں نہ ہو، نقاشی کو صاف، خشک ماحول میں براہ راست سورج کی روشنی اور انتہائی درجہ حرارت سے دور رکھیں۔
6 خرابیوں کا سراغ لگانا
If you encounter issues with your NEJE JZ-5 engraver, consider the following common solutions:
- Engraver Not Connecting:
- Ensure both USB cables are securely connected to your computer or power source.
- Verify that the software is running and attempting to connect. Try restarting the software or your computer.
- Check your computer's Device Manager to ensure the engraver is recognized and drivers are installed correctly.
- ناقص کندہ کاری کا معیار:
- Adjust the laser's focal length (refer to Section 4).
- Ensure the material is flat and securely placed on the engraving platform.
- Check the image resolution and settings within the software.
- اگر لیزر لینس گندا نظر آئے تو اسے صاف کریں۔
- سافٹ ویئر کے مسائل:
- Ensure your operating system is compatible (Windows 7/8/10/XP).
- Try reinstalling the software from the provided TF card.
7. تکنیکی تفصیلات
| فیچر | تفصیلات |
|---|---|
| برانڈ | NEJE |
| ماڈل | JZ-5 |
| لیزر پاور | 500mW |
| مواد | Acrylic + Aluminum + Stainless Steel |
| کندہ کاری کا علاقہ | 38 x 38 ملی میٹر |
| قرارداد | 512x512 پکسلز |
| طول و عرض (تقریباً) | 18 x 13.5 x 13 سینٹی میٹر (7 x 5 x 5 انچ) |
| آپریٹنگ سسٹم سپورٹ | Windows 7 / Windows 8 / Windows 10 / XP |
| ہم آہنگ آلات | Laptop, Smartphone (for power bank use) |
| شے کا وزن | 1 Grams (product specification) / 0.035 ounces (shipping weight) |
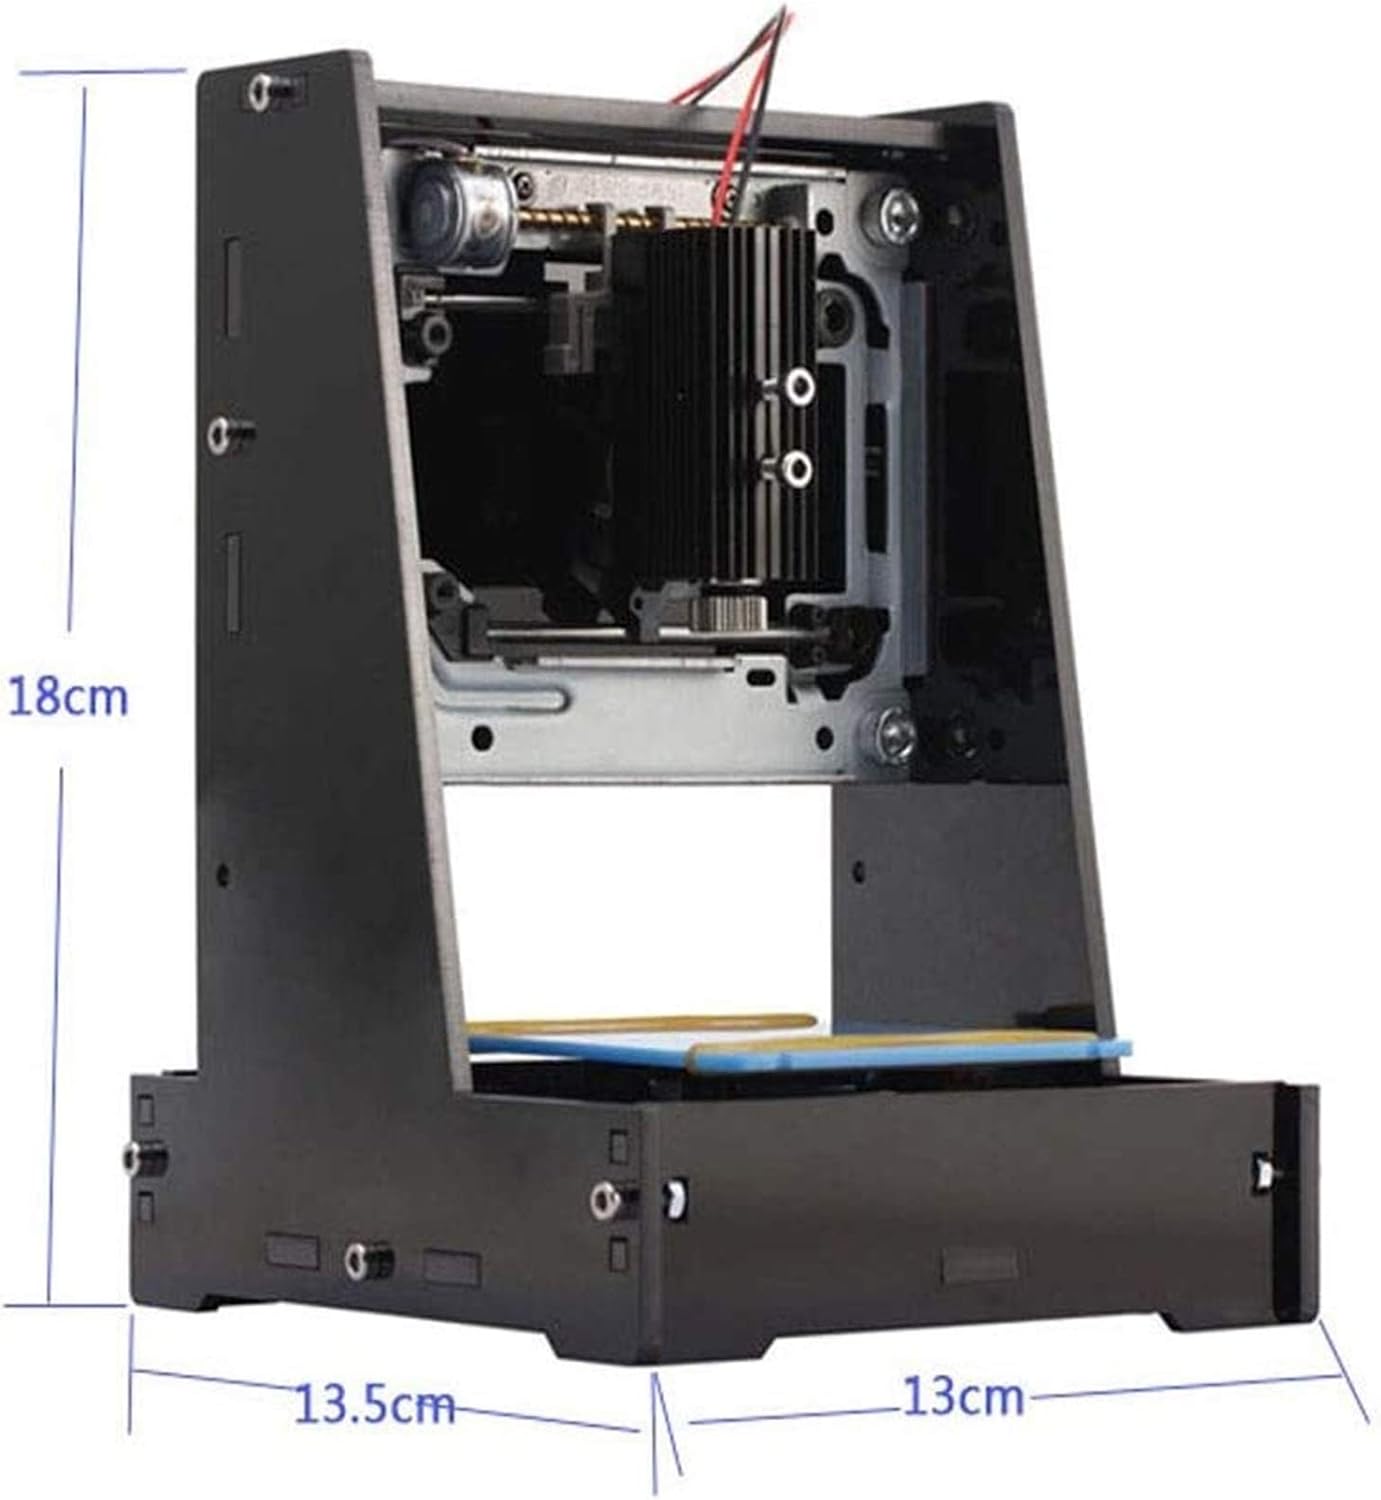
Figure 6: Approximate dimensions of the NEJE JZ-5 Engraver.
8. حفاظتی معلومات
Operating a laser engraving machine requires adherence to safety precautions to prevent injury:
- Always wear the provided protective glasses when the engraver is in operation or when adjusting the laser. The laser light can cause eye damage.
- لیزر بیم میں براہ راست مت دیکھو.
- Ensure the engraving area is well-ventilated, as some materials may produce fumes during engraving.
- مشین کو آتش گیر مواد سے دور رکھیں۔
- Do not leave the engraver unattended during operation.
- بچوں اور پالتو جانوروں کی پہنچ سے دور رکھیں۔

Figure 7: Protective glasses are essential for safe operation.