
1. تعارف
This manual provides detailed instructions for the assembly, operation, and maintenance of your Artillery Hornet 3D Printer. Please read this manual thoroughly before operating the device to ensure safe and efficient use.
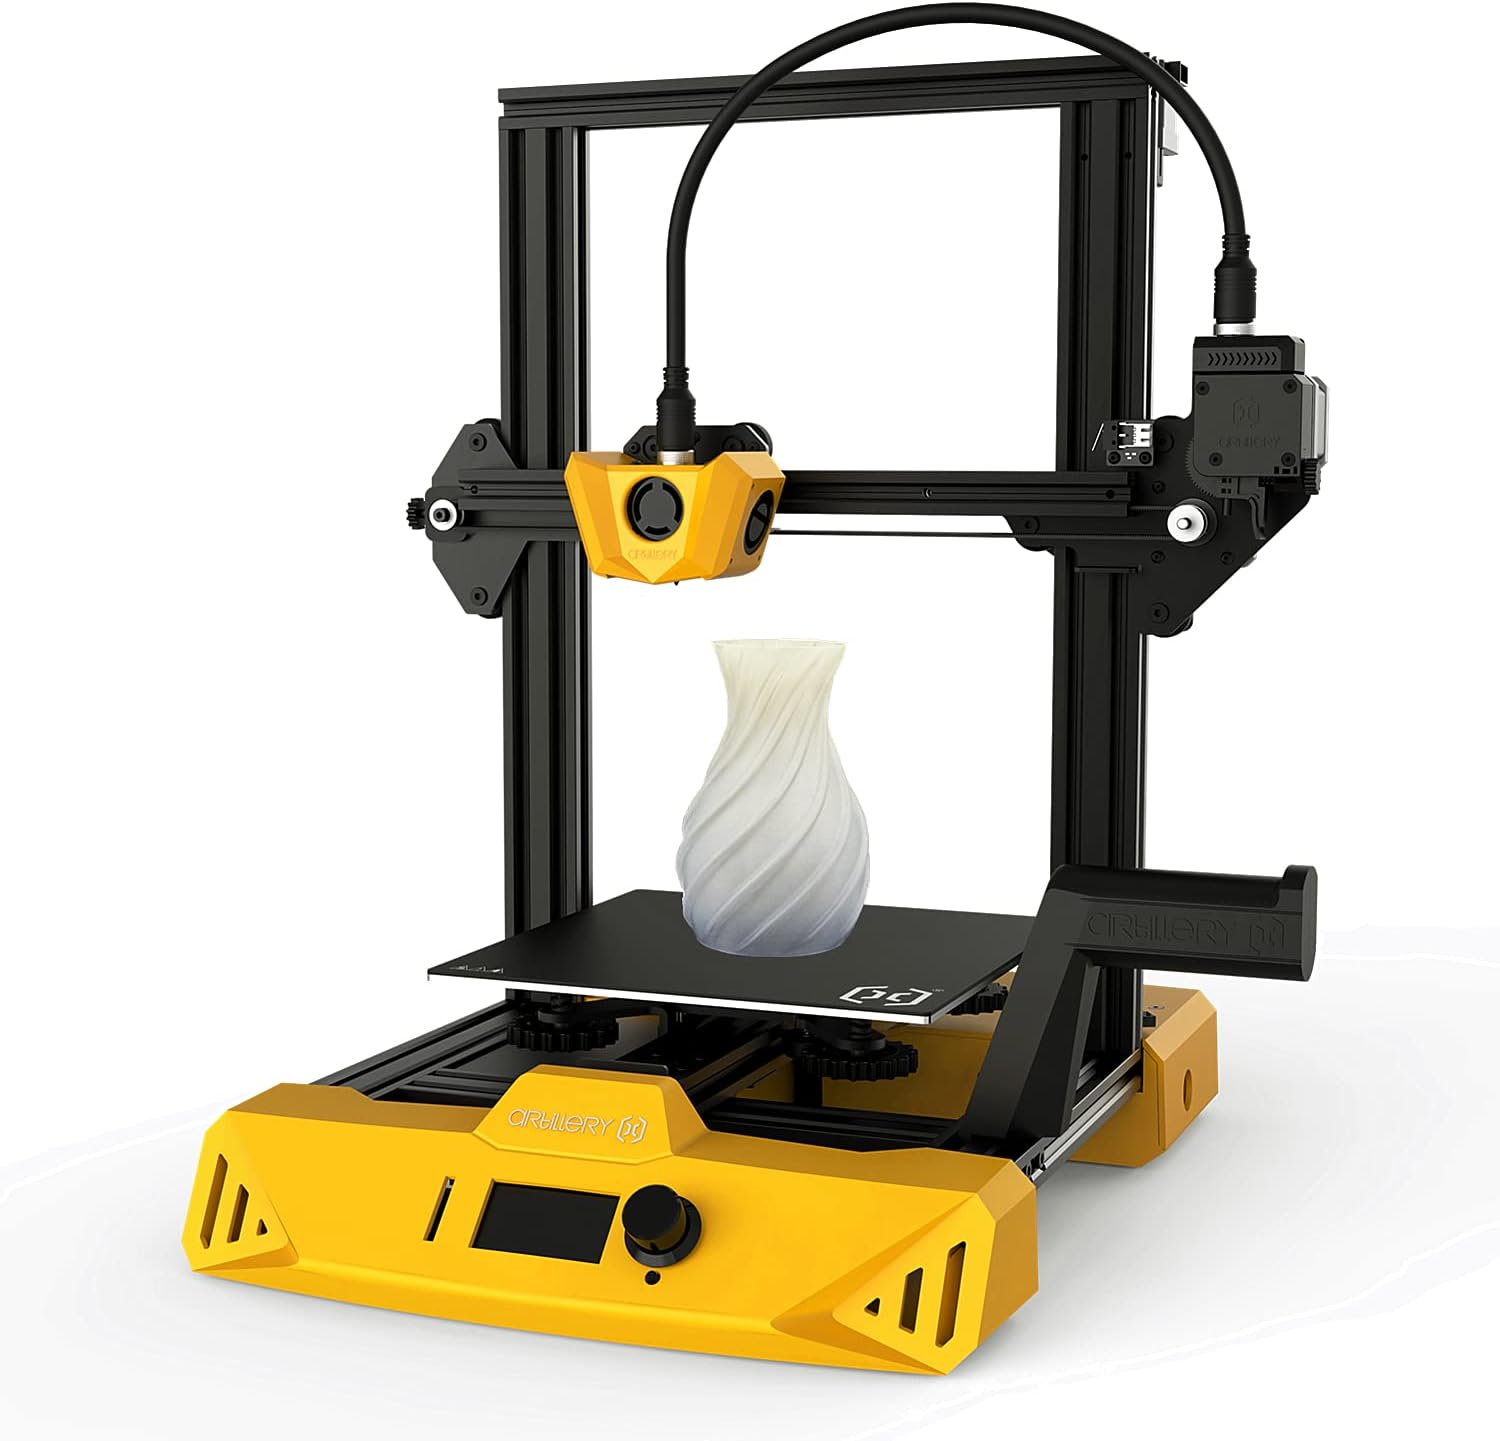
Figure 1: Artillery Hornet 3D Printer with a sample print.
2. سیٹ اپ اور اسمبلی
The Artillery Hornet 3D Printer is designed for easy assembly. Follow the steps below to get your printer ready for its first use.
2.1 ان باکسنگ اور اجزاء کی شناخت
Carefully unpack all components from the box. Ensure all parts are present and undamaged. Refer to the included packing list.
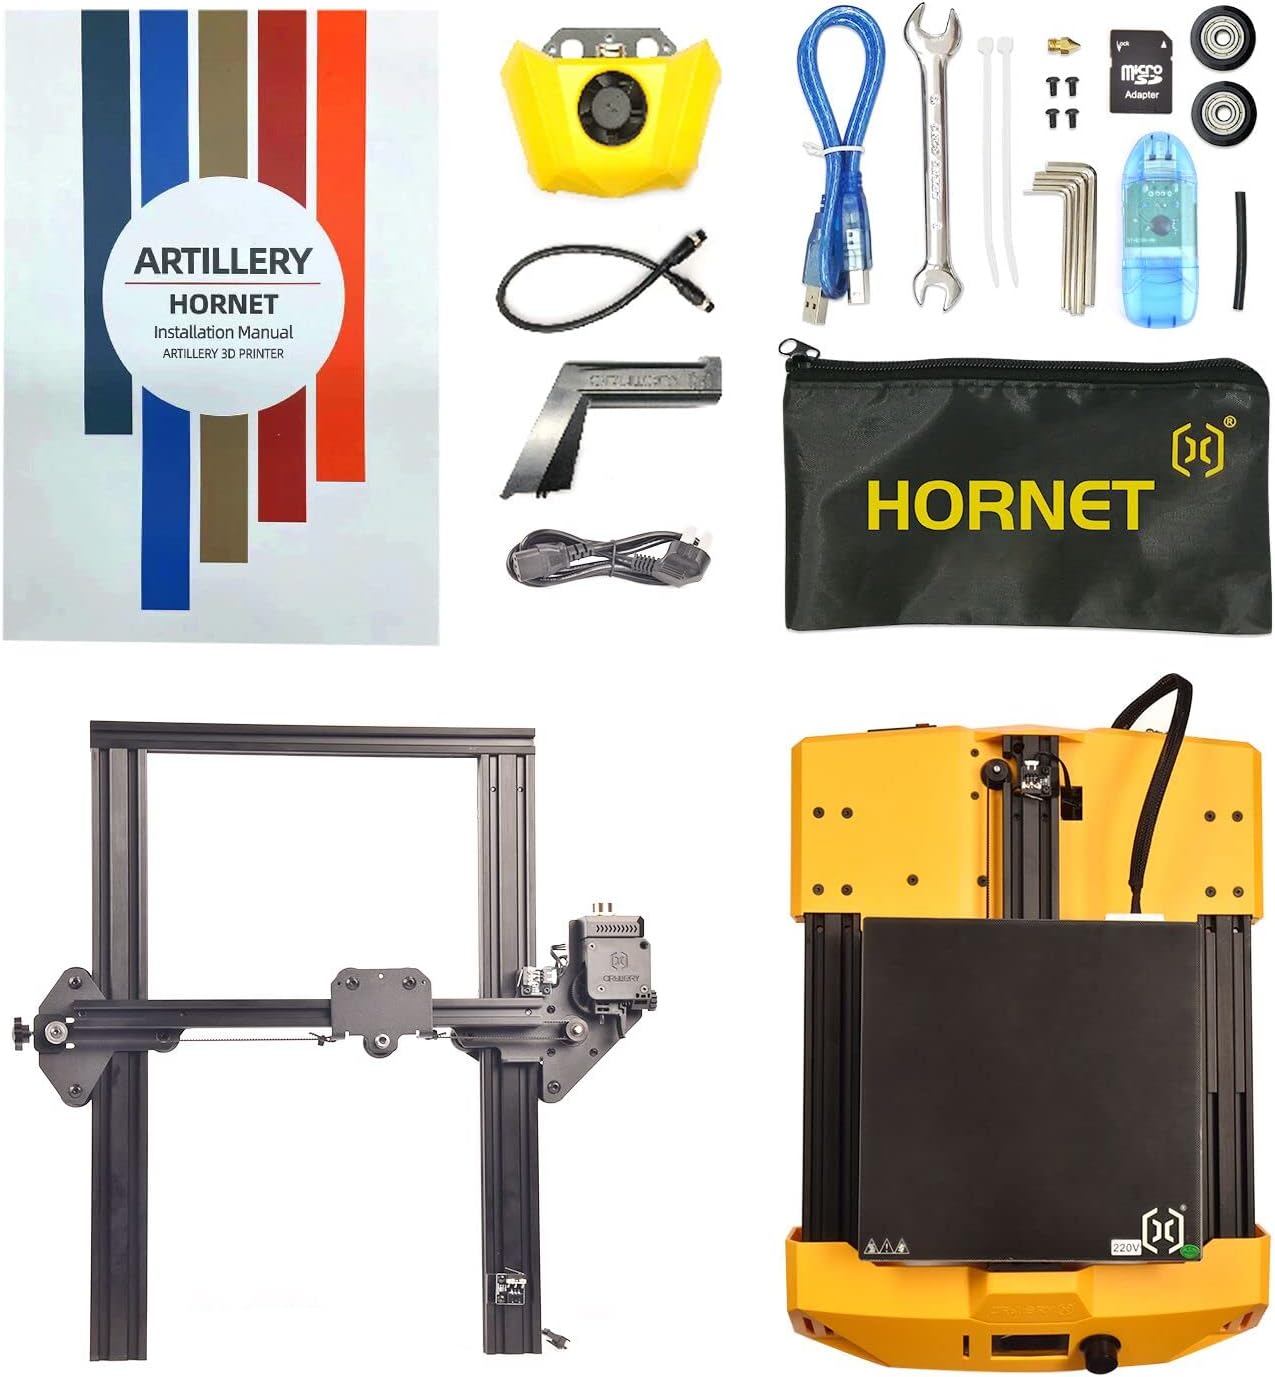
Figure 2: All components included with the Artillery Hornet 3D Printer.
2.2 مین باڈی اسمبلی
- Unpack the base and the XZ gantry.
- Fit the XZ gantry into the slot on the base. Secure it with four embedded M5x25 screws.
- Install the hotend assembly onto the carriage using the three M3x6 screws supplied in the kit.
- Fit the filament spool holder into the slots on the base.
2.3 وائرنگ
- Connect the Z-axis stepper motor cable.
- Connect the main cable to the designated port.
- Connect the Z-axis endstop cable.
- Connect the extruder cable. Fit the protrusion of the cable interface into the slot and turn the fastener to lock the cable in place.
2.4 Tightening and Initial Checks
- Loose or tighten the eccentric nuts (X-axis, Y-axis, and Z-axis) on the carriages as appropriate, using the supplied wrenches. This ensures smooth movement and proper alignment.
- پاور کیبل کو پرنٹر اور ایک مناسب پاور آؤٹ لیٹ سے جوڑیں۔
- Power on the printer and wait for it to start up.
Video 1: Artillery Hornet 3D Printer Installation and Printing Guide. This video demonstrates the assembly, wiring, tightening, preparation before printing, slicing, and printing process.
3. آپریٹنگ ہدایات
3.1 Preparation Before Printing
- On the printer's LCD screen, navigate to "Temperature" -> "Preheat PLA" to heat the nozzle and heated bed to the normal temperature for printing. This helps in achieving more accurate leveling.
- Select "Motion" -> "Level Corners" to home your printer. Then, move the nozzle to the first corner of the print bed.
- Slide a sheet of A4 paper between the nozzle and the heated bed. Adjust the height of the heated bed via the leveling nuts until the A4 paper can be slid freely with only a small amount of drag.
- Select "Next" to proceed to the next point. Repeat the previous step for all corners. Making adjustments to one corner can affect the leveling in other corners, so double or triple-check and continue adjusting until each point is correctly leveled.
- Put the filament spool on the spool holder.
- Insert the filament into the bottom of the extruder after pulling back the lever.
- Select "Change Filament" -> "Load Filament" to start loading filament. Observe the material coming out from the nozzle and clean up any extruded material. Do not touch the nozzle to prevent burns.
3.2 Slicing Software (Ultimaker Cura)
- Insert the included memory card into a card reader and connect it to your computer. Open it to install the slicing software, Ultimaker Cura.
- Open the software and add your printer: select "Custom" -> "Custom FFF Printer", enter the printer name "Artillery", and click "Add".
- In the machine settings, set the X-axis (width) and Y-axis (depth) values to 220 mm, and the Z-axis (height) value to 250 mm.
- Change the compatible material diameter to 1.75 mm.
- In the toolbar, click "Preferences" -> "Configure Cura" -> "Configure file" -> "Import". Check the memory card and select the three configuration files to be imported. After they are imported successfully, your printer is added.
- Import an STL model to start slicing.
- Export the generated G-code file میموری کارڈ کو
3.3 پرنٹنگ
- Insert the memory card into your printer and select the G-code file to be printed from the menu.
- Wait for the printer to heat up and begin printing.
- After printing, wait until the heated print bed completely cools down to room temperature. The printed model will automatically release from the bed once cooled.
4 دیکھ بھال
Regular maintenance ensures the longevity and optimal performance of your Artillery Hornet 3D Printer.
- نوزل صاف کریں: Periodically clean the nozzle with a brass brush or needle to prevent clogs and ensure smooth filament extrusion.
- پرنٹ بستر کو صاف کریں: ہر پرنٹ کے بعد، کسی بھی باقیات کو ہٹانے اور مستقبل کے پرنٹس کے لیے اچھی چپکنے کو یقینی بنانے کے لیے پرنٹ بیڈ کو آئسوپروپل الکحل سے صاف کریں۔
- موونگ پارٹس کو چکنا کرنا: Apply a small amount of lubricant to the lead screws and smooth rods every few months to ensure smooth movement of the axes.
- Check Belts and Pulleys: Inspect the belts for any signs of wear or looseness. Adjust tension if necessary. Ensure pulleys are clean and free of debris.
- فرم ویئر اپ ڈیٹس: سرکاری آرٹلری چیک کریں۔ webکارکردگی کو بہتر بنانے اور نئی خصوصیات شامل کرنے کے لیے کسی بھی دستیاب فرم ویئر اپ ڈیٹ کے لیے سائٹ۔
5 خرابیوں کا سراغ لگانا
یہاں کچھ عام مسائل اور ان کے ممکنہ حل ہیں:
- Poor Bed Adhesion:
- Ensure the print bed is properly leveled.
- Clean the print bed thoroughly.
- Increase bed temperature slightly.
- Apply an adhesive (e.g., glue stick, hairspray) to the print bed.
- Filament Clogging:
- Check for debris in the nozzle and clean it.
- Ensure the filament is loaded correctly and not tangled.
- Verify the printing temperature is appropriate for the filament type.
- پرت کی تبدیلی:
- Check belt tension on X and Y axes.
- Ensure the printer is on a stable surface.
- Reduce print speed.
- Extrusion Issues (Under/Over-extrusion):
- Calibrate E-steps (extruder steps per mm).
- Check for partial nozzle clogs.
- Adjust flow rate in slicing software.
6. وضاحتیں
| فیچر | تفصیلات |
|---|---|
| مصنوعات کے طول و عرض | 18.5 x 17.72 x 20.08 انچ |
| شے کا وزن | 17.16 پاؤنڈ (7.8 کلوگرام) |
| آئٹم ماڈل نمبر | Artillery Hornet 3D Printer |
| برانڈ | توپ خانہ |
| مواد | دھات |
| رنگ | پیلا |
| ہم آہنگ آلات | پرسنل کمپیوٹر |
7. وارنٹی اور سپورٹ
For warranty information, technical support, or service inquiries, please refer to the official Artillery website or contact their customer service directly. Details regarding specific warranty periods and support procedures are typically provided with your product documentation or on the manufacturer's official channels.