1. پروڈکٹ ختمview
The Xigmatek LUX S Arctic (Model EN48298) is a mid-tower PC case designed for computer enthusiasts and gamers. It features a distinctive triangular mesh front panel for optimal airflow and comes equipped with four 120mm X24A A-RGB fans to provide efficient cooling and customizable lighting. The case supports Micro ATX motherboards and is constructed with durable materials, including tempered glass for a clear view اندرونی اجزاء کی.
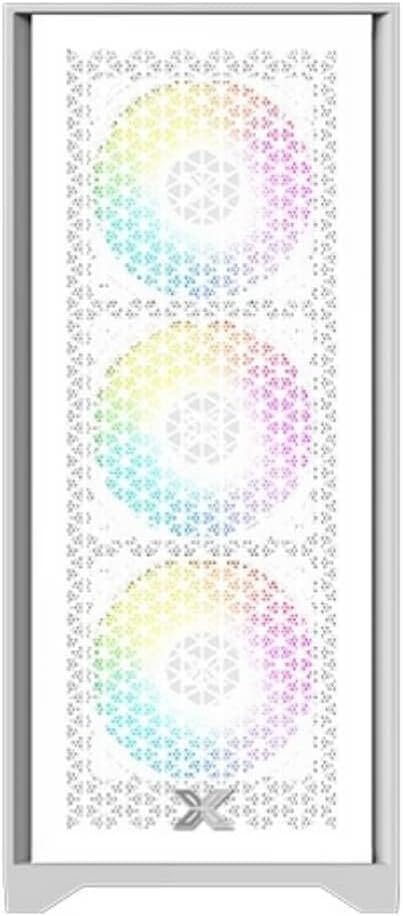
تصویر 1.1: سامنے والا view of the Xigmatek LUX S Arctic PC case, showcasing the triangular mesh design and the pre-installed A-RGB fans.
2. پیکیج کے مشمولات
Before proceeding with installation, please ensure all components listed below are present in your package. If any items are missing or damaged, contact your retailer or Xigmatek support.
- Xigmatek LUX S Arctic Mid-Tower PC Case
- 4 x 120mm X24A A-RGB Fans (pre-installed)
- Accessory box (screws, cable ties, standoffs, user manual)
3. سیٹ اپ اور انسٹالیشن
Follow these steps to install your computer components into the Xigmatek LUX S Arctic PC case. Ensure your system is powered off and unplugged before beginning any installation.
3.1 کیس کی تیاری
- کیس کو فلیٹ، مستحکم سطح پر رکھیں۔
- Carefully remove the tempered glass side panel by unscrewing the thumb screws at the rear of the case and gently pulling the panel away.
- Remove the opposite side panel (metal) in a similar manner to access the cable management area.

تصویر 3.1: داخلہ view of the PC case, illustrating the spacious layout for component installation.
3.2. مدر بورڈ کی تنصیب
- I/O شیلڈ انسٹال کریں جو آپ کے مدر بورڈ کے ساتھ کیس کے عقب میں نامزد اوپننگ میں آئی ہے۔
- Align your Micro ATX motherboard with the pre-installed standoffs. Ensure all screw holes on the motherboard match the standoffs.
- Secure the motherboard using the provided screws from the accessory box. Do not overtighten.
3.3. پاور سپلائی یونٹ (PSU) کی تنصیب
- Locate the PSU mounting area at the rear bottom of the case.
- Slide your PSU into the bay from the rear, ensuring the fan faces the bottom (if the case has a filtered intake) or upwards.
- کیس کے باہر کے پیچھے سے پیچ کے ساتھ PSU کو محفوظ کریں۔
3.4. اسٹوریج ڈرائیو کی تنصیب
The case supports various storage configurations. Refer to the accessory box for specific mounting hardware.
- 2.5" SSDs: Mount SSDs to the designated brackets behind the motherboard tray.
- 3.5" HDDs: PSU کفن کے نیچے واقع ڈرائیو کیج میں HDDs انسٹال کریں۔

تصویر 3.2: پیچھے کا داخلہ view, highlighting cable management cutouts and storage drive mounting locations.
3.5. Expansion Card Installation (GPU, etc.)
- کیس کے عقبی حصے سے ضروری PCIe سلاٹ کور کو ہٹا دیں۔
- Insert your expansion card (e.g., graphics card) into the corresponding PCIe slot on your motherboard until it clicks into place.
- Secure the card with a screw to the case chassis.
3.6. Cable Management and Connections
Connect all necessary cables from the PSU to your motherboard and components. Utilize the cable routing cutouts and tie-down points behind the motherboard tray for a clean build and improved airflow.
- Connect front panel headers (Power SW, Reset SW, HDD LED, Power LED) to the motherboard.
- Connect USB 2.0 and USB 3.0 headers to the motherboard.
- Connect audio header to the motherboard.
- Connect the pre-installed A-RGB fans to your motherboard's A-RGB header or a compatible controller. Ensure power is supplied to the fan hub/controller if applicable.
4. آپریٹنگ ہدایات
ایک بار جب تمام اجزاء انسٹال ہو جائیں اور کیبلز منسلک ہو جائیں، آپ اپنے سسٹم پر پاور کر سکتے ہیں۔
- Replace both side panels and secure them with their respective screws.
- Connect your monitor, keyboard, mouse, and power cable to the rear of your PC.
- Flip the power switch on your PSU to the 'ON' position.
- کیس کے سامنے والے پینل پر پاور بٹن دبائیں۔
- The pre-installed A-RGB fans will illuminate. You can control their lighting effects via your motherboard's software (if connected to an A-RGB header) or a dedicated controller (if included with the fans or purchased separately).
5 دیکھ بھال
باقاعدگی سے دیکھ بھال آپ کے کمپیوٹر کے اجزاء کی بہترین کارکردگی اور لمبی عمر کو یقینی بنانے میں مدد کرتی ہے۔
- ڈسٹ فلٹرز: The Xigmatek LUX S Arctic case likely includes removable dust filters (e.g., top, bottom, front). Clean these filters every 1-3 months, depending on your environment, by gently brushing or washing them with water and allowing them to dry completely before reinstallation.
- داخلہ کی صفائی: Periodically (every 6-12 months), open the case and use compressed air to remove dust buildup from fans, heatsinks, and other components. Hold fan blades gently to prevent them from spinning too fast during cleaning.
- بیرونی صفائی: بیرونی سطحوں کو نرم سے صاف کریں، ڈیamp cloth. Avoid harsh chemicals that may damage the finish or tempered glass.
6 خرابیوں کا سراغ لگانا
If you encounter issues with your PC build, refer to these common troubleshooting steps.
- سسٹم آن نہیں ہو رہا ہے:
- یقینی بنائیں کہ PSU سوئچ 'آن' پوزیشن میں ہے۔
- Check all power cables (24-pin ATX, 8-pin CPU, GPU power) are securely connected.
- Verify front panel power switch header is correctly connected to the motherboard.
- پنکھے نہیں گھومتے/آرجیبی روشنی نہیں کر رہے:
- Check fan power connections to the motherboard or fan hub.
- Ensure A-RGB cables are correctly connected to the motherboard's A-RGB header or controller.
- Verify that any fan hub or controller is receiving power.
- کوئی ڈسپلے آؤٹ پٹ نہیں:
- Ensure your monitor cable is connected to the graphics card (not the motherboard's integrated graphics ports, unless you are using integrated graphics).
- گرافکس کارڈ کو اس کے PCIe سلاٹ میں دوبارہ سیٹ کریں۔
- Check graphics card power connections.
For more complex issues, consult your motherboard manual or component manufacturer's support resources.
7. وضاحتیں
| فیچر | تفصیل |
|---|---|
| برانڈ | Xigmatek |
| ماڈل کا نام | LUX S Arctic |
| ماڈل نمبر | EN48298 |
| کیس کی قسم | وسط ٹاور |
| رنگ | آرکٹک سفید |
| مواد | Tempered Glass (side panel) |
| مدر بورڈ مطابقت | مائیکرو اے ٹی ایکس |
| پہلے سے نصب پرستار | 4 x 120mm X24A A-RGB Fans |
| کولنگ کا طریقہ | ہوا |
| فرنٹ پینل I / O | 2 x USB ports (type not specified, typically USB 2.0/3.0), Audio Jacks |
| پاور سپلائی بڑھتے ہوئے | Rear Mount (bottom) |
| تجویز کردہ استعمال | گیمنگ |
8. وارنٹی اور سپورٹ
For information regarding warranty coverage, technical support, or replacement parts, please refer to the warranty card included with your product or visit the official Xigmatek webسائٹ