
1. تعارف
Thank you for choosing the Parrot Uncle F8259 13-inch flush mount caged ceiling fan. This manual provides detailed instructions for the safe installation, operation, and maintenance of your new ceiling fan. Please read this manual thoroughly before installation and retain it for future reference. This fan is designed for indoor use in small spaces such as bedrooms and bathrooms, offering both air circulation and lighting.
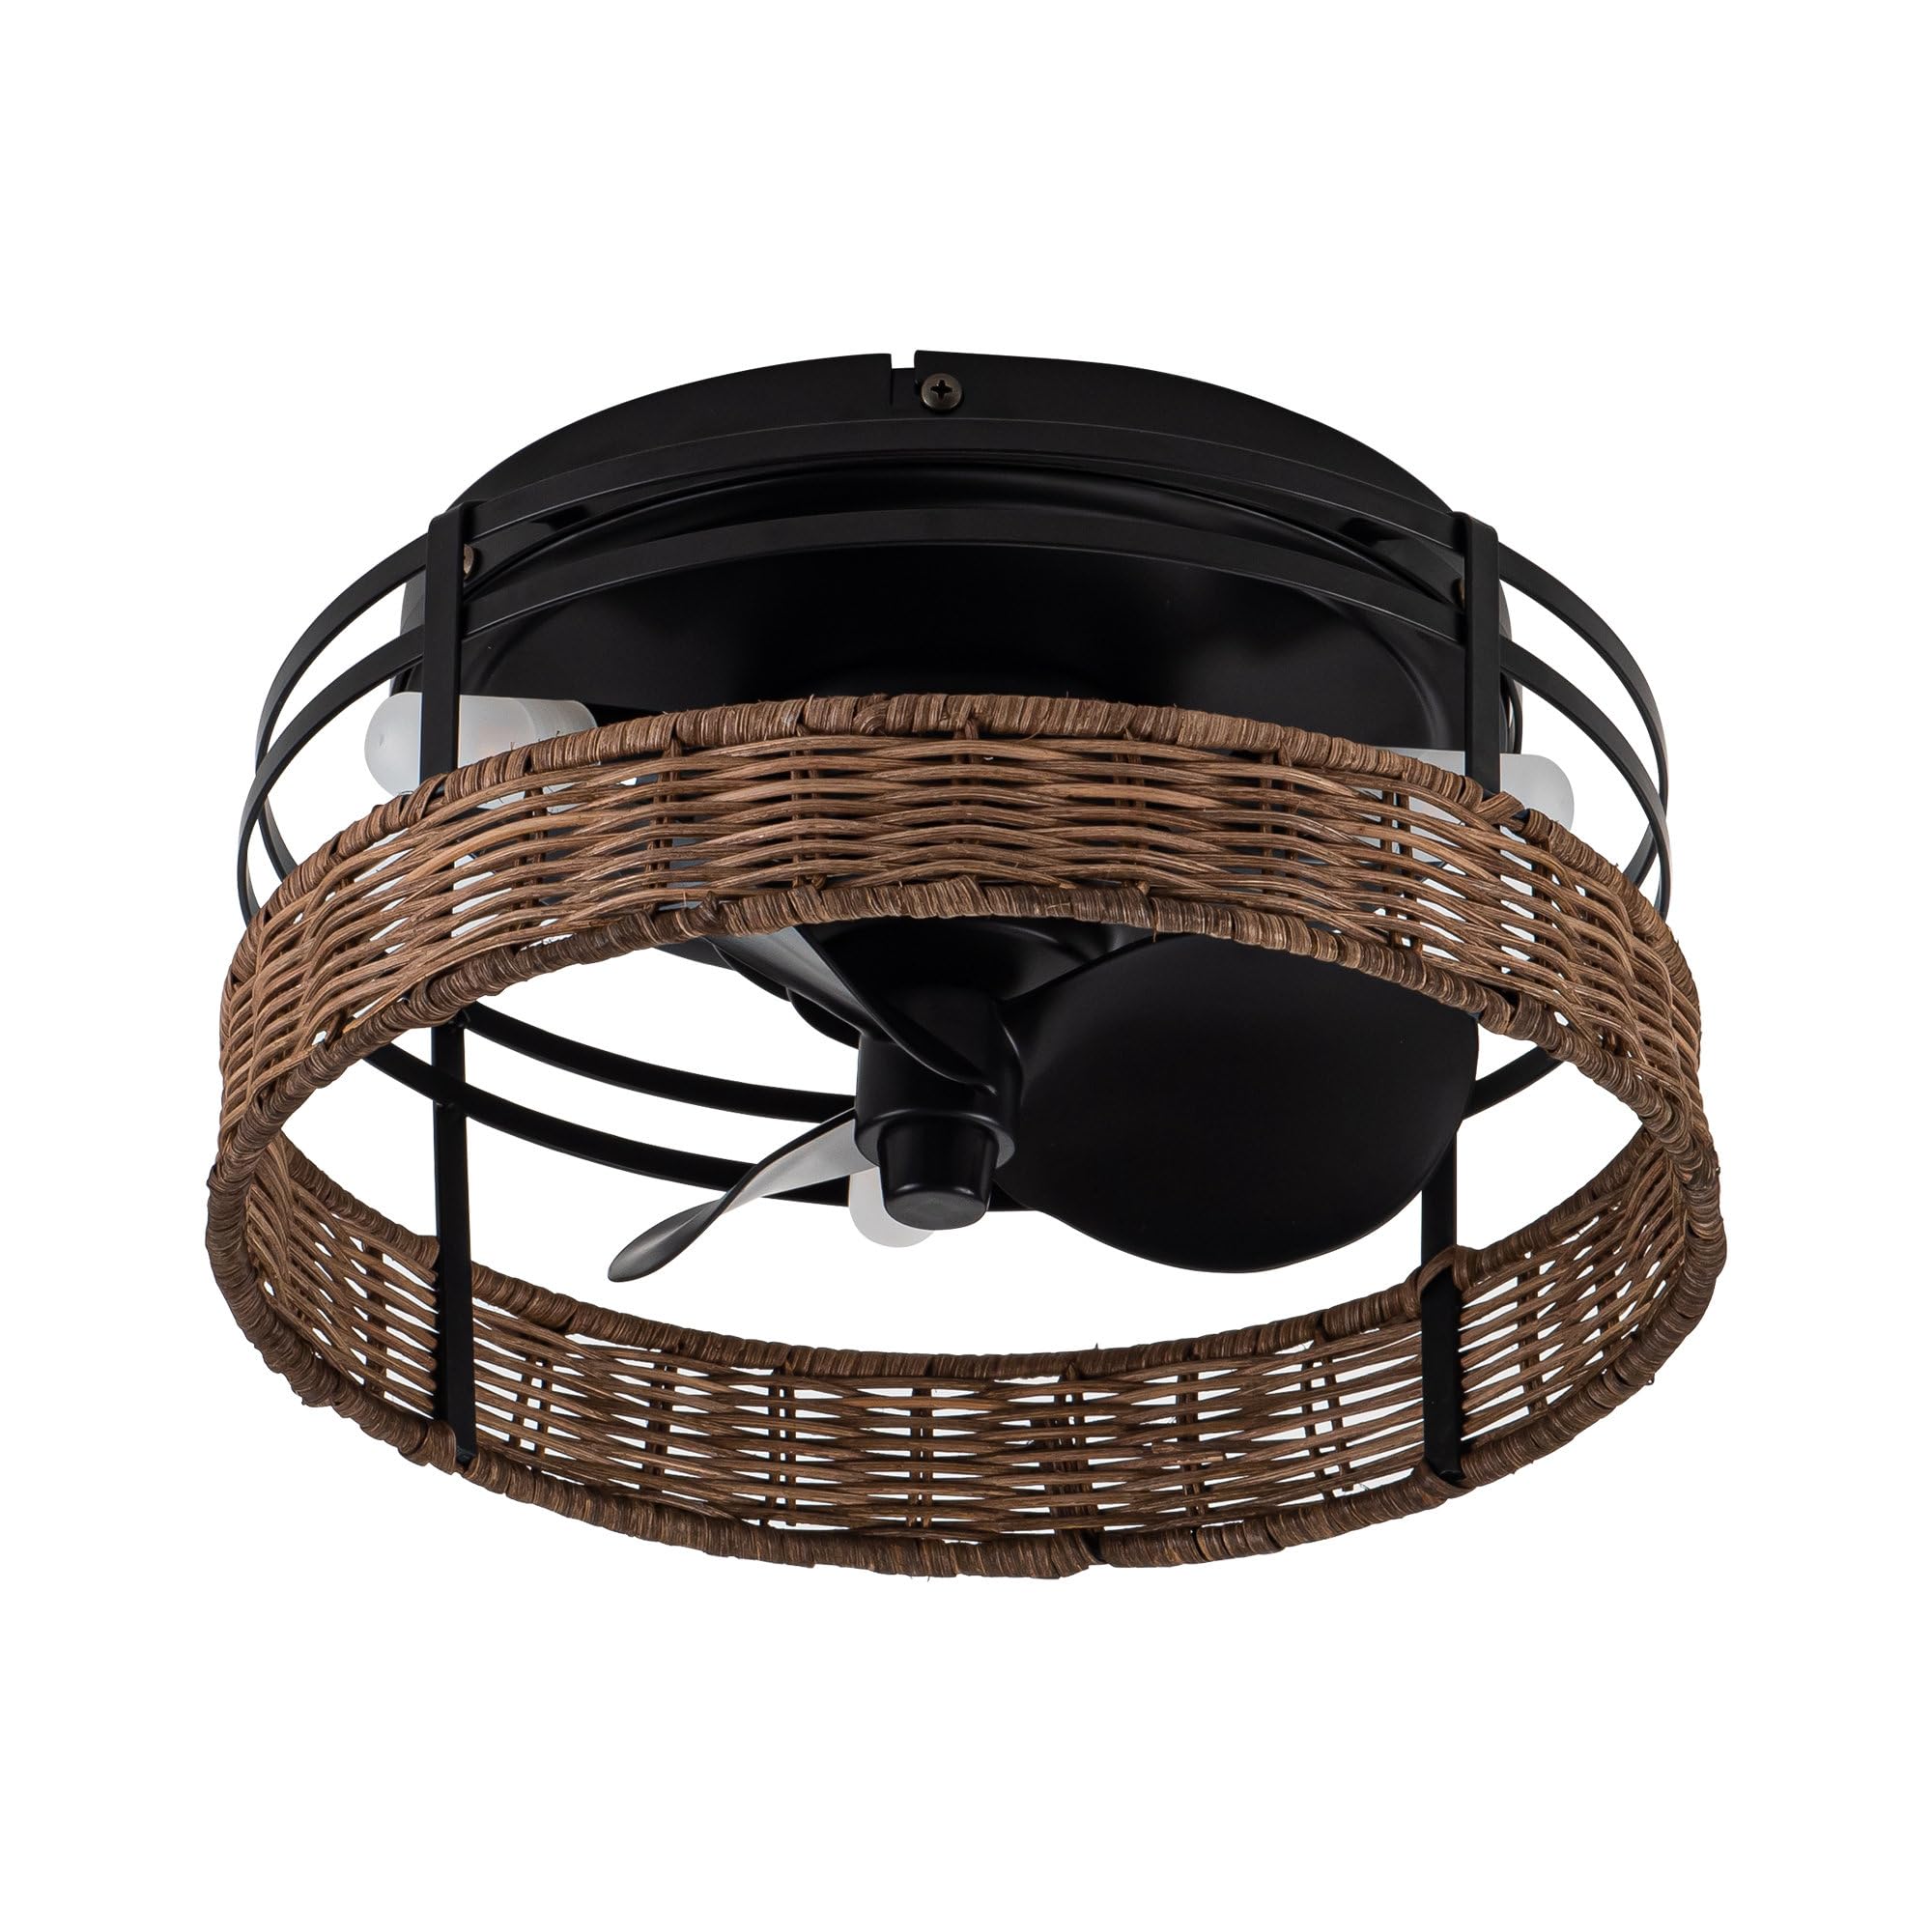
Image 1.1: The Parrot Uncle F8259 ceiling fan with lights, showcasing its rustic design in a home setting.
2. حفاظتی معلومات
- تمام ہدایات پڑھیں: تنصیب شروع کرنے سے پہلے، تمام ہدایات اور حفاظتی معلومات پڑھیں۔
- برقی حفاظت: All electrical wiring must be performed by a qualified electrician or a person with electrical experience. Ensure the power is turned off at the circuit breaker before installation or servicing.
- چڑھنا: بڑھتے ہوئے ڈھانچے کو پنکھے کے وزن (تقریباً 5.07 پونڈ) کو سہارا دینے کے قابل ہونا چاہیے۔
- بلیڈ کلیئرنس: Ensure there is adequate clearance from the fan blades to any obstructions.
- بلب کی قسم: Use only G9 bulbs as specified. Do not exceed the maximum wattage.
- صرف اندرونی استعمال: This fan is designed for indoor use and is not water resistant. Do not install in outdoor or damp مقامات
- ریموٹ کنٹرول: Keep the remote control away from children. Batteries are required for the remote (not included).
3. پیکیج کے مشمولات
تنصیب شروع کرنے سے پہلے تصدیق کریں کہ تمام اجزاء موجود ہیں۔ اگر کوئی پرزہ غائب یا خراب ہو تو کسٹمر سروس سے رابطہ کریں۔
- Ceiling Fan Unit (Motor, Blades, Caged Housing)
- بڑھتے ہوئے بریکٹ
- ریموٹ کنٹرول
- G9 Light Bulbs (3 included)
- ہارڈ ویئر پیک (پیچ، تار گری دار میوے، وغیرہ)
- ہدایت نامہ
4. وضاحتیں
| فیچر | تفصیلات |
|---|---|
| ماڈل نمبر | F8259 |
| مجموعی سائز | 12.5" Diameter x 6.3" Height |
| کینوپی قطر | 9.5" |
| وزن | 5.07 پونڈ |
| بلیڈ | 3 ABS بلیڈ |
| Motor Max Speed | 1100 RPM |
| ہوا کے بہاؤ کی گنجائش۔ | 800 کیوبک فٹ فی منٹ (CFM) |
| روشنی کا ذریعہ | 3 x G9 Bulbs (Max 2 Watts each, 1500 Lumens total) |
| والیومtage | 120 وولٹ |
| کنٹرول کا طریقہ | ریموٹ کنٹرول (RF) |
| خصوصی خصوصیات | Remote Controlled, Reversible Motor |
| تنصیب کی قسم | فلش ماؤنٹ |
| مواد | آئرن، ایکریلونیٹرائل بوٹاڈین اسٹائرین (ABS) |
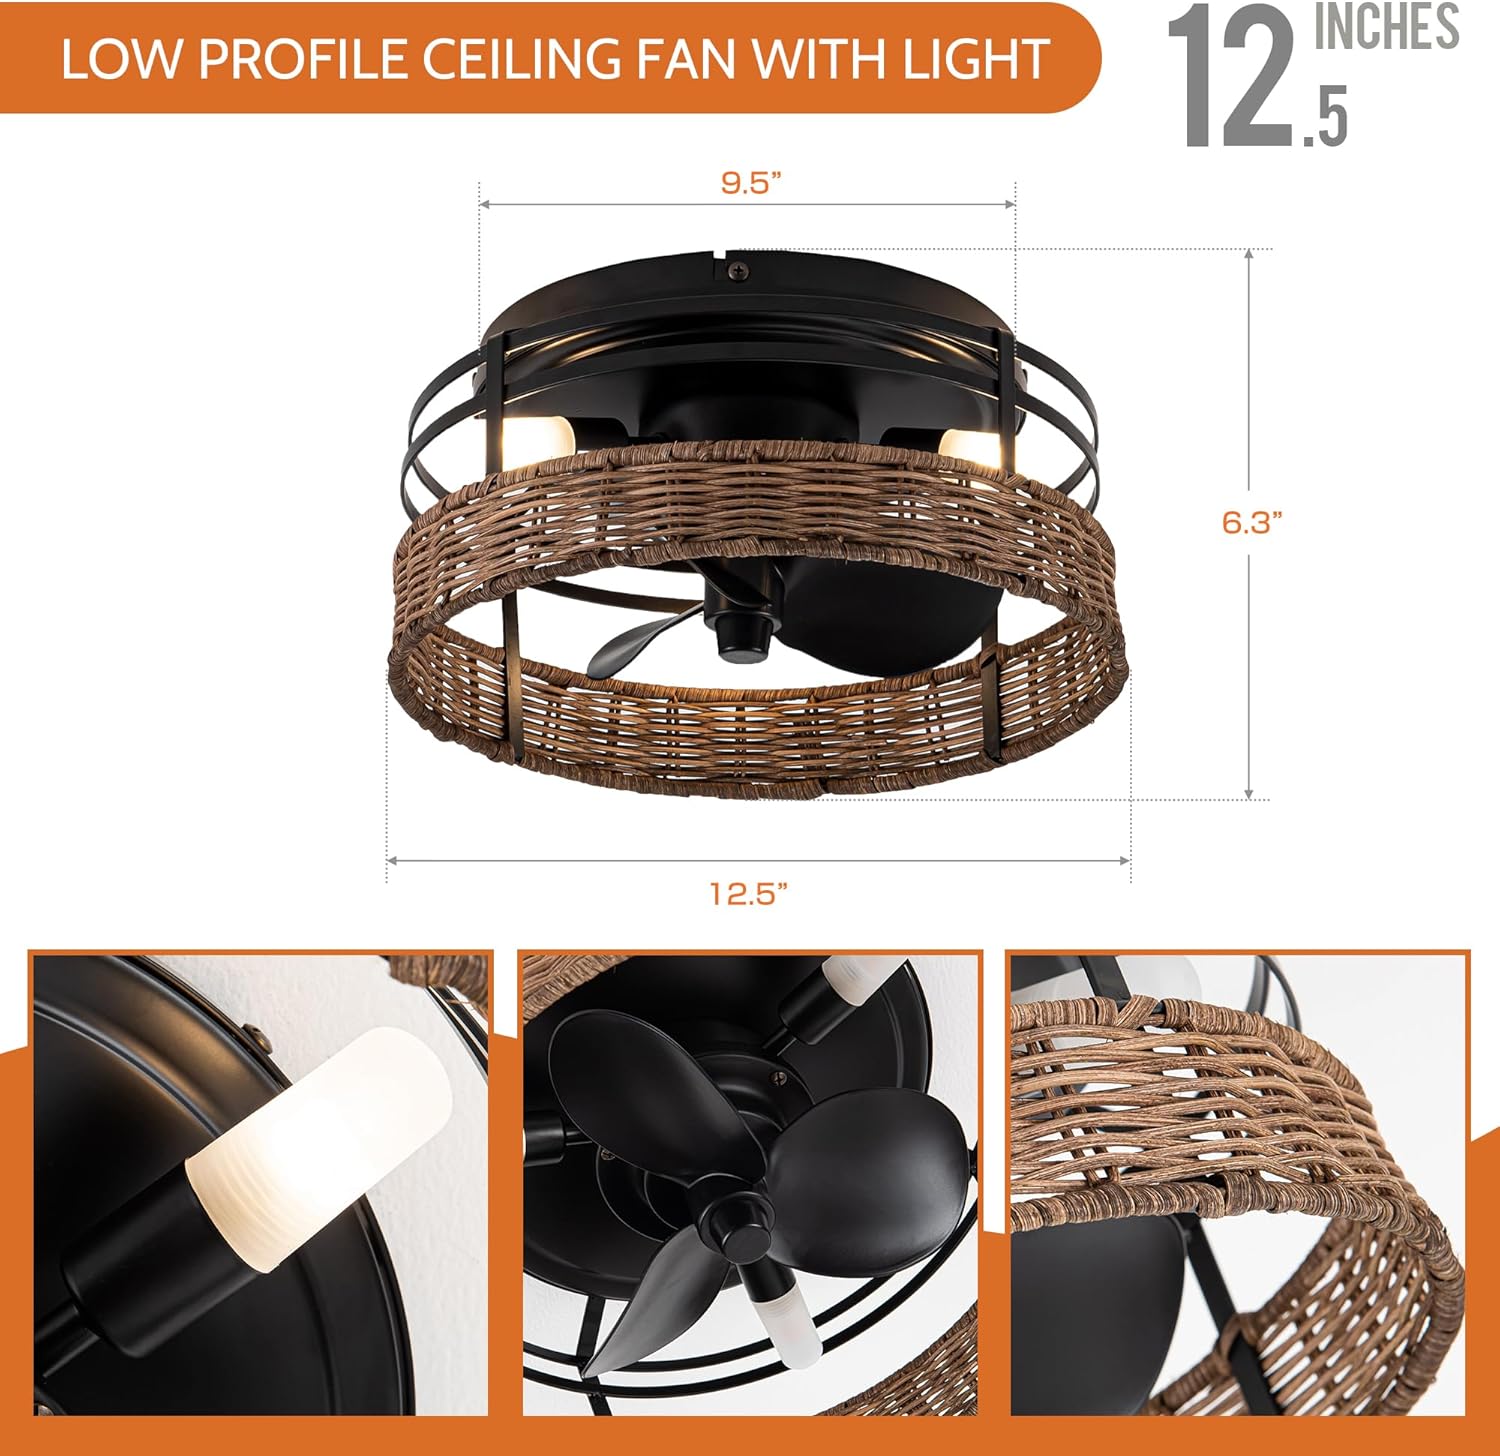
Image 4.1: Product dimensions, including 12.5 inches diameter and 6.3 inches height.
5. تنصیب
شروع کرنے سے پہلے: Ensure power is disconnected at the circuit breaker. Consult a qualified electrician if you are unsure about wiring.
- چڑھنے کی جگہ تیار کریں: Ensure the electrical box is securely mounted to the building structure and can support the fan's weight.
- ماؤنٹنگ بریکٹ منسلک کریں: Secure the mounting bracket to the electrical box using the provided screws.
- وائرنگ کنکشن: Connect the fan's electrical wires to the household wiring according to local electrical codes. Typically, this involves connecting live, neutral, and ground wires. Use wire nuts to secure connections.
- پنکھا لگانا: Carefully lift the fan unit and attach it to the mounting bracket. Ensure all screws are tightened securely.
- لائٹ بلب لگائیں: Insert the three G9 bulbs into their sockets.
- فائنل چیک: Double-check all connections and ensure the fan is securely mounted before restoring power.


6. آپریٹنگ ہدایات
Your Parrot Uncle F8259 ceiling fan is operated using the included remote control. Ensure batteries are installed in the remote (2 x AAA batteries, not included).
6.1 ریموٹ کنٹرول کے افعال

تصویر 6.1: ریموٹ کنٹرول لے آؤٹ اور فنکشنز۔
- پنکھے کی رفتار (1-3): Press buttons '1', '2', or '3' to select low, medium, or high fan speed.
- Fan Stop: Press the 'STOP' button to turn off the fan.
- آگے / ریورس: Press this button to change the fan's rotation direction (clockwise or counter-clockwise).
- لائٹ آن/آف: لائٹ آن یا آف کرنے کے لیے لائٹ بلب آئیکن بٹن کو دبائیں۔
- سبھی آن/آف: Press the power button to turn both the fan and light on or off simultaneously.
6.2 ریورس ایبل موٹر فنکشن
The fan features a reversible motor for year-round comfort. Use the 'Forward / Reverse' button on the remote to switch modes.
- سمر موڈ (گھڑی کی مخالف سمت میں گردش): پنکھے کے بلیڈ گھڑی کی مخالف سمت میں گھومتے ہیں، ٹھنڈی ہوا پیدا کرنے کے لیے ہوا کو نیچے کی طرف دھکیلتے ہیں۔
- ونٹر موڈ (گھڑی کی سمت میں گردش): پنکھے کے بلیڈ گھڑی کی سمت میں گھومتے ہیں، چھت کے قریب پھنسی ہوئی گرم ہوا کو گردش کرنے کے لیے ہوا کو اوپر کی طرف کھینچتے ہیں، گرمی کو زیادہ یکساں طور پر تقسیم کرنے میں مدد کرتے ہیں۔

Image 6.2: Airflow patterns for reversible motor function in summer and winter.
7 دیکھ بھال
باقاعدگی سے دیکھ بھال بہترین کارکردگی کو یقینی بناتی ہے اور آپ کے چھت کے پنکھے کی زندگی کو بڑھاتی ہے۔
- صفائی: Periodically clean the fan with a soft, damp کپڑا کھرچنے والے کلینر یا سالوینٹس کا استعمال نہ کریں، کیونکہ یہ ختم کو نقصان پہنچا سکتے ہیں۔ صفائی سے پہلے یقینی بنائیں کہ بجلی بند ہے۔
- بلب کی تبدیلی: To replace G9 bulbs, ensure the power is off and the bulbs have cooled. Carefully remove the old bulb and insert a new G9 bulb of the same type and wattage (Max 2W).
- فاسٹنرز کو سخت کریں: وقتاً فوقتاً پنکھے اور بڑھتے ہوئے ہارڈویئر پر موجود تمام پیچ اور فاسٹنرز کو چیک کریں تاکہ یہ یقینی بنایا جا سکے کہ وہ محفوظ ہیں۔
8 خرابیوں کا سراغ لگانا
اگر آپ کو اپنے پرستار کے ساتھ مسائل کا سامنا ہے، تو درج ذیل عام مسائل اور حل دیکھیں:
| مسئلہ | ممکنہ وجہ | حل |
|---|---|---|
| پنکھا شروع نہیں ہوتا | پنکھے کی طاقت نہیں؛ ڈھیلے تار کنکشن؛ ریموٹ کنٹرول بیٹری ڈیڈ۔ | سرکٹ بریکر چیک کریں؛ تصدیق کریں کہ تمام تار کنکشن محفوظ ہیں۔ ریموٹ کنٹرول بیٹریاں تبدیل کریں۔ |
| روشنی کام نہیں کرتی | Bulb is faulty; Loose wire connection; Remote control battery dead. | Replace G9 bulb; Check light fixture wiring; Replace remote control batteries. |
| ریموٹ کنٹرول کام نہیں کر رہا ہے۔ | Batteries are dead or incorrectly inserted; Remote not paired (if applicable). | Replace batteries (2 x AAA); Ensure batteries are inserted correctly; Refer to remote pairing instructions (if provided separately). |
| ضرورت سے زیادہ ہلچل | Loose mounting screws; Fan not securely attached to mounting bracket. | Ensure all mounting screws are tight; Verify fan is properly seated on the mounting bracket. |
9. وارنٹی اور سپورٹ
This Parrot Uncle ceiling fan comes with a limited warranty. For specific warranty details, claims, or technical support, please contact Parrot Uncle customer service directly. Keep your purchase receipt as proof of purchase.
رابطہ کی معلومات: Please refer to the contact information provided with your purchase or visit the official Parrot Uncle webسپورٹ کے لیے سائٹ۔