
1. تعارف
Thank you for choosing the Conentool 21V Cordless Impact Drill/Driver Kit. This tool is designed for various drilling and screwdriving tasks in wood, metal, plastics, and masonry. Please read this manual carefully before operating the tool to ensure safe and efficient use. Keep this manual for future reference.

Image 1.1: The Conentool 21V Cordless Impact Drill/Driver Kit, including the drill, two 2500mAh batteries, charger, and a variety of drill bits and accessories in a carrying case.
2. عام سیفٹی ہدایات۔
انتباہ: اس پاور ٹول کے ساتھ فراہم کردہ تمام حفاظتی انتباہات، ہدایات، عکاسی اور وضاحتیں پڑھیں۔ ذیل میں دی گئی تمام ہدایات پر عمل کرنے میں ناکامی کے نتیجے میں برقی جھٹکا، آگ، اور/یا شدید چوٹ لگ سکتی ہے۔
2.1 کام کے علاقے کی حفاظت
- کام کے علاقے کو صاف اور اچھی طرح سے روشن رکھیں۔ بے ترتیبی یا تاریک علاقے حادثات کو دعوت دیتے ہیں۔
- دھماکہ خیز ماحول، جیسے آتش گیر مائعات، گیسوں، یا دھول کی موجودگی میں بجلی کے اوزار نہ چلائیں۔ پاور ٹولز چنگاریاں پیدا کرتے ہیں جو دھول یا دھوئیں کو بھڑکا سکتے ہیں۔
- پاور ٹول چلاتے ہوئے بچوں اور دیکھنے والوں کو دور رکھیں۔ خلفشار آپ کو کنٹرول کھونے کا سبب بن سکتا ہے۔
2.2 الیکٹریکل سیفٹی
- پاور ٹول پلگ کو آؤٹ لیٹ سے مماثل ہونا چاہیے۔ کسی بھی طرح سے پلگ میں ترمیم نہ کریں۔
- زمینی یا زمینی سطحوں، جیسے پائپ، ریڈی ایٹرز، رینجز اور ریفریجریٹرز سے جسم کے رابطے سے گریز کریں۔ اگر آپ کا جسم مٹی یا گراؤنڈ ہے تو بجلی کے جھٹکے لگنے کا خطرہ بڑھ جاتا ہے۔
- بجلی کے آلات کو بارش یا گیلے حالات میں بے نقاب نہ کریں۔ بجلی کے آلے میں پانی داخل ہونے سے بجلی کے جھٹکے کا خطرہ بڑھ جائے گا۔
2.3 ذاتی حفاظت
- ہمیشہ آنکھوں کی حفاظت کا لباس پہنیں۔ حفاظتی شیشے، چشمیں، یا چہرے کی ڈھال کا استعمال کریں۔
- ٹول کو طویل مدت تک چلاتے وقت سماعت کا تحفظ پہنیں۔
- مناسب طریقے سے کپڑے. ڈھیلے کپڑے یا زیورات نہ پہنیں۔ اپنے بالوں اور کپڑوں کو حرکت پذیر حصوں سے دور رکھیں۔
- چوکس رہیں، دیکھیں کہ آپ کیا کر رہے ہیں، اور پاور ٹول چلاتے وقت عقل کا استعمال کریں۔
3. پیکیج کے مشمولات
تصدیق کریں کہ نیچے دی گئی تمام اشیاء آپ کے پیکج میں شامل ہیں۔ اگر کوئی اشیاء غائب یا خراب ہیں، تو براہ کرم کسٹمر سپورٹ سے رابطہ کریں۔
- 1 x Conentool 21V Cordless Impact Drill/Driver
- 2 x 2500mAh Lithium-ion Batteries
- 1 x بیٹری چارجر
- 1 x Flexible Shaft Extension
- Various Drill Bits (for wood, metal, masonry)
- Various Screwdriver Bits
- ساکٹ اڈاپٹر
- کیرینگ کیس
- صارف دستی

Image 3.1: A complete overview of the kit contents, including the drill, two batteries, charger, flexible shaft, various drill bits, screwdriver bits, and socket adapters, all neatly arranged.
4. پروڈکٹ ختمview
Familiarize yourself with the main components of your drill/driver:
- چک: ڈرل بٹس اور سکریو ڈرایور بٹس رکھتا ہے۔
- ٹارک ایڈجسٹمنٹ رنگ: Selects the desired torque setting.
- موڈ سلیکٹر رنگ: Switches between screwdriving, drilling, and impact drilling modes.
- سپیڈ سلیکٹر سوئچ: Changes between high and low-speed gears.
- ٹرگر سوئچ: Activates the tool and controls speed (variable speed).
- فارورڈ/ ریورس سلیکٹر: گردش کی سمت کو تبدیل کرتا ہے۔
- ایل ای ڈی ورک لائٹ: کام کے علاقے کو روشن کرتا ہے۔
- بیٹری پیک: آلے کو طاقت فراہم کرتا ہے۔
- بیٹری ریلیز بٹن: بیٹری کو ہٹانے کے لیے۔
- ہینڈل: آرام دہ اور پرسکون استعمال کے لئے ایرگونومک گرفت۔

تصویر 4.1: ایک اندرونی view highlighting the brushless motor, which provides increased power, efficiency, and a quieter operation with no sparks.
5. سیٹ اپ
5.1 بیٹری چارج کرنا
The battery pack is not fully charged at the time of purchase. It is recommended to fully charge the battery before first use.
- چارجر کو معیاری پاور آؤٹ لیٹ سے جوڑیں۔
- Slide the battery pack onto the charger base. Ensure it clicks into place.
- The charger indicator light will show the charging status. A red light typically indicates charging, and a green light indicates a full charge.
- مکمل چارج ہونے کے بعد، چارجر کو پاور آؤٹ لیٹ سے منقطع کریں اور بیٹری کو ہٹا دیں۔

Image 5.1: The battery charger connected to a wall outlet, with a battery pack inserted for charging. The red light indicates charging, and the green light indicates a completed charge.
5.2 بیٹری کو انسٹال اور ہٹانا۔
- انسٹال کرنے کے لیے: Align the battery pack with the base of the tool handle and slide it in until it clicks securely into place.
- ہٹانے کے لیے: Press the battery release button (usually located at the front of the battery) and slide the battery pack out of the tool.

Image 5.2: A cutaway view of the 2500mAh battery pack, illustrating its internal lithium-ion cells and power management system, designed for up to 90 minutes of use per battery.
5.3 Installing and Removing Drill/Screwdriver Bits
- انسٹال کرنے کے لیے: Rotate the chuck counter-clockwise to open the jaws. Insert the desired bit into the chuck as far as it will go. Rotate the chuck clockwise to tighten the jaws firmly around the bit.
- ہٹانے کے لیے: جبڑوں کو ڈھیلا کرنے اور بٹ کو باہر نکالنے کے لیے چک کو گھڑی کی مخالف سمت میں گھمائیں۔
Ensure the bit is securely fastened to prevent it from slipping during operation.
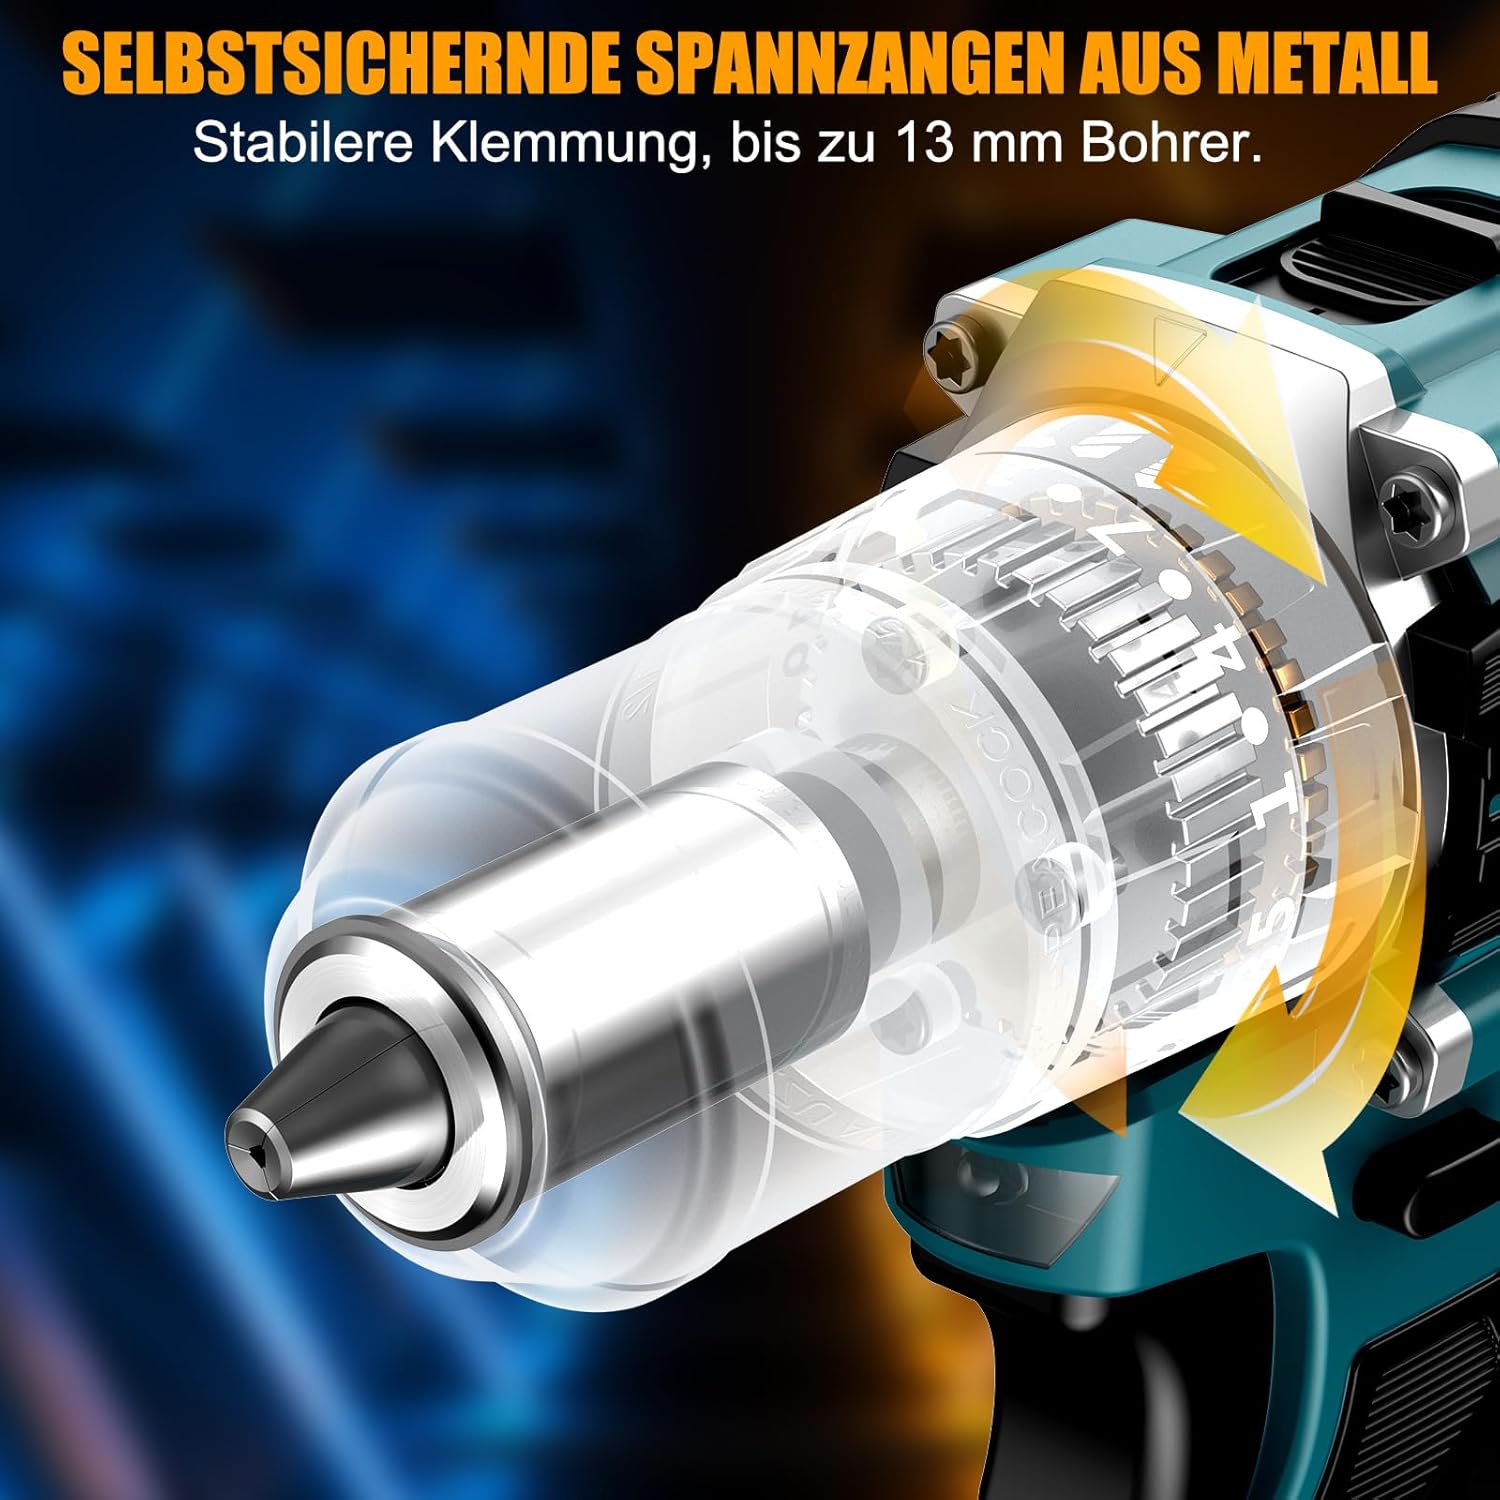
تصویر 5.3: ایک تفصیلی view of the self-locking metal chuck, demonstrating its stable clamping mechanism capable of holding drill bits up to 13mm securely.
6. آپریٹنگ ہدایات
6.1 پاور آن/آف اور سپیڈ کنٹرول
- To turn the tool ON, press the trigger switch. The speed is variable; press the trigger further for higher speed.
- ٹول کو آف کرنے کے لیے، ٹرگر سوئچ کو چھوڑ دیں۔
- The integrated LED work light will illuminate when the trigger is pressed, providing visibility in dimly lit areas.
6.2 فارورڈ/ ریورس روٹیشن
The forward/reverse selector switch is located above the trigger. Push it to the left for forward rotation (for screwdriving and drilling) and to the right for reverse rotation (for removing screws or freeing jammed bits). Ensure the tool is stopped before changing direction.
6.3 Speed Gear Selection
The drill features a 2-speed gear selector switch on top of the tool:
- Gear 1 (Low Speed, 0-650 RPM): Ideal for high-torque applications like driving large screws or drilling large holes.
- Gear 2 (High Speed, 0-1850 RPM): Suitable for fast drilling in softer materials and smaller diameter holes.
Always select the appropriate gear for the task. Change gears only when the tool is completely stopped.
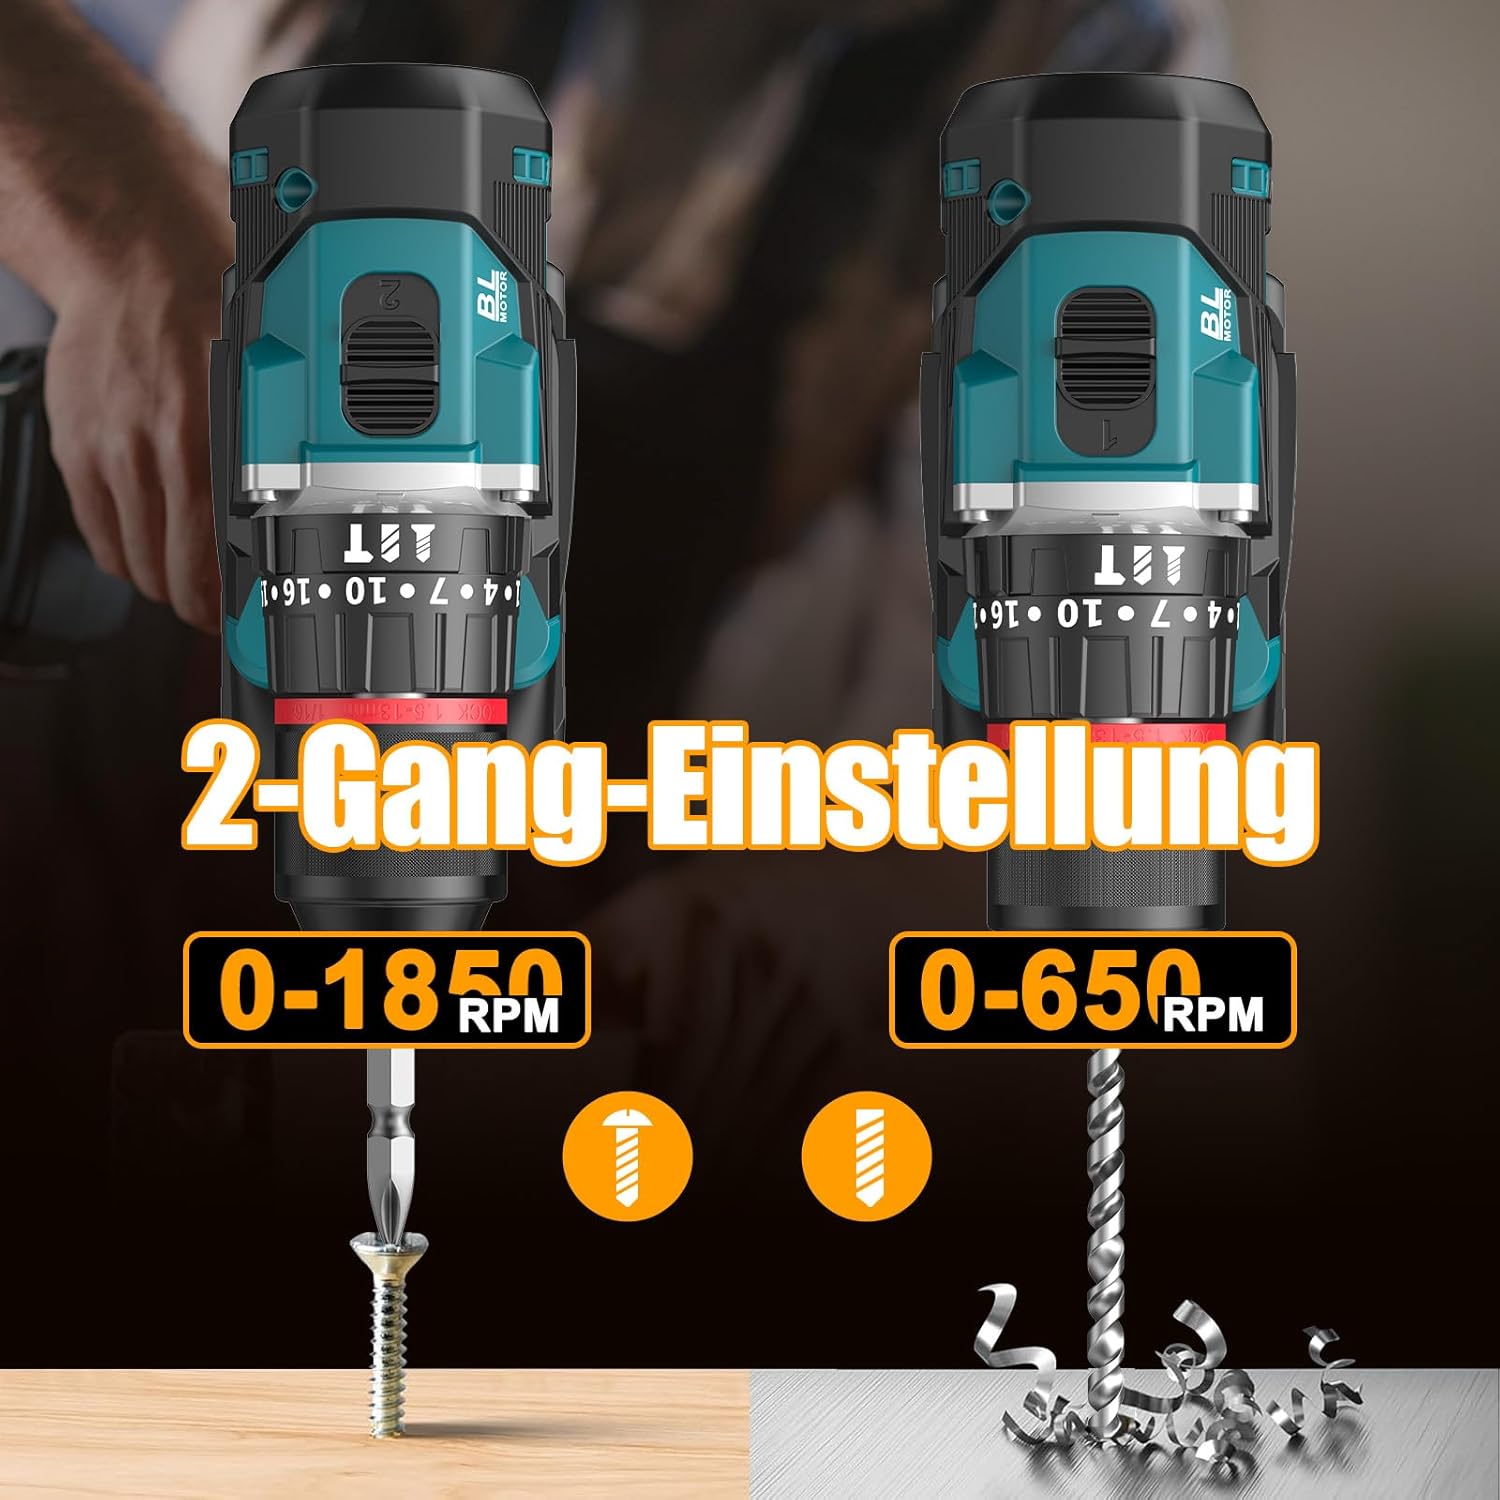
Image 6.1: An illustration demonstrating the two-speed gear settings: Gear 1 (0-650 RPM) for screwdriving and Gear 2 (0-1850 RPM) for drilling, allowing for optimal performance based on the application.
6.4 Torque Adjustment and Mode Selection
The torque adjustment ring allows you to set the desired torque for screwdriving applications, preventing overtightening or stripping screws. The mode selector ring allows you to switch between different operating modes.
- Screwdriving Mode (Torque Settings 1-35): Use these settings to match the torque to the screw size and material. Lower numbers for smaller screws/softer materials, higher numbers for larger screws/harder materials.
- Drilling Mode (ڈرل بٹ آئیکن): For general drilling without impact. The clutch is disengaged, providing maximum torque.
- Impact Drilling Mode (ہتھوڑا آئیکن): For drilling into masonry or concrete, providing a hammering action in addition to rotation.
The drill offers 35+3 settings, including 35 torque settings for screwdriving and 3 modes (screwdriving, drilling, impact drilling).

Image 6.2: A visual representation of the 35+3 torque and mode settings, indicating precise power control and a maximum torque of 55 N.m, suitable for various materials like wood, brick, plastic, and metal.
7 دیکھ بھال
7.1 صفائی
- کسی بھی صفائی یا دیکھ بھال کو انجام دینے سے پہلے ہمیشہ بیٹری پیک کو منقطع کریں۔
- زیادہ گرمی سے بچنے کے لیے ٹول کے وینٹیلیشن کے سوراخوں کو صاف رکھیں۔
- ایک نرم استعمال کریں، ڈیamp ٹول صاف کرنے کے لیے کپڑا casinجی سخت کیمیکل یا کھرچنے والے کلینر کا استعمال نہ کریں۔
7.2 اسٹوریج
- Store the tool and batteries in a cool, dry place, away from direct sunlight and moisture.
- Store the tool in its carrying case to protect it from dust and damage.
- بچوں کی پہنچ سے دور رکھیں۔

Image 7.1: A person carrying the Conentool drill kit in its durable black carrying case, designed for convenient storage and transport of the tool and its accessories.
7.3 بیٹری کی دیکھ بھال
- Do not store batteries in a discharged state. Recharge them regularly, especially if not used for extended periods.
- بیٹریوں کو انتہائی درجہ حرارت کے سامنے لانے سے گریز کریں۔
- بیٹری پیک کو الگ کرنے یا اس میں ترمیم کرنے کی کوشش نہ کریں۔
8 خرابیوں کا سراغ لگانا
| مسئلہ | ممکنہ وجہ | حل |
|---|---|---|
| ٹول شروع نہیں ہوتا ہے۔ | بیٹری چارج نہیں ہوئی یا غلط طریقے سے انسٹال ہوئی ہے۔ | یقینی بنائیں کہ بیٹری پوری طرح سے چارج ہے اور صحیح طریقے سے ڈالی گئی ہے۔ |
| کم طاقت یا رفتار | بیٹری چارج کم ہے۔ | بیٹری ری چارج کریں۔ |
| چک میں بٹ پھسل جاتا ہے۔ | چک کافی سخت نہیں. | Tighten the chuck firmly around the bit. Ensure the bit shank is clean. |
| زیادہ گرم ہونا | بلاک شدہ وینٹیلیشن سلاٹ؛ مسلسل بھاری استعمال. | وینٹیلیشن سلاٹس کو صاف کریں۔ طویل استعمال کے دوران آلے کو ٹھنڈا ہونے دیں۔ |
9. وضاحتیں
| فیچر | تفصیلات |
|---|---|
| ماڈل نمبر | ebvc-sd-de |
| والیومtage | 21 وولٹ |
| بیٹری کی قسم | لیتھیم آئن |
| بیٹری کی صلاحیت | 2500 mAh (ہر ایک) |
| زیادہ سے زیادہ Torque | 55 این ایم |
| ٹارک کی ترتیبات | 35 + 3 Modes (Screwdriving, Drilling, Impact Drilling) |
| بغیر لوڈ کی رفتار (گیئر 1) | 0-650 RPM |
| بغیر لوڈ کی رفتار (گیئر 2) | 0-1850 RPM |
| چک سائز | 13 mm (3/8 inch) Keyless |
| مصنوعات کے طول و عرض | 35 x 31 x 10 سینٹی میٹر |
| وزن (بیٹری کے ساتھ) | 1.5 کلوگرام |
10. وارنٹی اور سپورٹ
Conentool products are manufactured to high-quality standards. In the unlikely event of a defect due to material or manufacturing fault, please contact your retailer or Conentool customer service. Please retain your proof of purchase for warranty claims.
For further assistance, technical support, or to inquire about spare parts, please refer to the contact information provided with your purchase or visit the official Conentool webسائٹ