1. تعارف
This manual provides detailed instructions for the installation, operation, and maintenance of your EVTSCAN Digital Thermoregulator. This device is designed to precisely control heating equipment, such as wall-mounted boilers and gas boilers, ensuring a stable and energy-efficient temperature environment. Please read this manual thoroughly before installation and use to ensure proper function and safety.
2. حفاظتی معلومات
Always observe the following safety precautions to prevent damage to the device or personal injury:
- یقینی بنائیں کہ تنصیب یا دیکھ بھال سے پہلے بجلی کی فراہمی منقطع ہے۔
- Installation should be performed by a qualified professional if you are unsure about electrical wiring.
- آلے کو پانی یا ضرورت سے زیادہ نمی کے سامنے نہ رکھیں۔
- Use only the specified battery type (2 AA batteries) and ensure correct polarity.
- آلے کو آتش گیر مواد سے دور رکھیں۔
3. پروڈکٹ ختمview
The EVTSCAN Digital Thermoregulator features a clear LCD display for easy monitoring and a simple interface for temperature control. Its compact design allows for discreet integration into your living space.

شکل 3.1: سامنے view of the Digital Thermoregulator. The LCD screen displays current settings and room temperature, with a rotary knob below for adjustments.
کلیدی اجزاء:
- LCD ڈسپلے: Shows set temperature, room temperature, time, and operational icons.
- Control Knob/Button: مینوز کو نیویگیٹ کرنے اور ترتیبات کو ایڈجسٹ کرنے کے لیے استعمال کیا جاتا ہے۔
- بیٹری ٹوکری: Located on the rear or side for 2 AA batteries.
- وائرنگ ٹرمینلز: For connection to the heating system.
4. وضاحتیں
| فیچر | تفصیلات |
|---|---|
| ماڈل | EVTSCANok0g9ct2zq |
| پاور موڈ | 2 AA بیٹریاں (شامل نہیں) |
| Screen Accuracy | 0.5 ℃ |
| پروب سینسر | NTC (10k) 1% |
| صلاحیت سے رابطہ کریں | Greater than 30-230 V DC working voltage, lower current. Reference: 5 A 30 V (HF relay) or 2 A 30 V (NEC relay) |
| درجہ حرارت کی نمائش کی حد | 1 سے 40 ℃ |
| Default Temperature Adjustment Range | 5 سے 35 ℃ |
| آپریٹنگ درجہ حرارت کی حد | 0 سے 50 ℃ |
| رننگ پروگرام | Set once a week |
| آؤٹ پٹ | ریلے کو تبدیل کرنا |
| مواد | شعلہ ریٹارڈنٹ پولی کاربونیٹ۔ |
| وزن | 170 گرام |
5. سیٹ اپ اور انسٹالیشن
The EVTSCAN Digital Thermoregulator is designed for simple installation. Follow these steps carefully:
5.1 پیک کھولنا اور معائنہ
پیکیجنگ سے تمام اجزاء کو احتیاط سے ہٹا دیں۔ تصدیق کریں کہ پیکیج کے مندرجات میں درج تمام اشیاء موجود ہیں اور بغیر کسی نقصان کے۔
- 1 Digital Temperature Controller
- 2 پیچ
5.2. بیٹری کی تنصیب
The device requires 2 AA batteries for operation. These are not included in the package.
- Locate the battery compartment on the back of the thermoregulator.
- بیٹری کے ٹوکری کا احاطہ کھولیں۔
- درست قطبیت (+/-) کو یقینی بناتے ہوئے 2 AA بیٹریاں داخل کریں۔
- بیٹری کے کمپارٹمنٹ کور کو محفوظ طریقے سے بند کریں۔

شکل 5.1: زاویہ دار view of the thermoregulator, illustrating its compact size and potential location for battery access or mounting points.
5.3. بڑھتے ہوئے اور وائرنگ
The thermoregulator is designed for wall mounting. Ensure the power to your heating system is turned off before proceeding with wiring.
- Choose a suitable location on an interior wall, away from direct sunlight, drafts, or heat sources that could affect temperature readings.
- Mount the backplate (if detachable) to the wall using the provided screws.
- Connect the thermoregulator to your boiler or heating system according to the wiring diagram provided with your boiler and the thermoregulator's terminal markings. This typically involves connecting the switching relay output to the boiler's control input.
- Secure the thermoregulator onto the mounted backplate.
نوٹ: For wiring, consult a qualified electrician if you are unfamiliar with electrical installations.
6. آپریٹنگ ہدایات
The EVTSCAN Digital Thermoregulator uses a microcomputer control technology to maintain your desired temperature efficiently.
6.1. Powering On and Initial Display
Once batteries are installed, the LCD display will illuminate, showing the current room temperature, set temperature, and time.
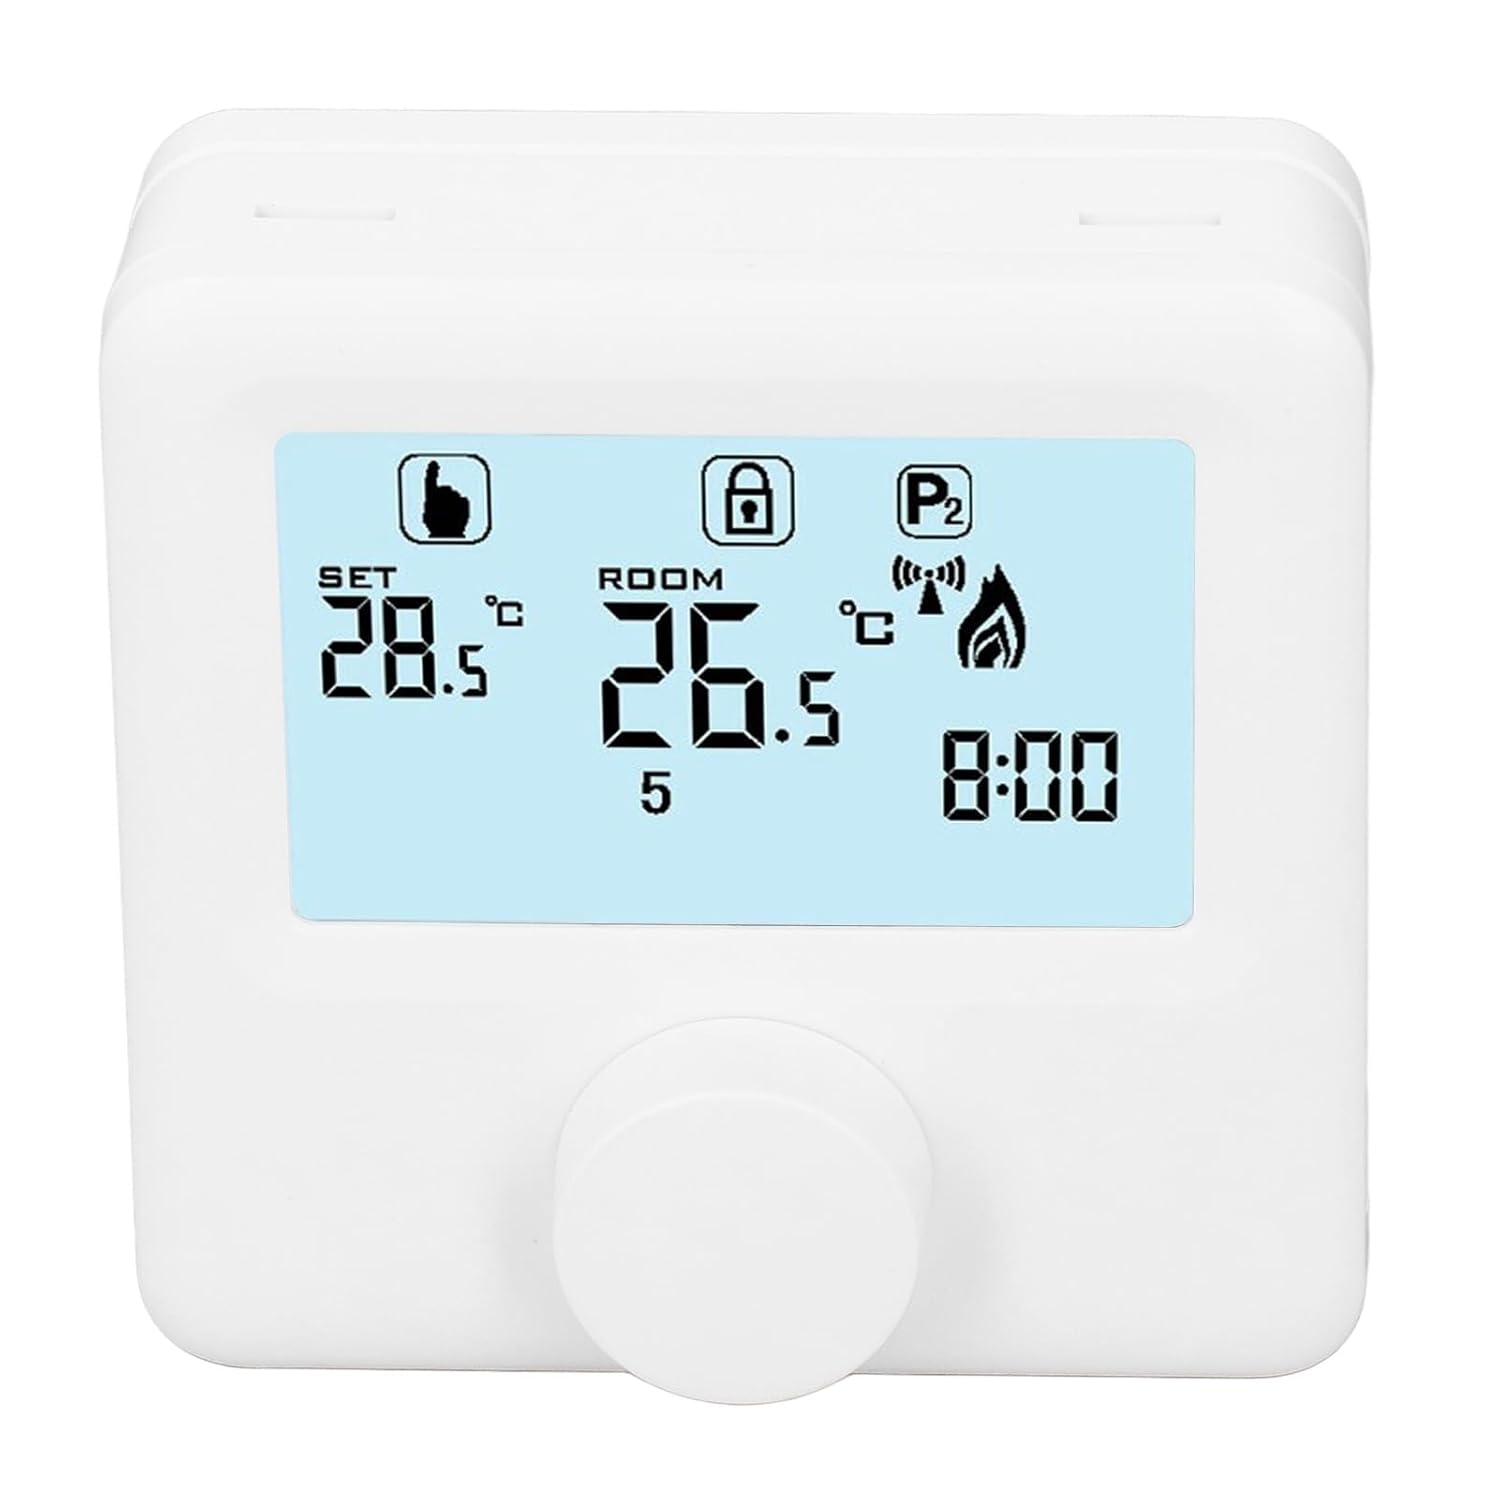
شکل 6.1: تفصیلی view of the LCD display. It shows the set temperature (SET), room temperature (ROOM), a lock icon, a program icon (P2), a signal icon, a flame icon indicating heating, and the current time.
6.2. درجہ حرارت کی ترتیب
مطلوبہ درجہ حرارت کو ایڈجسٹ کرنے کے لیے:
- Rotate the control knob to increase or decrease the set temperature. The "SET" value on the display will change accordingly.
- The device will automatically activate or deactivate the heating system to maintain the set temperature within the range of 1 to 40 ℃. The default adjustment range is 5 to 35 ℃.
6.3 پروگرامنگ ہفتہ وار شیڈول
The thermoregulator supports a weekly programming schedule. This allows you to set different temperatures for various times of the day across the week.
- Press and hold the control knob (or a designated button, if available) to enter programming mode.
- Use the control knob to navigate through days of the week and time slots.
- Adjust the desired temperature for each programmed period.
- Confirm your settings to save the weekly program. The device will then operate according to this schedule.
6.4. Understanding Display Icons
- سیٹ: Indicates the target temperature you have set.
- کمرہ: موجودہ محیطی کمرے کا درجہ حرارت دکھاتا ہے۔
- شعلے کا آئیکن: جب حرارتی نظام فعال ہوتا ہے تو روشن ہوتا ہے۔
- لاک آئیکن: May indicate a keypad lock feature to prevent accidental changes.
- P1/P2 Icon: Indicates the current program mode (e.g., P1 for comfort, P2 for economy, or specific weekly program segments).
- سگنل آئیکن: May indicate wireless communication status if applicable.
7 دیکھ بھال
Regular maintenance ensures the longevity and optimal performance of your thermoregulator.
- صفائی: آلے کو نرم، خشک کپڑے سے صاف کریں۔ کھرچنے والے کلینر یا سالوینٹس کا استعمال نہ کریں۔
- بیٹری کی تبدیلی: Replace batteries when the low battery indicator appears on the display. Always replace both batteries simultaneously with new AA batteries.
- سینسر ایریا: Ensure the temperature sensor area (usually a small vent on the device) is free from dust and obstructions for accurate readings.
8 خرابیوں کا سراغ لگانا
If you encounter issues with your EVTSCAN Digital Thermoregulator, refer to the following common problems and solutions:
- ڈسپلے خالی ہے:
- چیک کریں کہ آیا بیٹریاں صحیح طریقے سے انسٹال ہیں۔
- پرانی بیٹریاں نئی سے بدلیں۔
- حرارتی نظام جواب نہیں دے رہا ہے:
- Ensure the thermoregulator is powered on and the flame icon is displayed when heating is expected.
- Verify wiring connections to the boiler are secure and correct.
- Check the boiler's power supply and status.
- Ensure the set temperature is higher than the current room temperature.
- درجہ حرارت کی غلط ریڈنگ:
- Ensure the device is not exposed to direct sunlight, drafts, or heat sources.
- Clean any dust or debris from the sensor area.
- Cannot change settings:
- Check if the lock icon is displayed. If so, refer to the operating instructions to unlock the keypad.
اگر مسئلہ برقرار رہتا ہے تو، کسٹمر سپورٹ سے رابطہ کریں۔
9. وارنٹی اور سپورٹ
Specific warranty information for this product is not provided in the available data. Please refer to the product packaging or the retailer's webوارنٹی تفصیلات کے لئے سائٹ.
For technical support or further assistance, please contact EVTSCAN customer service through their official channels or the retailer from whom you purchased the product.
You can visit the EVTSCAN store on Amazon for more information: EVTSCAN Store