
1. تعارف
Thank you for choosing the Weytoll 16.8V Cordless Mini Angle Grinder. This manual provides essential information for the safe and efficient operation, maintenance, and troubleshooting of your new tool. Please read this manual thoroughly before first use and keep it for future reference.
This mini angle grinder is designed for various applications including cutting, grinding, and polishing tasks on materials such as tiles, metal, and wood. Its cordless design offers flexibility and convenience for both indoor and outdoor projects.
2. حفاظتی ہدایات
انتباہ: اس پاور ٹول کے ساتھ فراہم کردہ تمام حفاظتی انتباہات، ہدایات، عکاسی اور وضاحتیں پڑھیں۔ ذیل میں دی گئی تمام ہدایات پر عمل کرنے میں ناکامی کے نتیجے میں برقی جھٹکا، آگ، اور/یا شدید چوٹ لگ سکتی ہے۔
2.1 عام پاور ٹول سیفٹی وارننگز
- کام کے علاقے کی حفاظت: کام کے علاقے کو صاف اور اچھی طرح سے روشن رکھیں۔ بے ترتیبی یا تاریک علاقے حادثات کو دعوت دیتے ہیں۔ دھماکہ خیز ماحول، جیسے آتش گیر مائعات، گیسوں، یا دھول کی موجودگی میں بجلی کے اوزار نہ چلائیں۔
- برقی حفاظت: زمینی یا زمینی سطحوں جیسے پائپ، ریڈی ایٹرز، رینجز اور ریفریجریٹرز سے جسم کے رابطے سے گریز کریں۔ اگر آپ کا جسم مٹی یا گراؤنڈ ہے تو بجلی کے جھٹکے لگنے کا خطرہ بڑھ جاتا ہے۔
- ذاتی حفاظت: Always wear eye protection. Use personal protective equipment such as dust masks, non-skid safety shoes, hard hats, or hearing protection when appropriate.
- آلے کا استعمال اور دیکھ بھال: طاقت کے آلے کو مجبور نہ کریں۔ اپنی درخواست کے لیے صحیح پاور ٹول استعمال کریں۔ درست پاور ٹول اس کام کو بہتر اور محفوظ طریقے سے کرے گا جس شرح کے لیے اسے ڈیزائن کیا گیا تھا۔
- بیٹری ٹول کا استعمال اور دیکھ بھال: صرف مینوفیکچرر کی طرف سے مخصوص چارجر کے ساتھ ری چارج کریں۔ ایک چارجر جو ایک قسم کے بیٹری پیک کے لیے موزوں ہے دوسرے بیٹری پیک کے ساتھ استعمال کرنے پر آگ لگنے کا خطرہ پیدا کر سکتا ہے۔
2.2 Angle Grinder Specific Safety Warnings
- اس پاور ٹول کا مقصد گرائنڈر، سینڈر، وائر برش، یا کٹ آف ٹول کے طور پر کام کرنا ہے۔ اس پاور ٹول کے ساتھ فراہم کردہ تمام حفاظتی انتباہات، ہدایات، عکاسی اور وضاحتیں پڑھیں۔
- ایسے لوازمات کا استعمال نہ کریں جو خاص طور پر ٹول بنانے والے کے ذریعہ ڈیزائن اور تجویز کردہ نہیں ہیں۔ صرف اس لیے کہ آلات کو آپ کے پاور ٹول سے منسلک کیا جا سکتا ہے، یہ محفوظ آپریشن کی یقین دہانی نہیں کراتی ہے۔
- آلات کی درجہ بندی کی رفتار کم از کم پاور ٹول پر نشان زد زیادہ سے زیادہ رفتار کے برابر ہونی چاہیے۔ اپنی درجہ بندی کی رفتار سے زیادہ تیز چلنے والے لوازمات ٹوٹ کر اڑ سکتے ہیں۔
- Always ensure the protective guard is properly installed and adjusted for maximum safety during operation. The thickened baffle design reduces debris splash.
- Hold the tool firmly with both hands during operation. A loss of control can result in personal injury.
3. پیکیج کے مشمولات
Carefully unpack all items and check against the list below. If any items are missing or damaged, please contact your retailer.
- 1 x Weytoll Mini Angle Grinder
- 2 x 16.8V 2.0Ah لیتھیم آئن بیٹریاں
- 1 x بیٹری چارجر
- 1 x Grinding Blade (Cutting Disc)
- 1 ایکس سکریو ڈرایور
- دستانے کی 1 x جوڑی۔
- 6 x Saw Blades (various types)
- 1 ایکس یوزر مینوئل (یہ دستاویز)
4. پروڈکٹ ختمview
Familiarize yourself with the components of your Weytoll Mini Angle Grinder before operation.
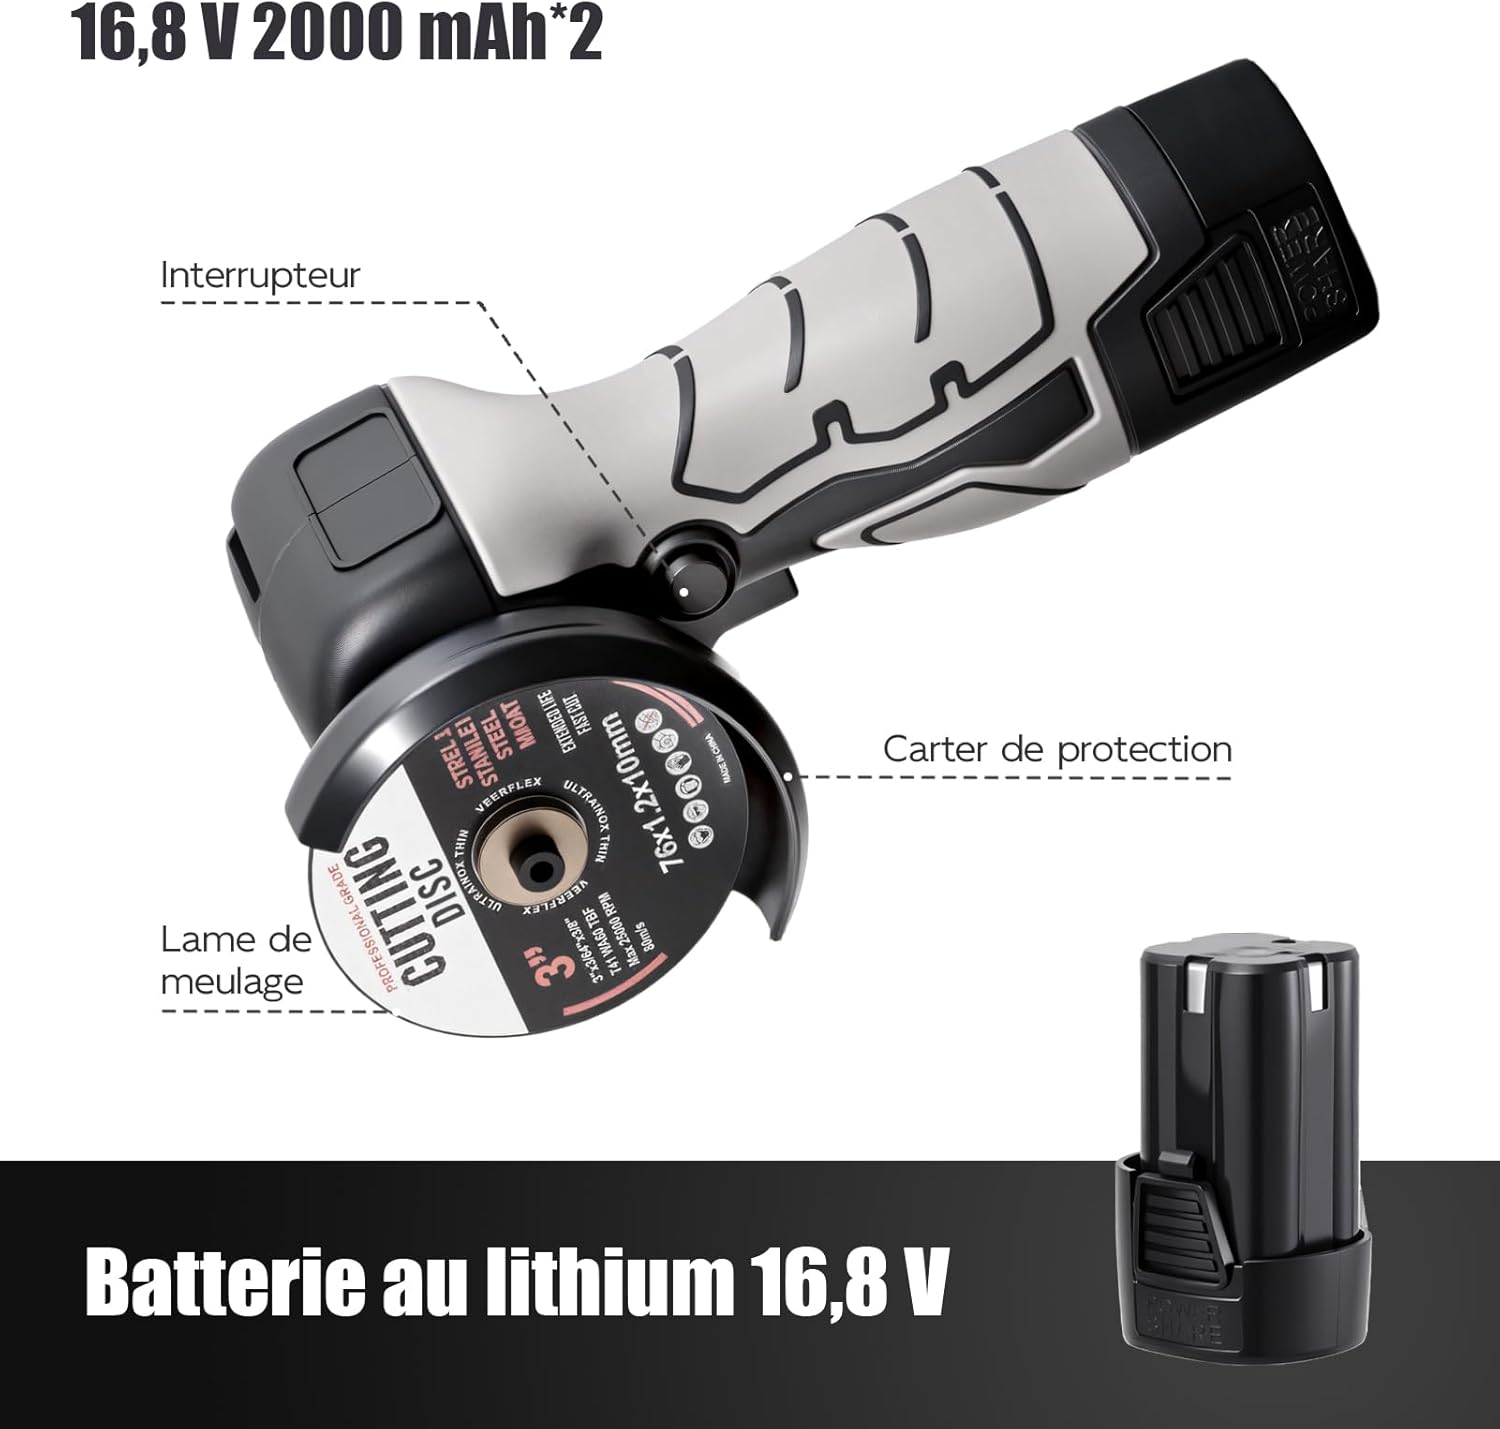
تصویر 4.1: Main components of the Weytoll Mini Angle Grinder. Key parts include the power switch, protective guard, grinding blade, and the detachable 16.8V lithium battery.
- سوئچ: Activates and deactivates the grinder.
- حفاظتی محافظ: Shields the user from sparks and debris. Always ensure it is correctly positioned.
- Grinding Blade/Cutting Disc: The abrasive disc used for cutting or grinding materials.
- 16.8V Lithium Battery: Provides power to the cordless grinder.
- سپنڈل لاک بٹن: Used to lock the spindle for easy disc changes.
5. سیٹ اپ
5.1 بیٹری چارج کرنا
The batteries are not fully charged upon delivery. Fully charge the batteries before first use.
- چارجر کو کسی مناسب پاور آؤٹ لیٹ سے جوڑیں۔
- Insert the 16.8V Lithium-ion battery into the charger.
- Allow the battery to charge until the indicator light on the charger shows a full charge (refer to charger manual for specific indicator details).
- Once charged, disconnect the battery from the charger and unplug the charger from the power outlet.
NOTE: The charger may have a US plug. An adapter for European outlets may be required (not included).
5.2 Installing/Changing the Cutting Disc
Always ensure the tool is switched off and the battery is removed before installing or changing any accessories.

تصویر 5.1: Easy assembly steps for installing a cutting disc.
- Press the Spindle Lock Button: Locate and press the spindle lock button to prevent the spindle from rotating.
- Rotate the Inner Flange: While holding the spindle lock, use the provided screwdriver or wrench to rotate the inner flange until it loosens.
- Remove the Inner Flange: Unscrew and remove the inner flange.
- Insert the Wheel: Place the desired cutting or grinding wheel onto the spindle, ensuring it sits correctly on the outer flange.
- Install the Outer Flange: Place the outer flange back onto the spindle, securing the wheel.
- Tighten the Outer Flange: While pressing the spindle lock button, use the screwdriver or wrench to firmly tighten the outer flange.
- Release the Spindle Lock: Release the spindle lock button. Ensure the disc is securely fastened and rotates freely without wobbling.

تصویر 5.2: Always use the correct type and size of cutting disc. Figure 1 illustrates the recommended disc type, while Figure 2 shows an unsuitable disc. Ensure the disc's maximum RPM rating meets or exceeds the grinder's 7000 RPM.
IMPORTANT: Only use cutting discs that are compatible with the grinder's specifications (70mm maximum diameter, 10mm joint diameter, and rated for at least 7000 RPM). Using incorrect discs can lead to serious injury or tool damage.
6. آپریٹنگ ہدایات
6.1 جنرل آپریشن
- بیٹری داخل کریں: Ensure the battery is fully charged and securely inserted into the grinder.
- محفوظ ورک پیس: آپریشن کے دوران حرکت کو روکنے کے لیے ورک پیس کو ہمیشہ مضبوطی سے محفوظ رکھیں۔
- ٹول کو پکڑو: Hold the grinder firmly with one hand, utilizing the ergonomic design for comfortable and secure handling.
- ٹول شروع کریں: Press the side switch to turn on the grinder. Allow the disc to reach full speed before contacting the workpiece.
- کام شروع کریں: Apply light, consistent pressure. Let the tool do the work. Avoid excessive force, which can cause kickback or damage the disc/tool.
- آف کریں: Release the side switch to turn off the grinder. Wait for the disc to stop completely before setting the tool down.
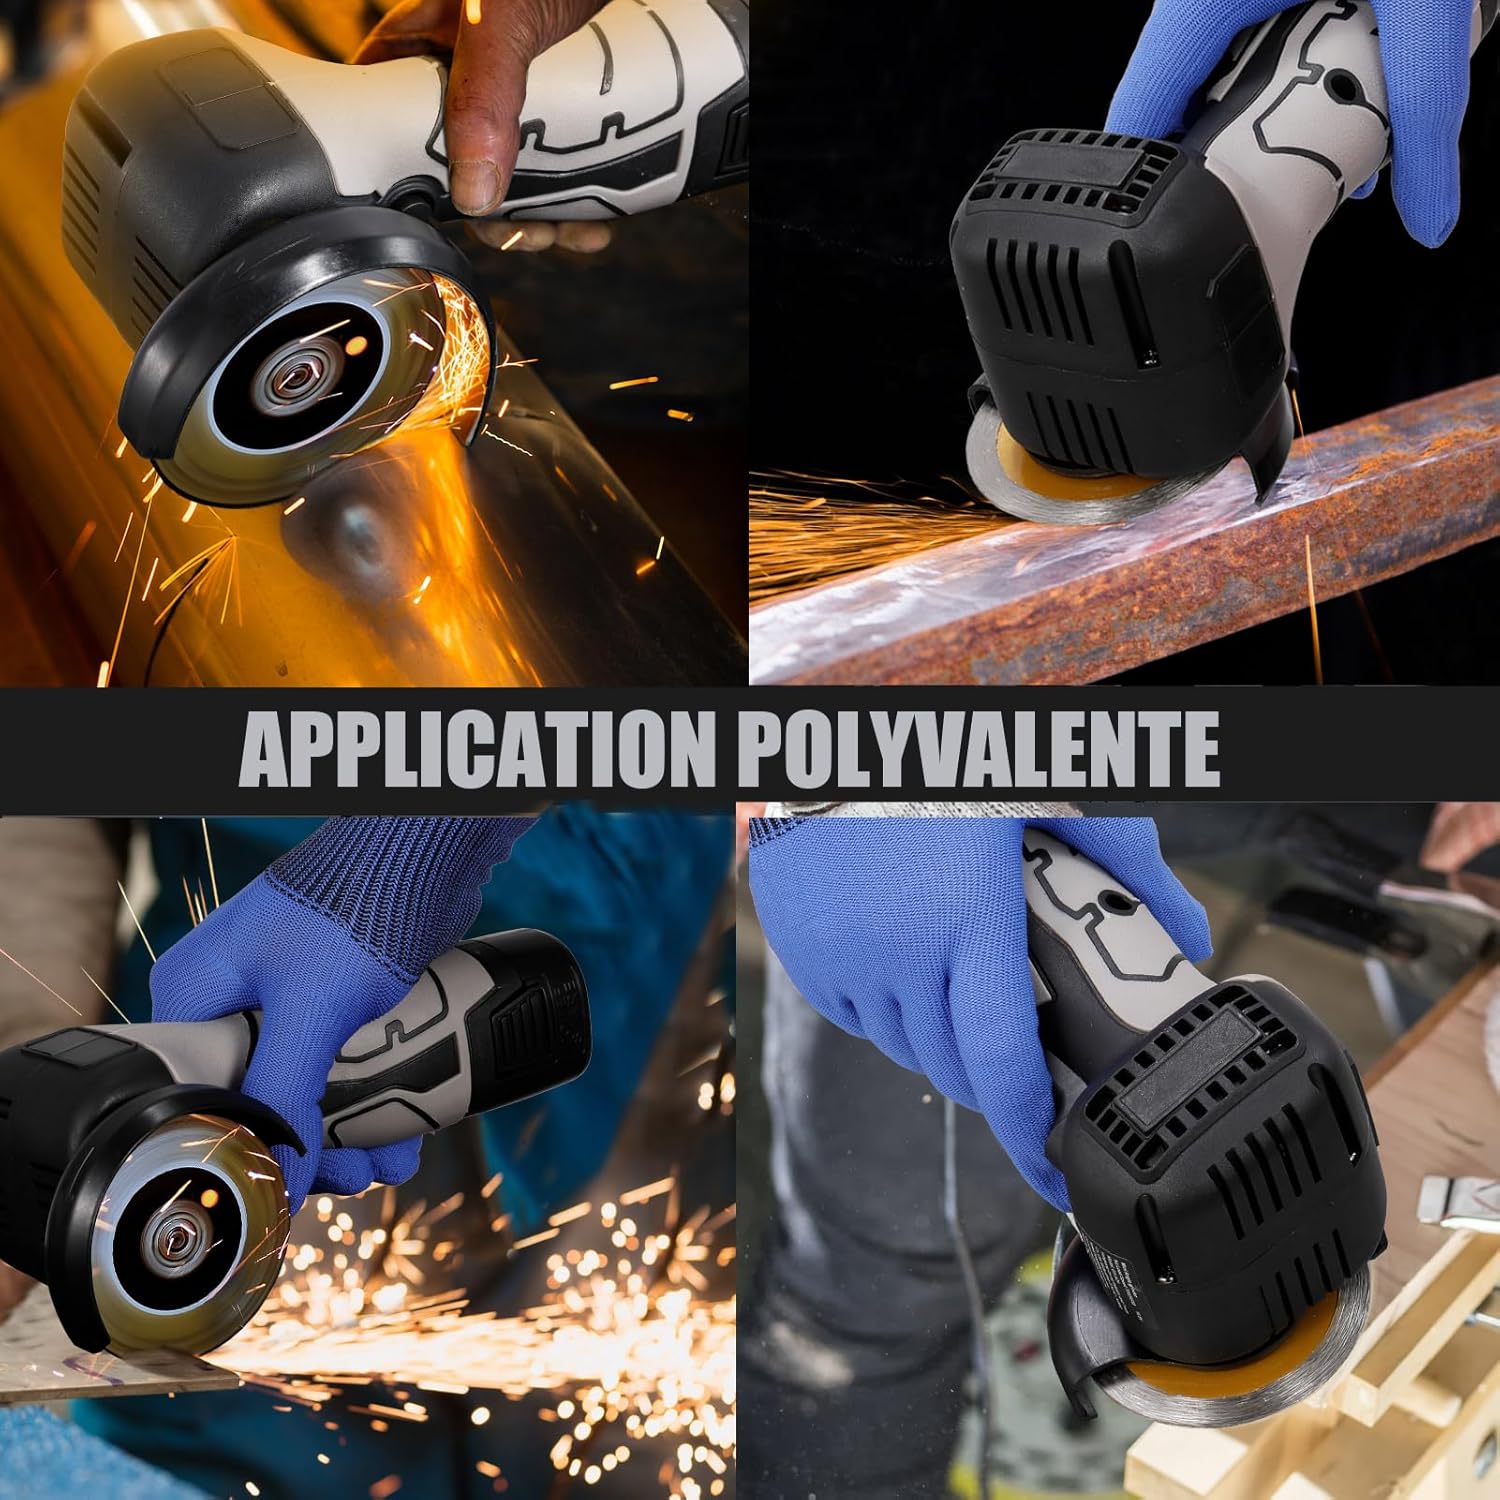
تصویر 6.1: Versatile applications of the angle grinder, including cutting and grinding on different materials.

تصویر 6.2: The grinder is suitable for both indoor and outdoor tasks, such as grinding wood and cutting metal.
6.2 کٹنگ آپریشنز
- Use appropriate cutting discs for the material (e.g., metal, tile, PVC pipe).
- Hold the grinder at a slight angle (15-30 degrees) to the workpiece for optimal cutting.
- Do not apply side pressure to the cutting disc, as this can cause it to bind, break, or kickback.
- Allow the disc to cool periodically during long cuts.
6.3 Grinding and Polishing Operations
- Use appropriate grinding or polishing accessories.
- Maintain a shallow angle (5-15 degrees) between the disc and the workpiece for grinding.
- Move the grinder smoothly and consistently across the surface to achieve an even finish.
- For polishing, use specialized polishing pads and compounds.
7 دیکھ بھال
Regular maintenance ensures the longevity and safe operation of your tool. Always disconnect the battery before performing any maintenance.
7.1 صفائی
- ہر استعمال کے بعد، آلے کو نرم، خشک کپڑے سے صاف کریں۔
- Remove any dust or debris from the ventilation openings to prevent overheating.
- پانی یا کیمیائی صفائی کے ایجنٹوں کا استعمال نہ کریں۔
7.2 ڈسک کا معائنہ
- Regularly inspect cutting and grinding discs for wear, cracks, or damage.
- Replace worn or damaged discs immediately. Never use a damaged disc.
7.3 بیٹری کی دیکھ بھال
- بیٹریوں کو براہ راست سورج کی روشنی اور انتہائی درجہ حرارت سے دور ٹھنڈی، خشک جگہ پر اسٹور کریں۔
- Do not store fully discharged batteries for extended periods. Charge them periodically if not in use.
- If a battery appears damaged or does not hold a charge, discontinue use and dispose of it properly according to local regulations.
7.4 اسٹوریج
- Store the grinder and its accessories in a clean, dry, and secure location, out of reach of children.
- اسٹوریج سے پہلے آلے سے بیٹری کو ہٹا دیں۔
8 خرابیوں کا سراغ لگانا
If you encounter issues with your angle grinder, refer to the table below for common problems and solutions.
| مسئلہ | ممکنہ وجہ | حل |
|---|---|---|
| گرائنڈر شروع نہیں ہوتا ہے۔ | بیٹری صحیح طریقے سے نہیں ڈالی گئی یا ڈسچارج نہیں ہوئی۔ | یقینی بنائیں کہ بیٹری مکمل طور پر داخل ہے۔ بیٹری چارج کریں۔ |
| گرائنڈر آپریشن کے دوران رک جاتا ہے۔ | اوورلوڈ تحفظ چالو؛ بیٹری کم ہے. | Reduce pressure on the tool. Charge or replace the battery. Allow tool to cool if overheated. |
| ضرورت سے زیادہ کمپن یا شور۔ | خراب یا غلط طریقے سے نصب ڈسک؛ ڈھیلے اجزاء. | Inspect and replace damaged disc. Ensure disc is correctly installed and tightened. Check for loose parts. |
| ناقص کاٹنے / پیسنے کی کارکردگی۔ | Worn or incorrect disc; insufficient power. | Replace with a new, appropriate disc. Ensure battery is fully charged. |
اگر ان حلوں کو آزمانے کے بعد بھی مسئلہ برقرار رہتا ہے، تو براہ کرم کسٹمر سپورٹ سے رابطہ کریں۔
9. وضاحتیں
Detailed technical specifications for the Weytoll Mini Angle Grinder WT7000-168.
| ماڈل نمبر | ڈبلیو ٹی 7000-168 |
| برانڈ | ویٹول |
| شرح شدہ جلدtage | 16.8 وولٹ |
| مقررہ رفتار | 7000 RPM |
| بیٹری کی قسم | لیتھیم آئن |
| بیٹری کی صلاحیت | 2000 mAh (2.0 Ah) |
| Max Grinding Wheel Diameter | 70 ملی میٹر |
| Joint Diameter | 10 ملی میٹر |
| چارج کرنے کا درجہ حرارت | 0 ℃ ~ 45 ℃ (32 °F ~ 113 °F) |
| آپریٹنگ / اسٹوریج درجہ حرارت | -20 ℃ ~ 50 °C (-4 °F ~ 122 °F) |
| پروڈکٹ کے طول و عرض (L x W x H) | 21.2 x 11 x 7.5 سینٹی میٹر (8.34 x 4.33 x 2.95 انچ) |
| شے کا وزن | 0.73 کلوگرام (1.61 پونڈ) |
| مواد | ABS, Acrylonitrile Butadiene Styrene Rubber |
| طاقت کا منبع | بیٹری سے چلنے والا |
| رنگ | سیاہ |

تصویر 9.1: Key specifications at a glance.
10. وارنٹی اور سپورٹ
No specific warranty information is provided in the product details. For warranty claims or technical support, please contact your retailer or the manufacturer directly with your purchase details.
Please retain your proof of purchase for any warranty or service inquiries.