
SSV Works 240-X32-PHZ4V
SSV Works Can-Am Maverick X3 / X3 Maxx Phase-4 V-Spec Audio System
Model: 240-X32-PHZ4V - Instruction Manual
تعارف
This manual provides detailed instructions for the installation, operation, and maintenance of your SSV Works Phase-4 V-Spec Audio System for Can-Am Maverick X3 and X3 Maxx vehicles. This system includes an MR3 radio, 6.5" dash speakers, 6.5" rear cage speakers, a 10" subwoofer, and amplifiers, delivering a total of 1650 watts of power. Please read this manual thoroughly before installation and use to ensure proper function and longevity of your audio system.
حفاظتی معلومات
- کوئی بھی برقی تنصیب شروع کرنے سے پہلے گاڑی کی بیٹری کو ہمیشہ منقطع کریں۔
- یقینی بنائیں کہ تمام وائرنگ کنکشن محفوظ ہیں اور شارٹ سرکٹس کو روکنے کے لیے مناسب طریقے سے موصل ہیں۔
- Do not operate the audio system at excessively high volumes for extended periods, as this may cause hearing damage.
- Verify that all mounting hardware is tightened securely to prevent components from becoming loose during vehicle operation.
- اگر آپ کو انسٹالیشن کے عمل کے کسی بھی حصے کے بارے میں یقین نہیں ہے تو کسی پیشہ ور انسٹالر سے مشورہ کریں۔
- This system is designed for off-road use. Ensure all components are protected from extreme elements as specified.
پیکیج کے مشمولات
تصدیق کریں کہ نیچے دی گئی تمام اشیاء آپ کے پیکیج میں شامل ہیں:
- JVC MR3 ریڈیو
- Dash Panels (for 6.5" speakers)
- Rear Cage Speaker Pods (for 6.5" speakers)
- (4) 6.5" Speakers
- 10" Subwoofer with Enclosure
- Amplifiers (800W 4-channel and 850W mono)
- Plug-and-Play Wiring Kit
- Mounting Hardware (various screws, brackets, etc.)
- RGB Controller (if applicable to your specific kit)
سیٹ اپ اور انسٹالیشن
The SSV Works Phase-4 V-Spec Audio System is designed for a plug-and-play installation. Follow these steps carefully.
1. گاڑی تیار کریں۔
- Park the Can-Am Maverick X3 on a level surface and engage the parking brake.
- Disconnect the negative terminal of the vehicle's battery to prevent electrical shorts during installation.
- Remove any existing audio components or trim panels as required to access the installation locations.
2. Install the JVC MR3 Radio
Mount the JVC MR3 radio into the designated dash location. Ensure all connections are secure and the radio is firmly seated.
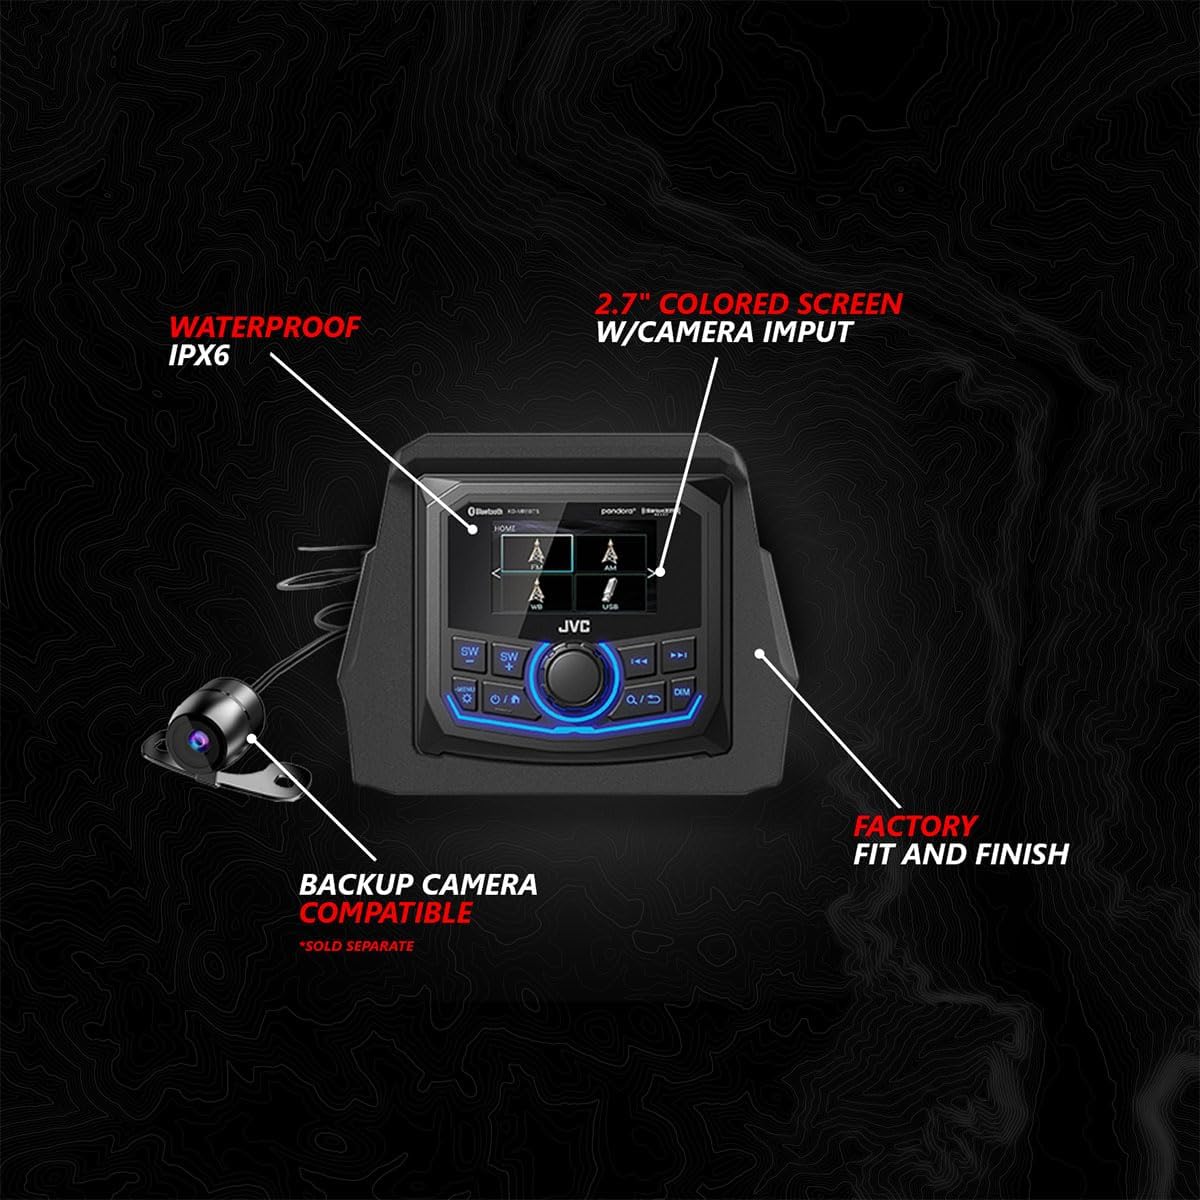
Image: JVC MR3 Radio. This unit features an IPX6 waterproof rating, a 2.7-inch colored screen with camera input, and is compatible with a backup camera (sold separately). It is designed for a factory fit and finish.
3. Install Dash Speakers
Mount the 6.5" SSV Works speakers into the provided dash panels. Secure the panels in the vehicle's dash, ensuring the weatherproof EPDM dual-lock gasket creates a tight seal.

Image: Dash Speaker Assembly. Features 6.5-inch / 160W SSV Works speakers with 1.1-inch tweeters, a weatherproof EPDM dual-lock gasket, and a factory fit. Includes a Smart-Shox brain relocation mount.
4. Install Rear Cage Speakers
Attach the 6.5" SSV Works speakers into the rear cage speaker pods. Mount these pods securely to the rear cage of your Can-Am Maverick X3. Connect the plug-and-play wiring.

Image: Rear Cage Speaker Pods. These pods house 6.5-inch / 160W SSV Works speakers with 1.1-inch tweeters, feature RGB lighting, and utilize plug-and-play connections.
5. Install the 10" Subwoofer
Place the 10" subwoofer with its enclosure in the designated location within the vehicle. Ensure a factory fit and that the weatherproof EPDM dual-lock gasket is properly seated.

Image: 10-inch Subwoofer. This 1000-watt SSV Works subwoofer comes in a factory-fit enclosure with a weatherproof EPDM dual-lock gasket.
6. انسٹال کریں۔ Ampزندہ باد
Mount the 800W 4-channel amplifier and the 850W mono amplifier in a secure, dry location, typically under the dash or seats. These amplifiers are pretuned for your specific audio kit and vehicle and feature an IP67 weatherproof rating.

Image: 800W 4-Channel Powersports Amplifier. This Kicker amplifier is pretuned for your audio kit and vehicle, featuring plug-and-play connections and an IP67 weatherproof rating.
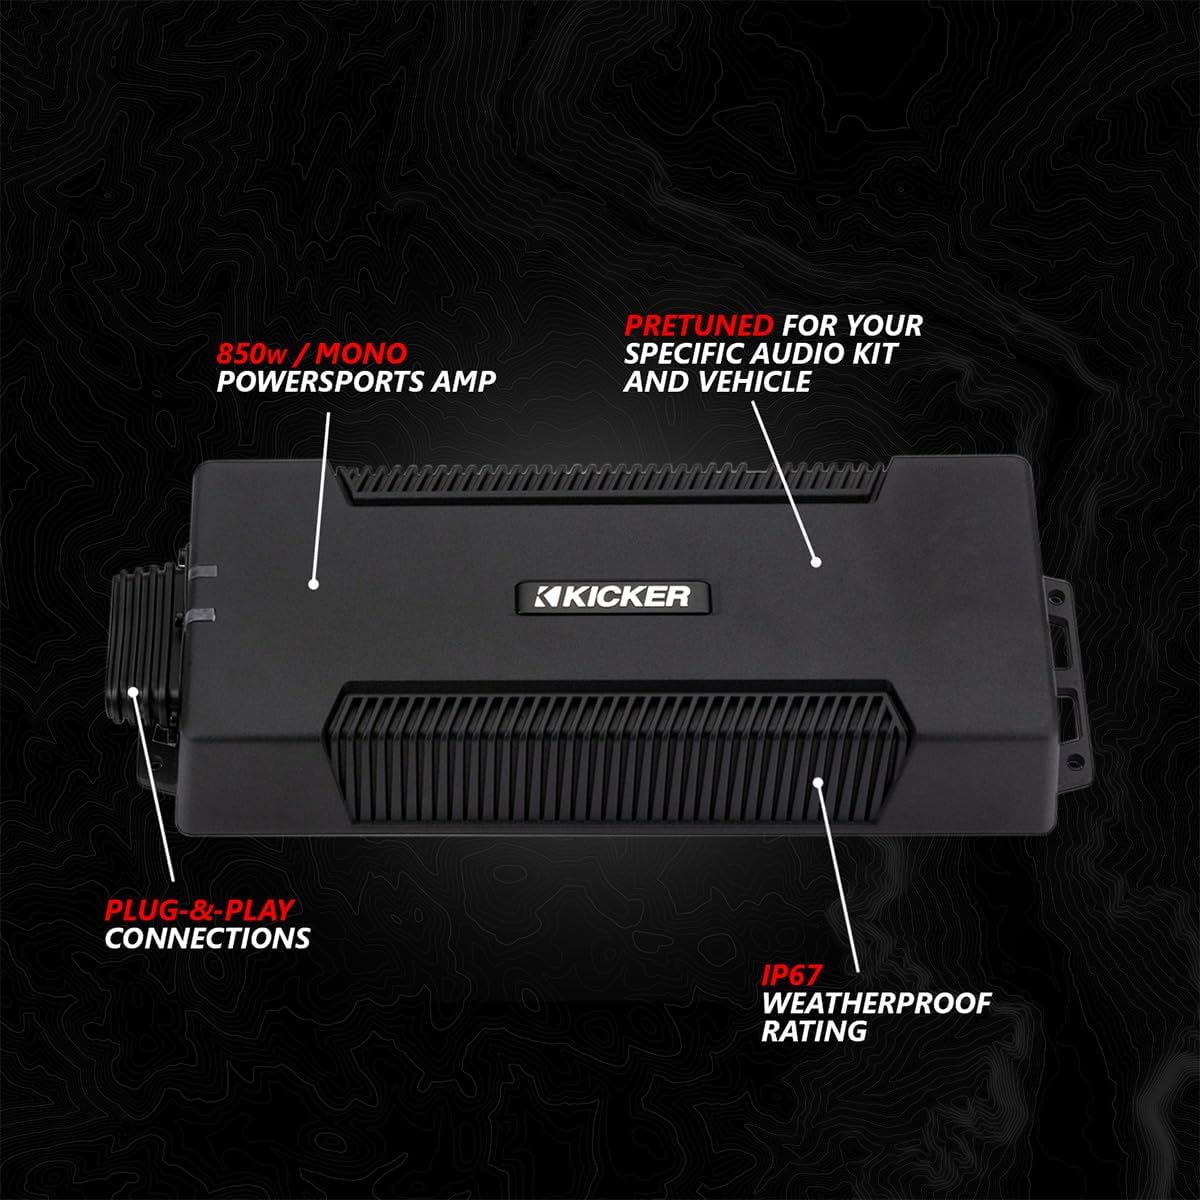
Image: 850W Mono Powersports Amplifier. This Kicker amplifier is pretuned for your audio kit and vehicle, featuring plug-and-play connections and an IP67 weatherproof rating.
7. Connect Wiring Harnesses
Utilize the provided plug-and-play wiring kit to connect all components. Ensure all connections are weatherproof and sealed to protect against the elements.

Image: Weatherproof Sealed Connections. Illustrates the plug-and-play connections designed to be weatherproof and sealed for durability in off-road conditions.
8. Install RGB Controller (if applicable)
If your system includes an RGB controller for speaker lights, rock lights, or other accessories, install it in an accessible location and connect it using the plug-and-play connections.

Image: RGB Controller. This controller features three 5-amp outputs for controlling speaker lights, rock lights, whips, or other RGB accessories. It offers various modes including solid color, strobe, color change, and glow.
9. Reconnect Battery and Test
- Once all components are installed and wired, reconnect the negative terminal of the vehicle's battery.
- Turn on the vehicle and test the audio system's functionality.
- Ensure all speakers, the subwoofer, and the radio are working correctly.
- Test all RGB lighting functions if an RGB controller is installed.
آپریٹنگ ہدایات
JVC MR3 Radio Operation
Refer to the separate JVC MR3 Radio user manual for detailed instructions on specific radio functions, including tuning, source selection, and settings adjustments. Key features include:
- پاور آن/آف: یونٹ کو آن یا آف کرنے کے لیے پاور بٹن دبائیں۔
- حجم کنٹرول: Use the rotary knob or designated buttons to adjust the volume.
- ماخذ کا انتخاب: Cycle through available audio sources (Bluetooth, USB, AM/FM radio) using the MODE button.
- ڈسپلے: The 2.7" colored screen provides information on current source, track, and settings.
بلوٹوتھ کنیکٹیویٹی
- یقینی بنائیں کہ آپ کے موبائل آلہ پر بلوٹوتھ فعال ہے۔
- On the MR3 radio, select Bluetooth as the audio source.
- تلاش کریں۔ available devices on your mobile device and select "JVC MR3" (or similar name) to pair.
- Once paired, you can stream audio wirelessly from your device to the audio system.
USB پلے بیک
آڈیو پر مشتمل USB اسٹوریج ڈیوائس کو جوڑیں۔ files to the USB port on the MR3 radio. The radio will automatically detect the device and begin playback or allow you to browse files.
RGB Controller Operation (if installed)
Use the RGB controller to customize the lighting effects of your speakers and other connected accessories. Common modes include:
- ٹھوس رنگ: ایک جامد رنگ منتخب کریں۔
- اسٹروب: Flashing effect.
- رنگین تبدیلی: Colors cycle automatically.
- چمک: Gradual color transitions.
دیکھ بھال
- صفائی: ایک نرم استعمال کریں، ڈیamp cloth to clean the surfaces of the radio, speakers, and enclosures. Avoid harsh chemicals or abrasive cleaners.
- رابطے: Periodically check all wiring connections to ensure they remain secure and free from corrosion, especially after exposure to water or mud.
- گاسکیٹ: Inspect the weatherproof gaskets on speakers and the subwoofer enclosure for any signs of wear or damage. Replace if necessary to maintain water resistance.
- ذخیرہ: If the vehicle is stored for an extended period, ensure the audio system is clean and dry. Disconnecting the battery may be advisable.
خرابی کا سراغ لگانا
No Power to System
- Check the vehicle's battery connections.
- Verify all power and ground wires are securely connected to the amplifiers and radio.
- Inspect inline fuses for the system; replace if blown.
اسپیکرز سے کوئی آواز نہیں۔
- Ensure the radio is powered on and an audio source is selected.
- Check volume levels on both the radio and your connected device (if using Bluetooth/USB).
- Verify all speaker wires are correctly connected to the amplifiers اور مقررین.
- تصدیق کریں۔ amplifier power and remote turn-on connections are secure.
مسخ شدہ آواز
- Reduce the volume to see if distortion decreases.
- Check for loose speaker wires or damaged speaker cones.
- یقینی بنائیں amplifier gain settings are not set too high.
بلوٹوتھ کنکشن کے مسائل
- Ensure your device is within range of the radio.
- Try unpairing and re-pairing the device with the radio.
- Restart both your mobile device and the MR3 radio.
وضاحتیں
| فیچر | تفصیل |
|---|---|
| ماڈل نمبر | 240-X32-PHZ4V |
| کُل سسٹم پاور | 1650 واٹ (چوٹی) |
| ریڈیو یونٹ | JVC MR3 (IPX6 Waterproof, 2.7" Color Screen, Camera Input) |
| ڈیش اسپیکرز | (2) 6.5" SSV Works V-Spec, 160W Max, 1.1" Tweeter |
| Rear Cage Speakers | (2) 6.5" SSV Works V-Spec, 160W Max, 1.1" Tweeter, RGB Lighting |
| سب ووفر | 10" SSV Works, 1000W Max, with Enclosure |
| Ampزندہ باد | 800W 4-Channel Powersports Amp, 850W Mono Powersports Amp (IP67 Weatherproof, Pretuned) |
| کنیکٹوٹی | بلوٹوتھ، یو ایس بی |
| انکلوژر میٹریل | Metal or UV-resistant Plastic |
| پانی کی مزاحمت کی سطح | Water Resistant (IPX6 for radio, IP67 for amps) |
| ہم آہنگ گاڑی کی قسم | Can-Am Maverick X3 / X3 Maxx UTVs |
وارنٹی اور سپورٹ
SSV Works provides a limited warranty for its products. Please review مندرجہ ذیل تفصیلات:
- الیکٹرانکس: 1 سالہ محدود وارنٹی
- Panels and Pods: محدود لائف ٹائم وارنٹی۔
For technical support, warranty claims, or further assistance, please contact SSV Works customer service. You can find contact information on the official SSV Works website or through your authorized dealer. When contacting support, please have your product model number (240-X32-PHZ4V) and proof of purchase available.
آن لائن وسائل: For additional information, FAQs, and product registration, visit the SSV Works Store on Amazon or the official SSV Works webسائٹ
Ask a question about this manual
Ask about setup, troubleshooting, compatibility, parts, safety, or missing instructions. Manuals+ will review the question and use this page’s manual context to help answer it.