
1. تعارف
This manual provides detailed instructions for the Waveshare ESP32-P4-NANO High-Performance Development Board. It is designed to assist users in understanding the board's features, setting it up, and utilizing its capabilities effectively. The ESP32-P4-NANO is based on the ESP32-P4 chip, featuring RISC-V dual-core and single-core processors, and is equipped with various human-machine interfaces.
This specific kit, ESP32-P4-NANO-KIT-A, includes the ESP32-P4-NANO board, an RPi Camera (B), an 8Ω 2W speaker, and an FFC 15PIN cable, providing a comprehensive platform for development projects.

Image 1.1: The Waveshare ESP32-P4-NANO Development Board bundled with an RPi Camera and speaker.
2. پیکیج کے مشمولات
تصدیق کریں کہ نیچے دی گئی تمام اشیاء آپ کے پیکج میں موجود ہیں۔ اگر کوئی اجزاء غائب یا خراب ہیں تو، براہ کرم کسٹمر سپورٹ سے رابطہ کریں۔
- 1x ESP32-P4-NANO Development Board
- 1x RPi Camera (B)
- 1x 8Ω 2W Speaker
- 1x FFC 15PIN Cable

Image 2.1: Visual representation of the ESP32-P4-NANO-KIT-A package contents, including the development board, RPi Camera (B), 8Ω 2W speaker, and FFC 15PIN cable.
3. کلیدی خصوصیات
The ESP32-P4-NANO Development Board offers a robust set of features for advanced embedded applications:
- High-performance MCU: Features RISC-V 32-bit dual-core and single-core processors.
- یادداشت: Includes 128 KB HP ROM, 16 KB LP ROM, 768 KB HP L2MEM, 32 KB LP SRAM, 8 KB TCM.
- Image and Voice Processing: Provides interfaces for JPEG Codec, Pixel Processing Accelerator, Image Signal Processor, and H264 encoder.
- Integrated PSRAM and Flash: 32MB PSRAM in the chip's package, with onboard 16MB Nor Flash.
- Extensive Peripherals: Supports MIPI-CSI, MIPI-DSI, USB 2.0 OTG, Ethernet, SDIO 3.0 TF card slot, microphone, speaker header, and RTC battery header.
- GPIOs: 2*2*13 GPIO headers with 28 x programmable GPIOs.
- حفاظتی خصوصیات: Incorporates Secure Boot, Flash Encryption, cryptographic accelerators, and TRNG. Hardware access protection mechanisms enable Access Permission Management and Privilege Separation.
- وائرلیس رابطہ: Onboard ESP32-C6-MINI module extends 2.4GHz Wi-Fi 6 and Bluetooth 5/BLE.

تصویر 3.1: ختمview of the ESP32-P4-NANO's core features, including RISC-V MCU, memory, and connectivity options.
4. ہارڈ ویئر ختمview
4.1 بورڈ کے اجزاء
The following diagram identifies the main components and interfaces on the ESP32-P4-NANO development board.

تصویر 4.1: تفصیلی view of the ESP32-P4-NANO board with numbered components and their descriptions.
- ESP32-P4NRW32
- ESP32-C6-MINI-1: SDIO interface protocol, extending Wi-Fi 6 and Bluetooth 5 for ESP32-P4-NANO
- Display interface: MIPI 2-lane
- Camera interface: MIPI 2-lane
- USB Type-C connector: for power supply, program burning and debugging
- USER-LED: power supply indicator
- BOOT button: Press it when powering on or resetting to enter download mode
- ری سیٹ بٹن
- PoE module / external power supply header: for connecting external 5V power supply or PoE module power supply
- RTC battery header: for connecting rechargeable RTC battery (supports rechargeable RTC batteries only)
- Onboard microphone
- PoE module header
- Type-A Port: USB OTG 2.0 High Speed port
- RJ45 100M Ethernet port
- Speaker header: MX1.25 2P connector, supports 8Ω 2W speaker
- GPIO ہیڈر
- TF card slot: SDIO 3.0 interface protocol
4.2 پن کی تعریف
The pinout diagram illustrates the functionality of each GPIO pin on the development board, crucial for connecting external components and sensors.

Image 4.2: Pin definition diagram showing power, GPIO, USB, UART, Touch Channel, ADC Channel, RTC Clock source, and ESP32-C6 GPIO assignments.
4.3 خاکہ کے طول و عرض
Refer to the following diagrams for the physical dimensions of the ESP32-P4-NANO board, measured in millimeters.

تصویر 4.3: اوپر اور نیچے view with precise measurements of the ESP32-P4-NANO development board.
5. سیٹ اپ ہدایات
This section guides you through the initial setup of your ESP32-P4-NANO Development Board and its bundled accessories.
5.1 Connecting the RPi Camera (B)
- Locate the MIPI-CSI camera interface on the ESP32-P4-NANO board (refer to Image 4.1, component 4).
- Carefully insert one end of the FFC 15PIN cable into the camera module's connector, ensuring the contacts face the correct direction.
- Insert the other end of the FFC 15PIN cable into the MIPI-CSI connector on the development board. Ensure a secure connection.

Image 5.1: The RPi Camera (B) module, compatible with Raspberry Pi series boards, featuring a 5MP OV5647 sensor.
5.2 اسپیکر کو جوڑنا
- Identify the speaker header (MX1.25 2P connector) on the development board (refer to Image 4.1, component 15).
- Connect the 8Ω 2W speaker to this header. Ensure the polarity is correct if indicated.
5.3 بورڈ کو طاقت دینا
The board can be powered via the USB Type-C connector. Connect a compatible USB cable from your computer or a 5V power adapter to the USB Type-C port on the board (refer to Image 4.1, component 5).
5.4 Development Environment Setup
For programming and development, it is recommended to use the Espressif IoT Development Framework (ESP-IDF) or the Arduino IDE with ESP32 board support. Refer to the official Waveshare Wiki for detailed instructions on setting up your development environment and obtaining exampلی کوڈ
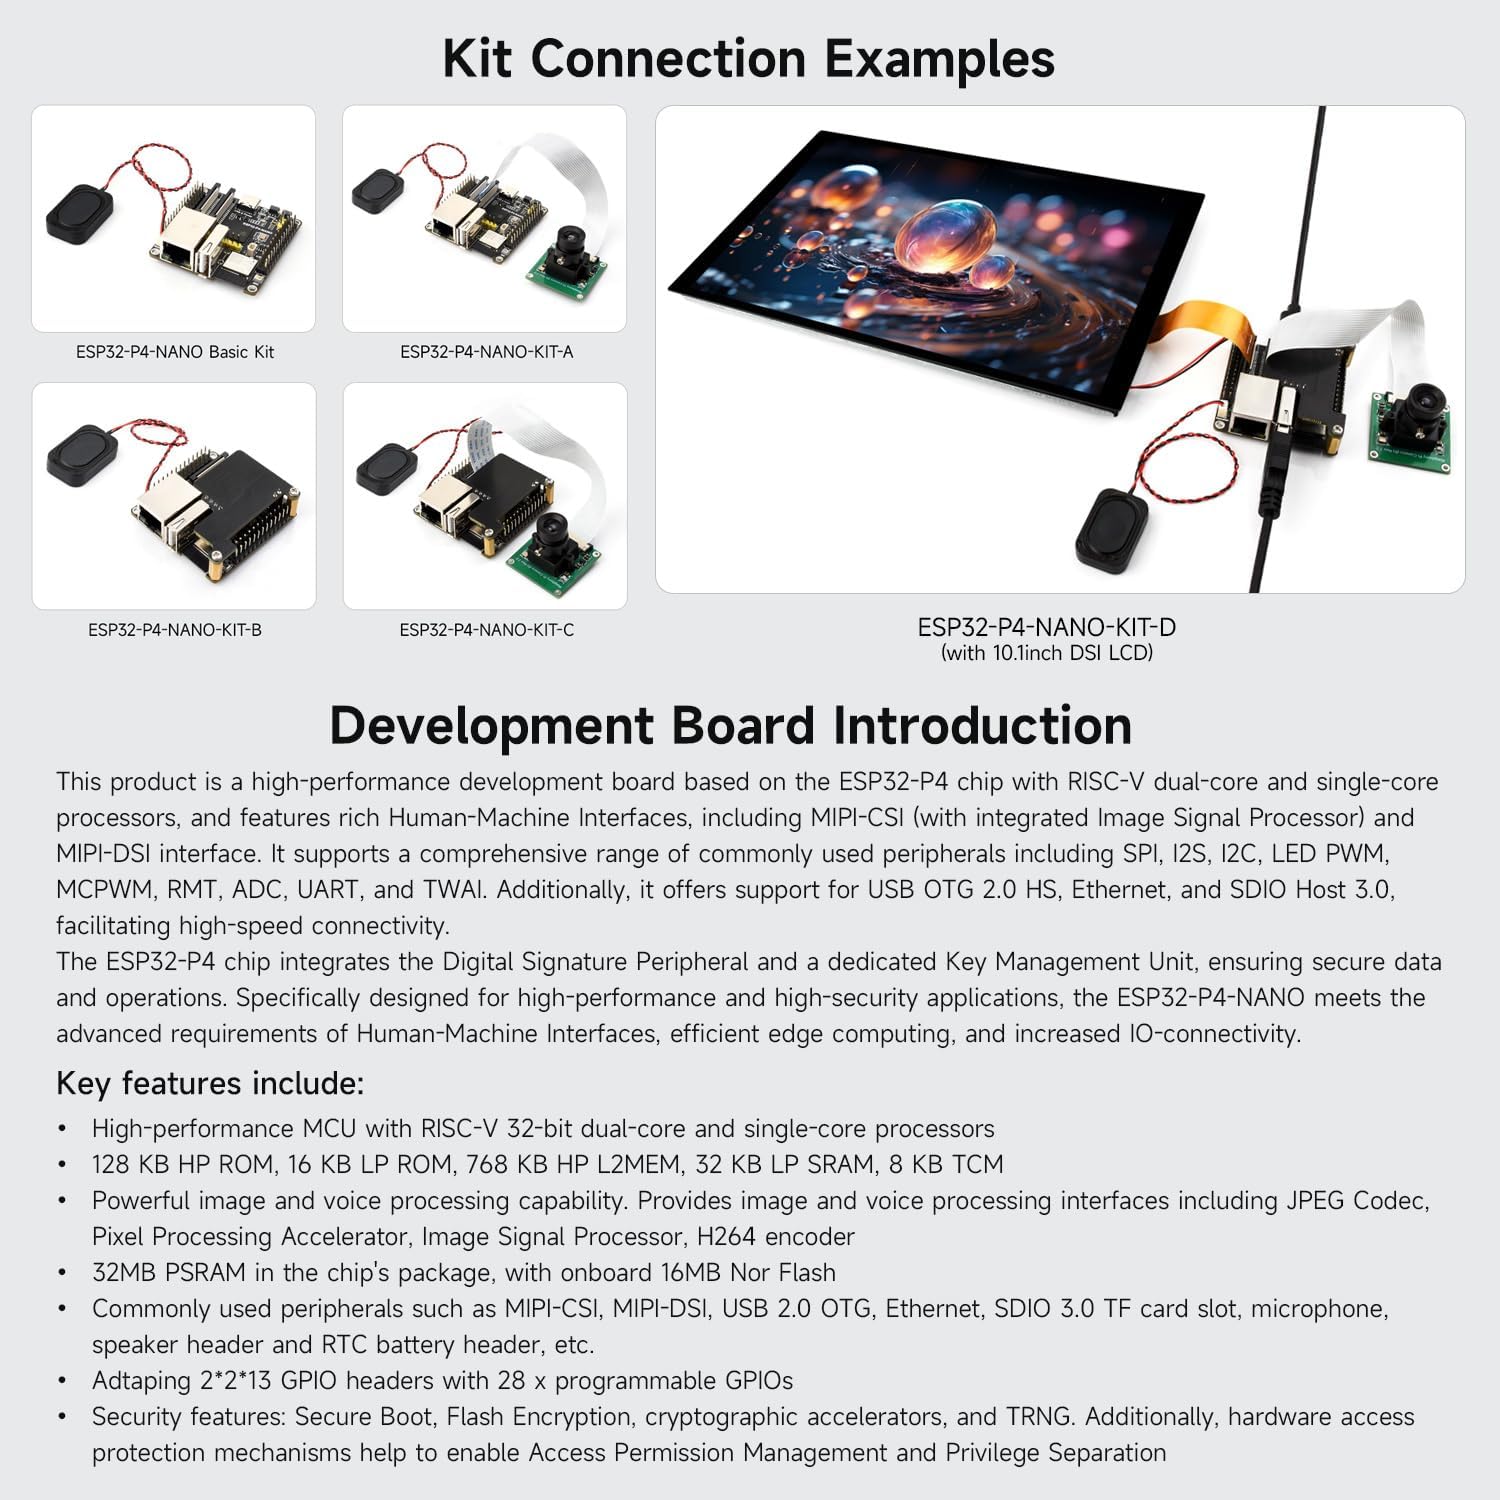
تصویر 5.2: مثال کے طور پرamples of how various kits, including KIT-A, can be connected, demonstrating the board with camera and speaker.
6. آپریٹنگ ہدایات
Once the board is set up and programmed, follow these general guidelines for operation.
6.1 بنیادی آپریشن
- پاور آن: Connect the USB Type-C cable to a power source. The USER-LED (component 6) should illuminate, indicating power.
- Program Upload: Use your chosen IDE (ESP-IDF or Arduino) to compile and upload your code to the board via the USB Type-C port.
- Resetting the Board: Press the RESET button (component 8) to restart the loaded program.
- Download Mode: To enter download mode for flashing new firmware, press and hold the BOOT button (component 7) while pressing and releasing the RESET button, then release the BOOT button.
6.2 Utilizing Peripherals
- کیمرہ: Access the RPi Camera (B) through the MIPI-CSI interface using appropriate libraries and code examples from the Waveshare Wiki or Espressif documentation.
- اسپیکر: Generate audio output via the speaker header. Ensure your code includes audio playback functionalities.
- نیٹ ورکنگ: Utilize the 100Mbps Ethernet port (component 14) for wired network connectivity or the integrated Wi-Fi 6 and Bluetooth 5/BLE for wireless communication.
- ذخیرہ: Insert a TF card into the SDIO 3.0 TF card slot (component 17) for external storage.
- GPIOs: Connect various sensors, actuators, and other modules to the programmable GPIO headers (component 16) as required by your project.
7 دیکھ بھال
Proper maintenance ensures the longevity and reliable operation of your development board.
- ہینڈلنگ: Always handle the board by its edges to avoid touching sensitive components. Use anti-static precautions when working with the board.
- صفائی: Keep the board clean and free from dust and debris. Use a soft, dry brush or compressed air for cleaning. Avoid liquid cleaners.
- ذخیرہ: Store the board in an anti-static bag in a dry, cool environment when not in use.
- بجلی کی فراہمی: Use only recommended 5V power supplies. Over-voltagای بورڈ کو نقصان پہنچا سکتا ہے۔
- فرم ویئر اپ ڈیٹس: Regularly check the Waveshare Wiki for firmware updates and security patches to ensure optimal performance and security.
8 خرابیوں کا سراغ لگانا
یہ سیکشن عام مسائل کو حل کرتا ہے جن کا آپ کو سامنا ہو سکتا ہے۔
- بورڈ آن نہیں ہو رہا ہے:
- Ensure the USB Type-C cable is securely connected to both the board and a functional power source.
- تصدیق کریں کہ پاور سورس 5V فراہم کرتا ہے۔
- Check if the USER-LED (component 6) illuminates.
- پروگرام اپ لوڈ میں ناکامی:
- Confirm that the correct board and port are selected in your IDE.
- Try entering download mode manually by holding the BOOT button during reset.
- Ensure all necessary drivers are installed for the USB-to-serial converter.
- Camera Interface Issues:
- Some users have reported challenges with the camera interface functionality. Waveshare acknowledges this and suggests monitoring Espressif's official resources for potential software fixes or updated examples
- Ensure the FFC cable is correctly seated and not damaged.
- Verify that your code correctly initializes and accesses the MIPI-CSI interface.
- کوئی وائی فائی/بلوٹوتھ کنیکٹیویٹی نہیں:
- درست وائی فائی/بلوٹوتھ ابتدا اور اسناد کے لیے اپنا کوڈ چیک کریں۔
- Ensure the ESP32-C6-MINI module is properly functioning.
For further assistance, consult the official Waveshare Wiki or contact their technical support.
9. وضاحتیں
| فیچر | تفصیل |
|---|---|
| برانڈ | ویو شیئر |
| ماڈل کا نام | ESP32-P4-NANO-KIT-A |
| پروسیسر | ESP32-P4 (RISC-V 32-bit dual-core and single-core) |
| رام | 32MB PSRAM |
| فلیش میموری | 16MB نہ ہی فلیش |
| وائرلیس کنیکٹیویٹی | Wi-Fi 6 (802.11ax), Bluetooth 5/BLE (via ESP32-C6-MINI) |
| ایتھرنیٹ | 100Mbps RJ45 |
| یو ایس بی | USB 2.0 OTG (Type-A Port), USB Type-C (Power/Debug) |
| کیمرہ انٹرفیس | MIPI-CSI 2-lane |
| انٹرفیس ڈسپلے کریں | MIPI-DSI 2-lane |
| ذخیرہ | SDIO 3.0 TF card slot |
| GPIOs | 28 programmable GPIOs (2*2*13 headers) |
| آڈیو | Onboard microphone, Speaker header (8Ω 2W speaker included in kit) |
| طول و عرض | 50 x 50 mm (approximate board size) |
| وزن | ~9.5 ounces (total item weight) |
10 سپورٹ اور وسائل
For the most up-to-date information, detailed tutorials, and example code, please refer to the official Waveshare Wiki. This resource is regularly updated and provides comprehensive documentation for all Waveshare products.
- Official Waveshare Wiki: https://www.waveshare.com/wiki (Please note: specific product page link may vary, search for "ESP32-P4-NANO")
- تکنیکی معاونت: If you encounter issues not covered in this manual or the Wiki, please contact Waveshare customer support through their official webسائٹ
Information regarding warranty is typically provided with the product packaging or available on the manufacturer's official webسائٹ