Important Information and Safety Precautions
This manual provides instructions for the installation, operation, and maintenance of your Generic Mini PC Fan, compatible with Beelink L55, L55-A, and L55-A-8258UDOW64 mini PCs. Please read this manual carefully before proceeding with installation.
Note: This fan model has various wire sequence configurations. The specific order of wires may differ between units and might not be universally compatible. It is crucial to verify the wire sequence of your existing fan against the replacement fan before purchase and installation. Contact the seller if you have any doubts regarding compatibility.
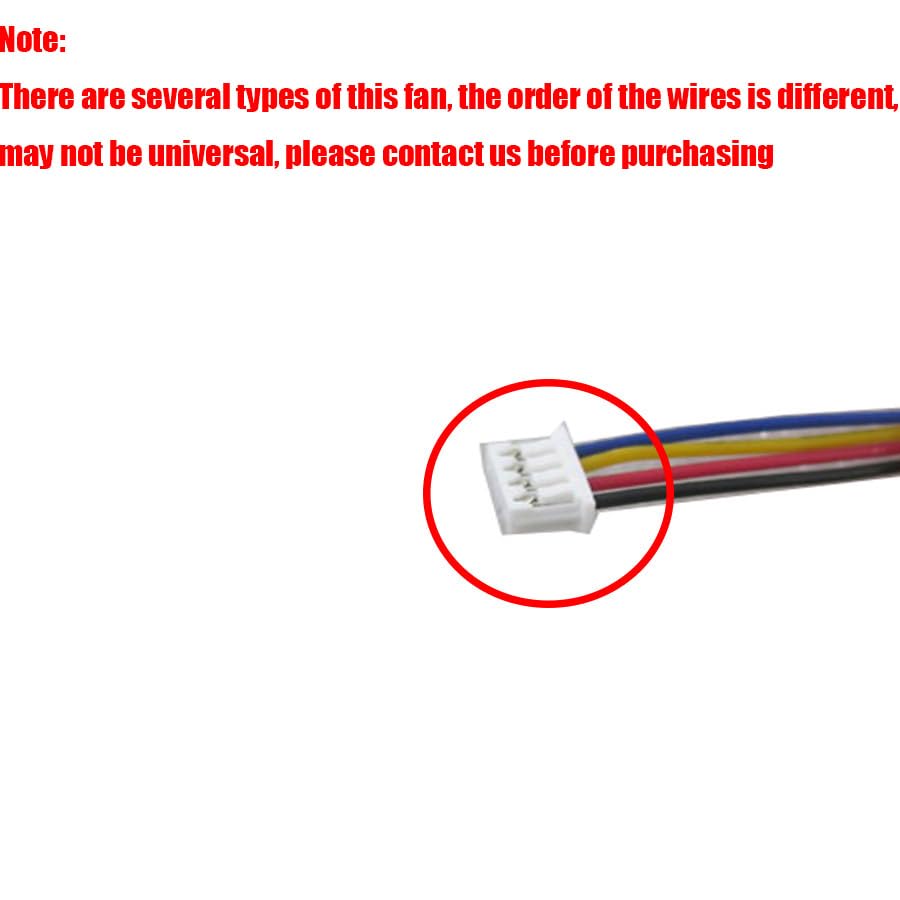
Image: This image illustrates a typical 4-pin fan connector, highlighting the importance of checking the wire order. The accompanying text emphasizes that wire sequences can vary and may not be universal, advising customers to contact the seller before purchasing مطابقت کو یقینی بنانے کے لیے۔
Always ensure your device is powered off and disconnected from the power source before performing any installation or maintenance. Static electricity can damage electronic components; consider using an anti-static wrist strap.
سیٹ اپ اور انسٹالیشن
This fan is designed as a replacement part for specific Beelink L55 series mini PCs. Installation typically involves replacing an existing fan.
اوزار کی ضرورت ہے:
- چھوٹا فلپس ہیڈ سکریو ڈرایور
- Plastic prying tool (optional, for opening casing)
- مخالف جامد کلائی پٹا (تجویز کردہ)
تنصیب کے مراحل:
- بجلی بند: Completely shut down your Beelink mini PC and disconnect all power cables and peripherals.
- داخلی اجزاء تک رسائی حاصل کریں: Carefully open the mini PC casing. Refer to your Beelink mini PC's specific service manual for instructions on how to safely open the enclosure.
- Locate and Disconnect Old Fan: Identify the existing fan. Gently disconnect its power cable from the motherboard. Note the orientation and routing of the cable.
- پرانے پنکھے کو ہٹا دیں: Unscrew any mounting screws holding the old fan in place and carefully remove it.
- نیا پنکھا انسٹال کریں: Position the new Generic Mini PC Fan in the same location as the old one. Secure it with the mounting screws.
- نیا پنکھا جڑیں: Carefully connect the new fan's power cable to the corresponding header on the motherboard. Ensure the wire sequence matches the original connection. Incorrect connection can damage the fan or the motherboard.
- دوبارہ جوڑنا: Route the fan cable neatly and carefully close the mini PC casing.
- پاور آن اور ٹیسٹ: Reconnect power and peripherals. Power on the mini PC and verify that the fan spins freely and quietly.

Image: This image displays the Generic Mini PC Fan, showing its overall design and the attached 4-pin connector. This is the component to be installed as a replacement.
آپریشن
Once correctly installed, the Mini PC Fan operates automatically, controlled by your mini PC's system to maintain optimal internal temperatures. It will adjust its speed based on the thermal load of the system.
عام آپریشن:
- The fan should spin quietly, producing a consistent airflow.
- The mini PC's internal temperature should remain within normal operating ranges.
If you notice unusual noises or if the PC reports high temperatures, refer to the Troubleshooting section.
دیکھ بھال
Regular maintenance helps ensure the longevity and efficient operation of your fan and mini PC.
صفائی:
- تعدد: Depending on your environment, it is recommended to clean the fan every 6-12 months.
- طریقہ کار:
- Power off and disconnect the mini PC from all power sources.
- Carefully open the mini PC casing to access the fan.
- Use compressed air to gently blow dust away from the fan blades and heatsink fins. Hold the fan blades to prevent them from spinning rapidly during cleaning, which can damage the bearings.
- Avoid using liquid cleaners directly on the fan or internal components.
- Reassemble the mini PC.
معائنہ:
- Periodically inspect the fan for any signs of physical damage, loose connections, or excessive wear on the blades.
- Ensure the fan spins freely without obstruction.
خرابی کا سراغ لگانا
| مسئلہ | ممکنہ وجہ | حل |
|---|---|---|
| تنصیب کے بعد پنکھا نہیں گھوم رہا ہے۔ |
|
|
| Fan making excessive noise. |
|
|
| Mini PC overheating. |
|
|
مصنوعات کی وضاحتیں
| آئٹم کی تفصیل | Laptop Parts |
| برانڈ | عام |
| ماڈل نمبر | L55 (Compatible with L55-A, L55-A-8258UDOW64) |
| والیومtage | DC5V |
| کرنٹ | 0.22A |
| مواد | پلاسٹک |
| مصنوعات کے طول و عرض | 11.81 x 7.87 x 3.94 انچ |
| شے کا وزن | 1.32 پاؤنڈ |
| اشیاء کی تعداد | 1 |
وارنٹی کی معلومات
یہ پروڈکٹ ایک کے ساتھ آتا ہے۔ 90 دن کی وارنٹی from the date of purchase. This warranty covers manufacturing defects. It does not cover damage resulting from improper installation, misuse, accidents, or unauthorized modifications.
For warranty claims, please retain your proof of purchase and contact the seller directly.
کسٹمر سپورٹ
If you encounter any issues during installation or operation, or if you have questions regarding product compatibility, especially concerning wire sequences, please contact the seller through your purchase platform.
To ensure you receive the correct goods and support, please check your registered email after payment for any important communications from the seller.


