GenMachine Ren4000
GenMachine Mini PC AMD Ryzen 3 4300U (Ren4000) Instruction Manual
Model: Ren4000
1. تعارف
Thank you for choosing the GenMachine Mini PC AMD Ryzen 3 4300U. This compact and high-performance mini computer is designed for both home and office use, offering efficient multitasking, 4K visuals, and advanced connectivity. This manual provides essential information for setting up, operating, and maintaining your device.
2. باکس میں کیا ہے۔
تصدیق کریں کہ تمام اشیاء آپ کے پیکیج میں موجود ہیں:
- GenMachine Mini PC (R3 4300U 8G 256G)
- صارف دستی
- پاور اڈاپٹر
- HDMI کیبل
- Mounting Bracket (for VESA mounting)

3. پروڈکٹ ختمview (ہارڈ ویئر)
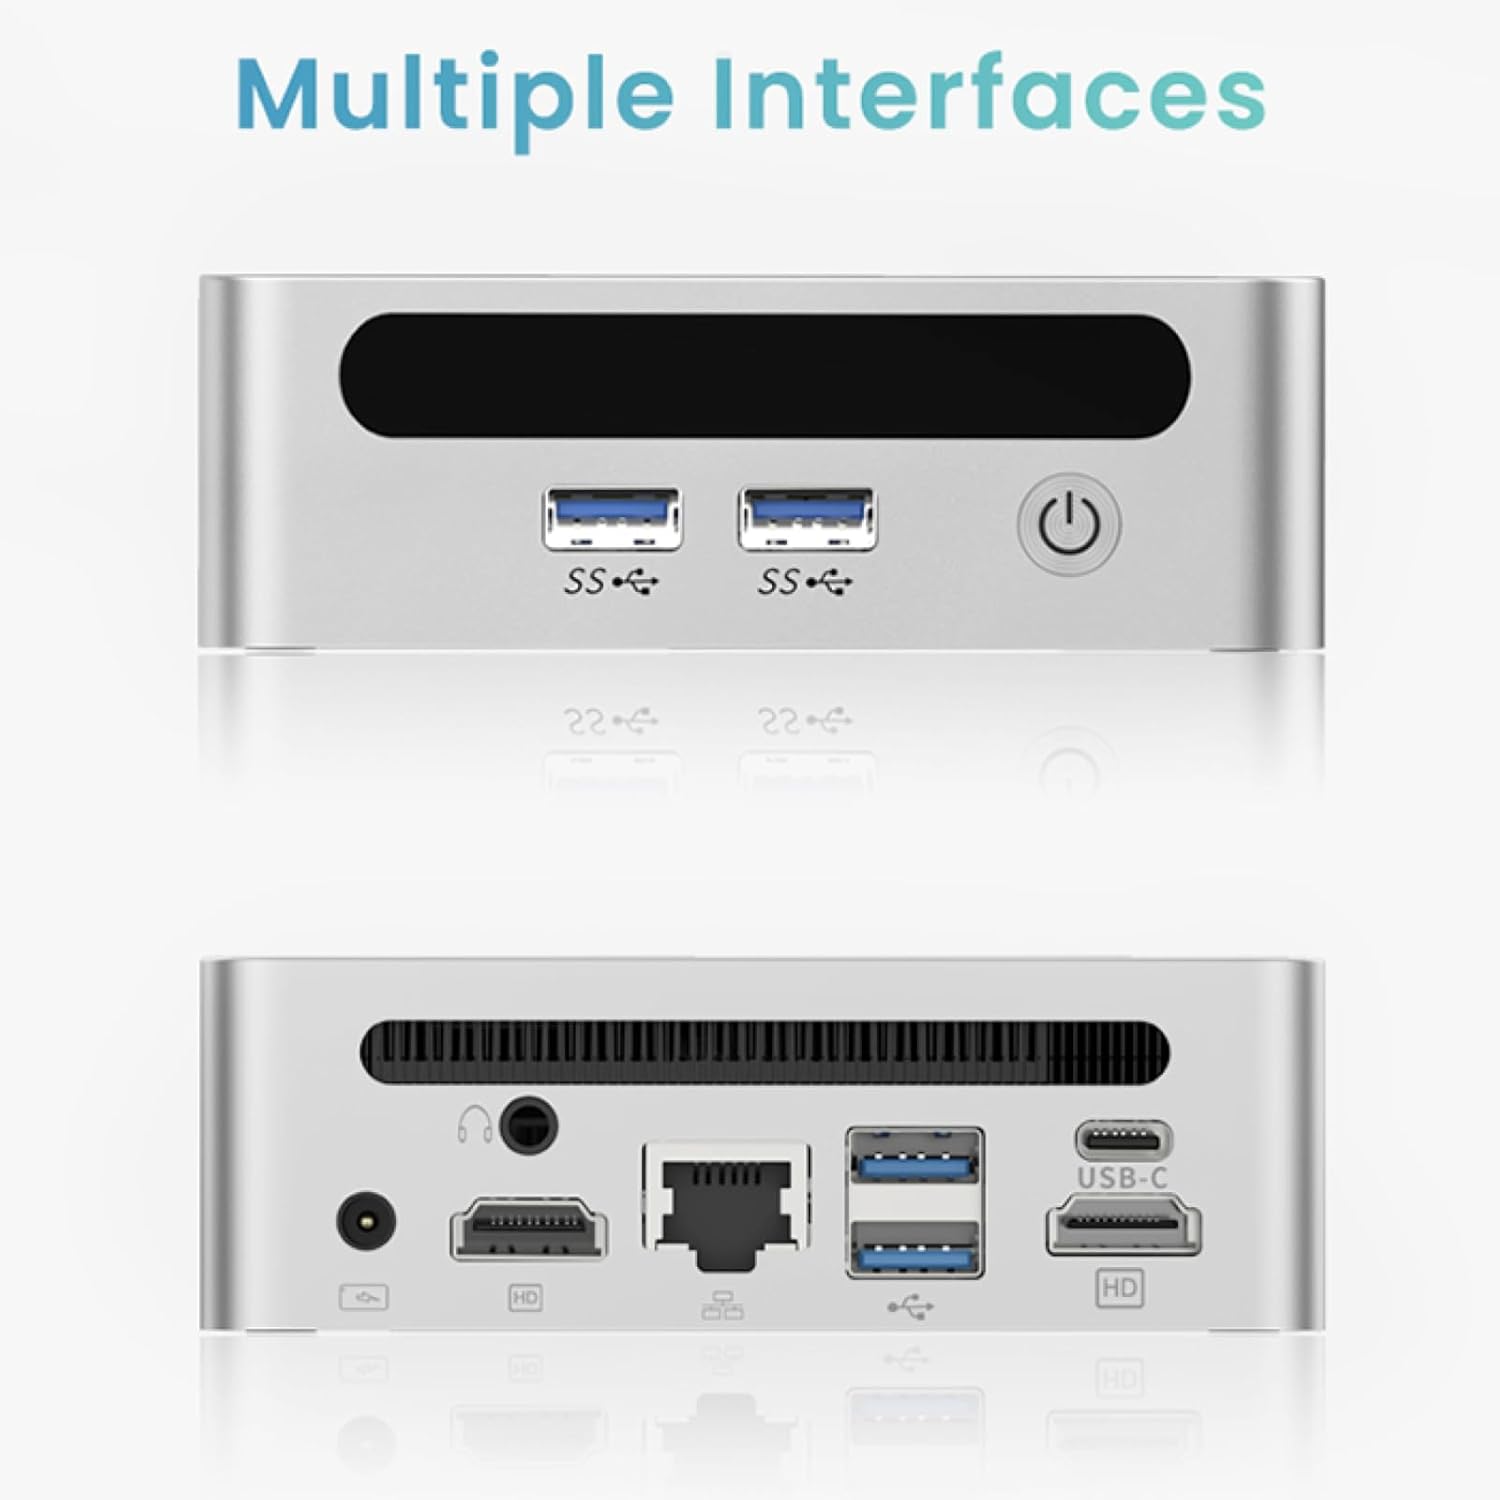
The GenMachine Mini PC features a compact design with various ports for connectivity and expansion.
فرنٹ پینل
- پاور بٹن: ڈیوائس کو آن/آف کرنے کے لیے۔
- USB 3.0 پورٹس (x2): For high-speed data transfer and peripheral connections.
- USB 2.0 پورٹ (x1): معیاری پردیی کنکشن کے لیے۔
پیچھے والا پینل
- ڈی سی پاور ان پٹ: فراہم کردہ پاور اڈاپٹر کو یہاں جوڑیں۔
- USB 2.0 پورٹ (x1): معیاری پردیی کنکشن کے لیے۔
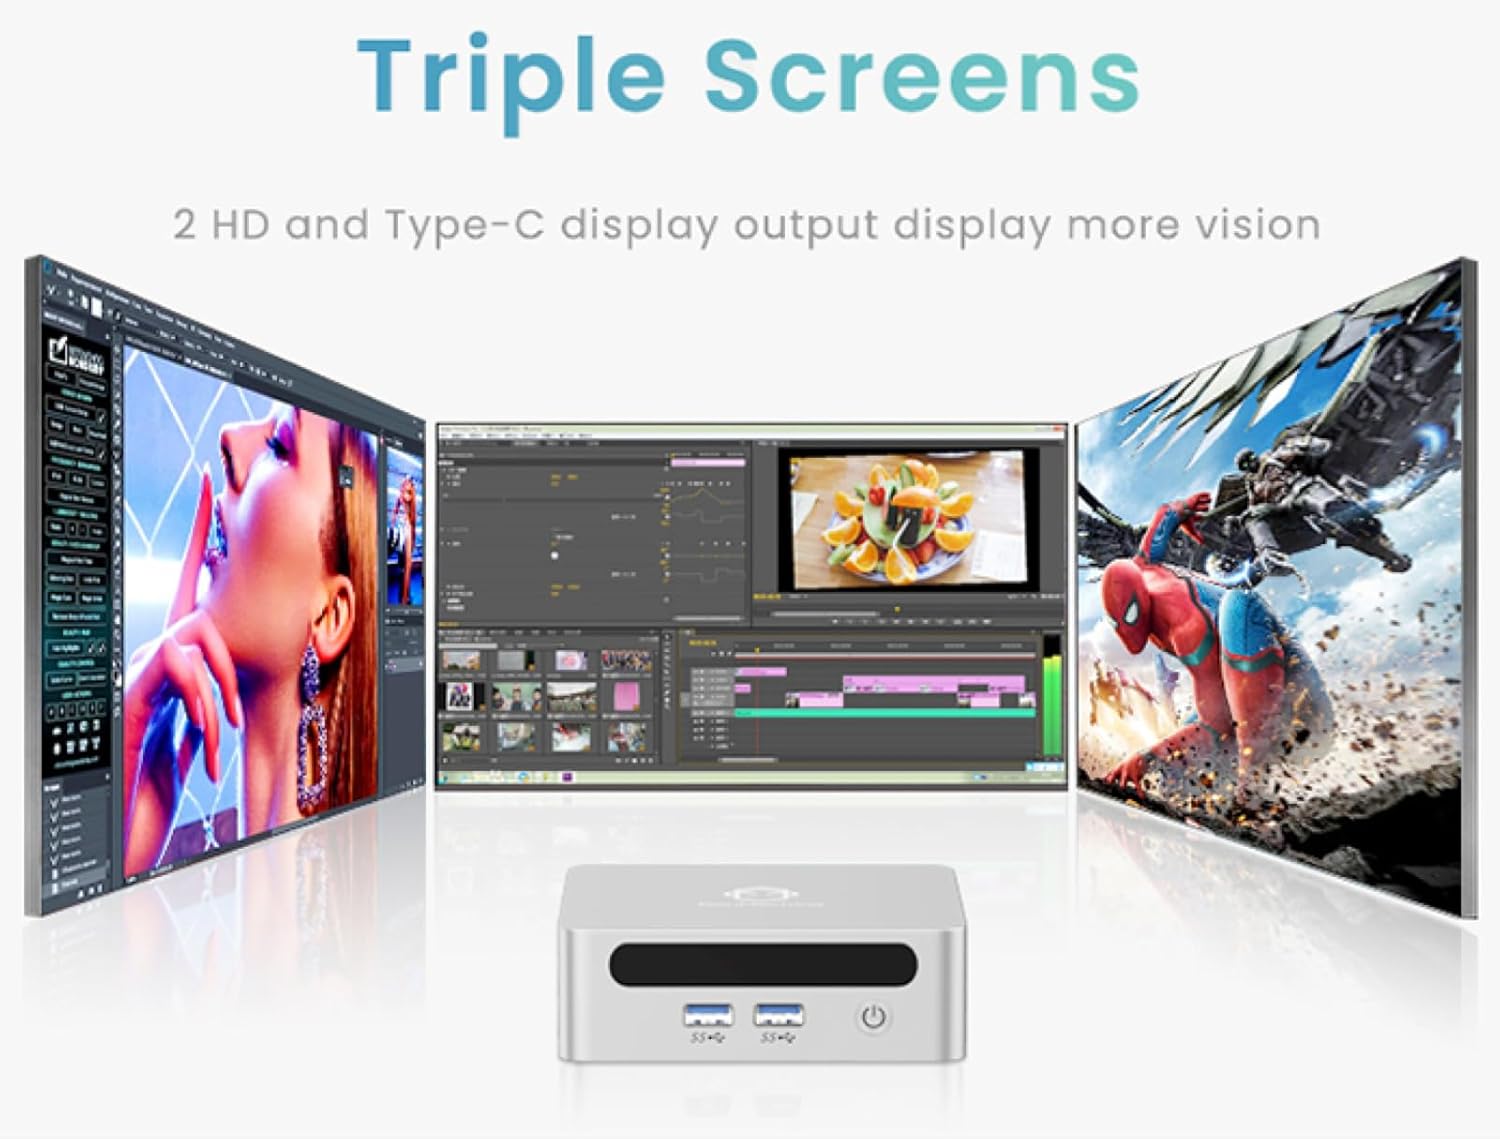
- HDMI پورٹس (x2): کنیکٹنگ ڈسپلے کے لیے، 4K ریزولوشن تک سپورٹ کرنا۔
- ایتھرنیٹ (LAN) پورٹ: وائرڈ نیٹ ورک کنکشن کے لیے۔
- 3.5 ملی میٹر آڈیو جیک: ہیڈ فون یا اسپیکر کے لیے۔
- کینسنگٹن لاک سلاٹ: ڈیوائس کو محفوظ بنانے کے لیے۔
4. سیٹ اپ گائیڈ
ابتدائی رابطہ
- Power off the Mini PC and disconnect all cables.
- Connect your monitor(s) to the HDMI port(s) on the rear panel.
- اپنے کی بورڈ اور ماؤس کو دستیاب USB پورٹس سے مربوط کریں۔
- (Optional) For a wired network connection, plug an Ethernet cable into the LAN port.
- Connect the power adapter to the DC input port and then to a power outlet.
- مینی پی سی کو آن کرنے کے لیے فرنٹ پینل پر پاور بٹن دبائیں۔
Operating System Setup (Windows 11)
Your GenMachine Mini PC comes with Windows 11 pre-installed. Upon first boot, you will be guided through the initial Windows setup process, including:
- علاقہ اور کی بورڈ لے آؤٹ کا انتخاب۔
- Network connection (Wi-Fi 6 or Ethernet).
- مائیکروسافٹ اکاؤنٹ سائن ان یا مقامی اکاؤنٹ بنانا۔
- رازداری کی ترتیبات کی ترتیب۔
سیٹ اپ مکمل کرنے کے لیے اسکرین پر دی گئی ہدایات پر عمل کریں۔
5. Performance and Usage
The AMD Ryzen 3 4300U processor, combined with 8GB DDR4 RAM and a 256GB SSD, provides robust performance for various tasks.
اہم خصوصیات:
- 4K Ultra HD Visuals & Dual Display Support: Connect up to two 4K monitors for enhanced productivity or immersive entertainment.
- Wi-Fi 6 اور بلوٹوتھ 5.2: Enjoy faster and more stable wireless internet and seamless connectivity with Bluetooth peripherals.
- Compact and Quiet Design: Its small footprint and ultra-quiet cooling system make it suitable for any workspace without distraction.

6. Upgrading Components (Maintenance)
The GenMachine Mini PC allows for easy upgrades of its RAM and SSD to further enhance performance or storage capacity.
اوزار کی ضرورت ہے:
- چھوٹا فلپس ہیڈ سکریو ڈرایور
- Plastic pry tool (optional, for opening the case)
- New SSD (M.2 2280 NVMe or 2.5-inch SATA SSD)
- New RAM (DDR4 SODIMM)
طریقہ کار:
- Power off the Mini PC and disconnect all cables.
- Carefully remove the four rubber foot pads on the bottom of the Mini PC to reveal the hidden screws.
- چار پیچ کھول دیں۔
- Gently pry open the bottom plate along the edges. Be careful with the internal clips.
- Locate the existing SSD and RAM modules.
- To remove the SSD: If fixed by screws, unscrew them. If by clips, open the clips and pull out the original SSD.
- To remove RAM: Open the clips at both ends of the memory slot and pull out the original memory vertically.
- Insert the new SSD/RAM into the respective slots, ensuring they are properly seated and secured.
- Replace the bottom plate, aligning it with the clips and screw holes.
- Screw on the previously removed screws and reattach the foot pads.
7. بڑھتے ہوئے اختیارات
The GenMachine Mini PC can be mounted behind a VESA-compatible monitor using the included mounting bracket, saving desk space and creating a clean setup.

8. وضاحتیں
| فیچر | تفصیل |
|---|---|
| پروسیسر | AMD Ryzen 3 4300U (2.7 GHz) |
| رام | 8GB DDR4 SDRAM |
| ذخیرہ | 256GB 2280 SSD (PCIE x 16 interface) |
| گرافکس | انٹیگریٹڈ AMD Radeon گرافکس |
| آپریٹنگ سسٹم | OS (Windows 11 pre-installed) |
| کنیکٹوٹی | Wi-Fi 6, Bluetooth 5.2, Ethernet |
| ویڈیو آؤٹ پٹ | 2x HDMI (4K @ 60Hz), USB-C (DisplayPort Alt Mode) |
| USB پورٹس | 2x USB 3.0, 2x USB 2.0, 1x USB-C |
| طول و عرض | 6.26 x 6.26 x 3.6 انچ |
| وزن | 2 پاؤنڈ |
9 خرابیوں کا سراغ لگانا
- کوئی طاقت نہیں: یقینی بنائیں کہ پاور اڈاپٹر منی پی سی اور ورکنگ پاور آؤٹ لیٹ دونوں سے محفوظ طریقے سے جڑا ہوا ہے۔
- کوئی ڈسپلے نہیں: Verify that the HDMI cable(s) are correctly connected to the monitor(s) and the Mini PC. Check monitor input source settings.
- No Internet (Wi-Fi): Ensure Wi-Fi is enabled in Windows settings and you are connected to the correct network.
- No Internet (Wired): Check the Ethernet cable connection and ensure your router is functioning correctly.
- سست کارکردگی: Close unnecessary applications. Check for background updates. Consider upgrading RAM or SSD if issues persist.
10. وارنٹی اور سپورٹ
For warranty information, technical support, or service inquiries, please refer to the contact details provided in your product packaging or visit the official GenMachine webسائٹ وارنٹی کے دعووں کے لیے اپنی خریداری کی رسید اپنے پاس رکھیں۔