
1. تعارف
This manual provides essential information for the setup, operation, and maintenance of the Waveshare ESP32-P4 High-Performance Development Board. The ESP32-P4-Module-DEV-KIT-C is designed for multimedia and edge computing applications, featuring a 400MHz RISC-V dual-core processor, Wi-Fi 6, Bluetooth 5/BLE, and extensive peripheral support. This specific kit includes a 10-inch DSI Capacitive Touch Display and an RPi Camera (B).
The board offers comprehensive connectivity and rich human-machine interfaces, making it suitable for complex multimedia projects. It also incorporates advanced security features to ensure robust data protection.
2. پیکیج کے مشمولات
Verify that all items listed below are present in your package. Refer to the image for visual confirmation of the components included in the ESP32-P4-Module-DEV-KIT-C.
- ESP32-P4-Module-DEV-KIT-C Development Board x1
- 10.1-DSI-TOUCH-A 10-inch DSI Capacitive Touch Display x1
- RPi Camera (B) x1
- Speaker (8Ω 2W) x1
- سکرو پیک x1
- USB Type-A dual-plug cable x1
- USB Type-A to Type-C cable x1
- DSI cable x1
- FFC 15PIN cable x1
- FFC 22PIN cable (2PCS) x1
- 2PIN cable x1
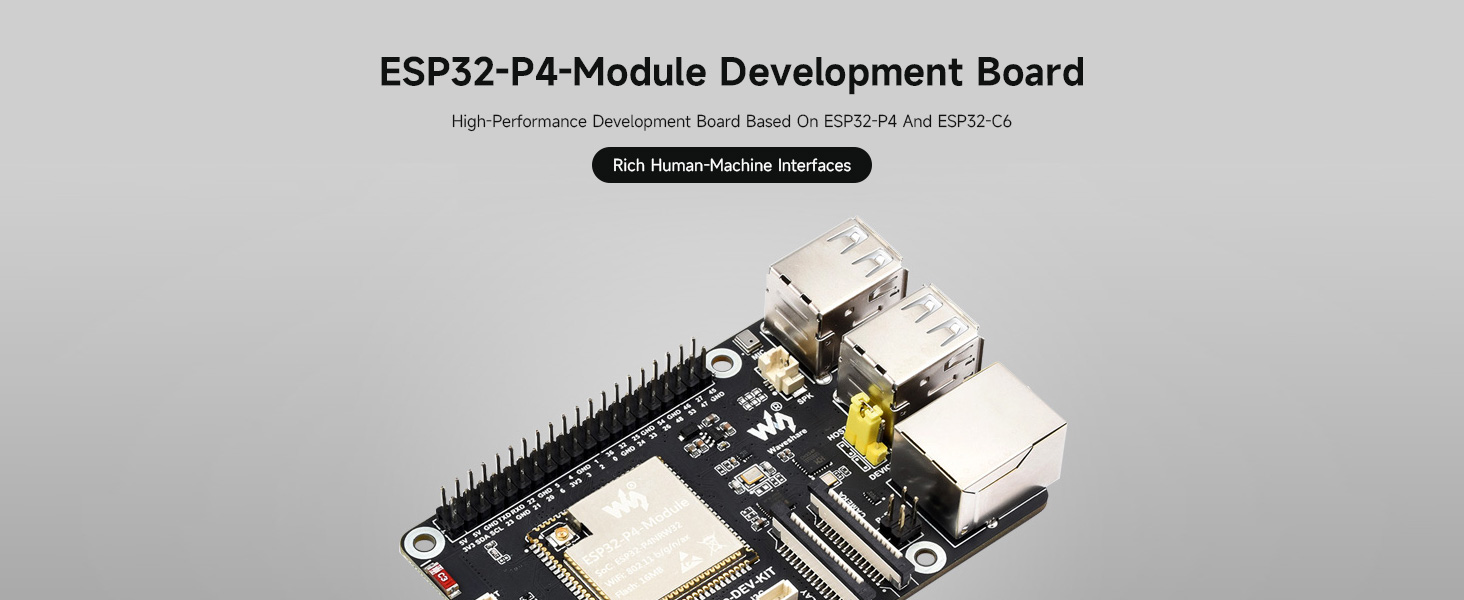
Figure 2.1: Contents of the ESP32-P4-Module-DEV-KIT-C package.
3. پروڈکٹ ختمview
The Waveshare ESP32-P4 Development Board is a high-performance platform built around the ESP32-P4 and ESP32-C6 modules, offering robust capabilities for various embedded projects.
3.1 کلیدی خصوصیات
- ہائی پرفارمنس پروسیسر: Features a 400MHz RISC-V dual-core processor for enhanced performance.
- یادداشت: Up to 32MB PSRAM and 16MB Nor Flash for ample storage and processing.
- وائرلیس رابطہ: Supports Wi-Fi 6 and Bluetooth 5/BLE for versatile communication.
- بھرپور انٹرفیس: Includes MIPI-CSI (Camera), MIPI-DSI (Display), I2S, SPI, I2C, UART, USB 2.0 OTG, and more.
- Ethernet with PoE: Onboard RJ45 Ethernet with Power over Ethernet (PoE) functionality.
- GPIO Header: 40-pin GPIO header compatible with Raspberry Pi HATs.
- سیکورٹی: Secure Boot, Flash Encryption, cryptographic accelerators, and TRNG for data security.
- ملٹی میڈیا سپورٹ: Designed for multimedia applications with integrated image signal processor and H.264 encoder.

Figure 3.1: ESP32-P4-Module Development Board overview.
3.2 Integrated Modules
The board integrates the ESP32-P4-Module, which includes the ESP32-C6 for Wi-Fi 6 and Bluetooth 5/BLE connectivity, and 16MB Nor Flash.

Figure 3.2: ESP32-P4-Module for high performance.
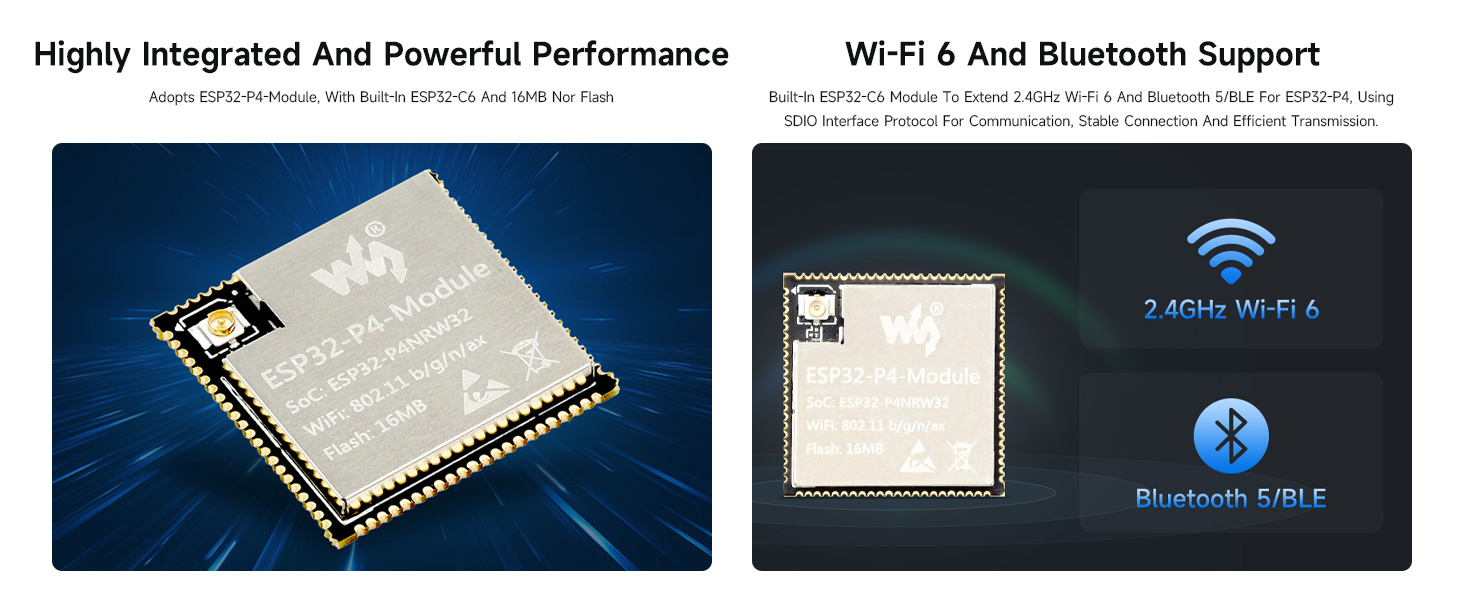
Figure 3.3: Wi-Fi 6 and Bluetooth 5/BLE support.
3.3 PoE پاور سپلائی
The board includes a reserved PoE module header, allowing for power supply and network connection through a single Ethernet cable when connected to a compatible PoE module (not included).
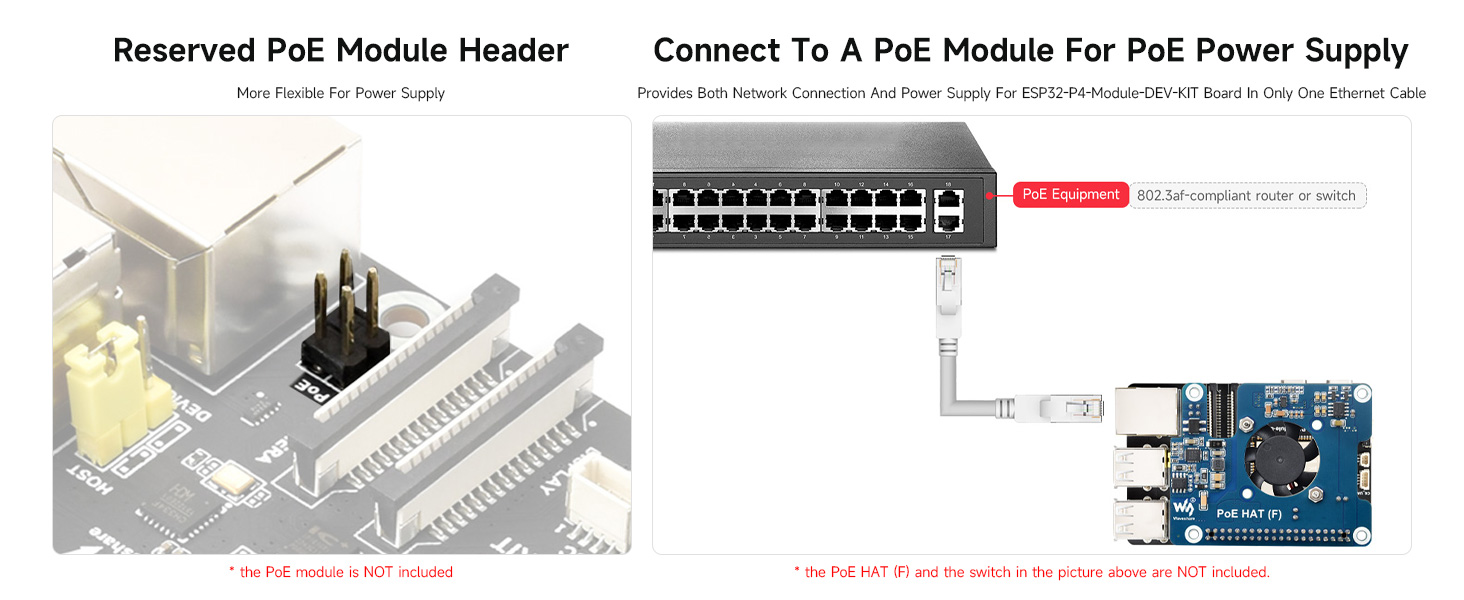
Figure 3.4: Reserved PoE module header.
4. Board Layout and Pinout
Understanding the board's layout and pin definitions is crucial for proper connection and development.
4.1 What's On Board
The following diagram identifies key components and interfaces on the ESP32-P4-Module-DEV-KIT-C.

Figure 4.1: Labeled components of the ESP32-P4-Module-DEV-KIT-C.
4.2 Pin Definition and Outline Dimensions
The 40-pin GPIO header provides various power and data pins. Refer to the diagram for pin assignments and board dimensions.
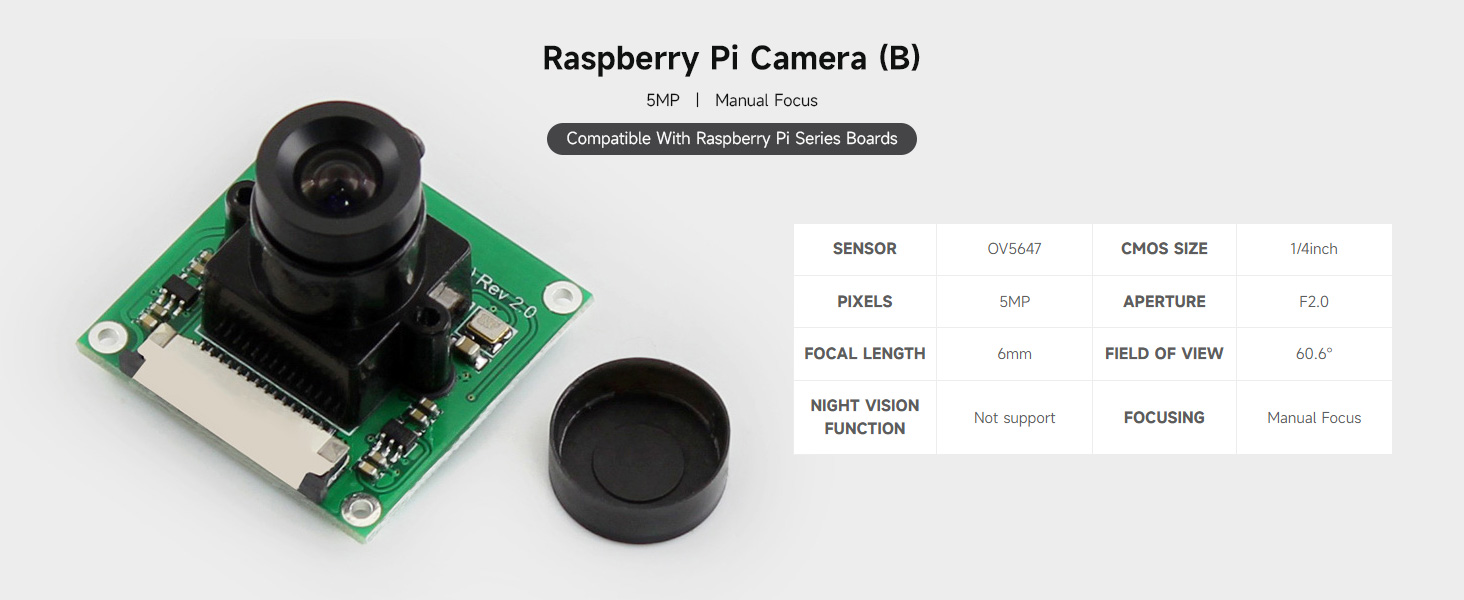
Figure 4.2: Pin definitions and outline dimensions.
5. سیٹ اپ اور کنکشن
This section guides you through connecting the various components of your ESP32-P4 development kit.
5.1 Kit Selection Overview
The ESP32-P4-Module-DEV-KIT is available in several configurations. This manual focuses on the 'C' kit, which includes the 10-inch DSI LCD and RPi Camera (B).
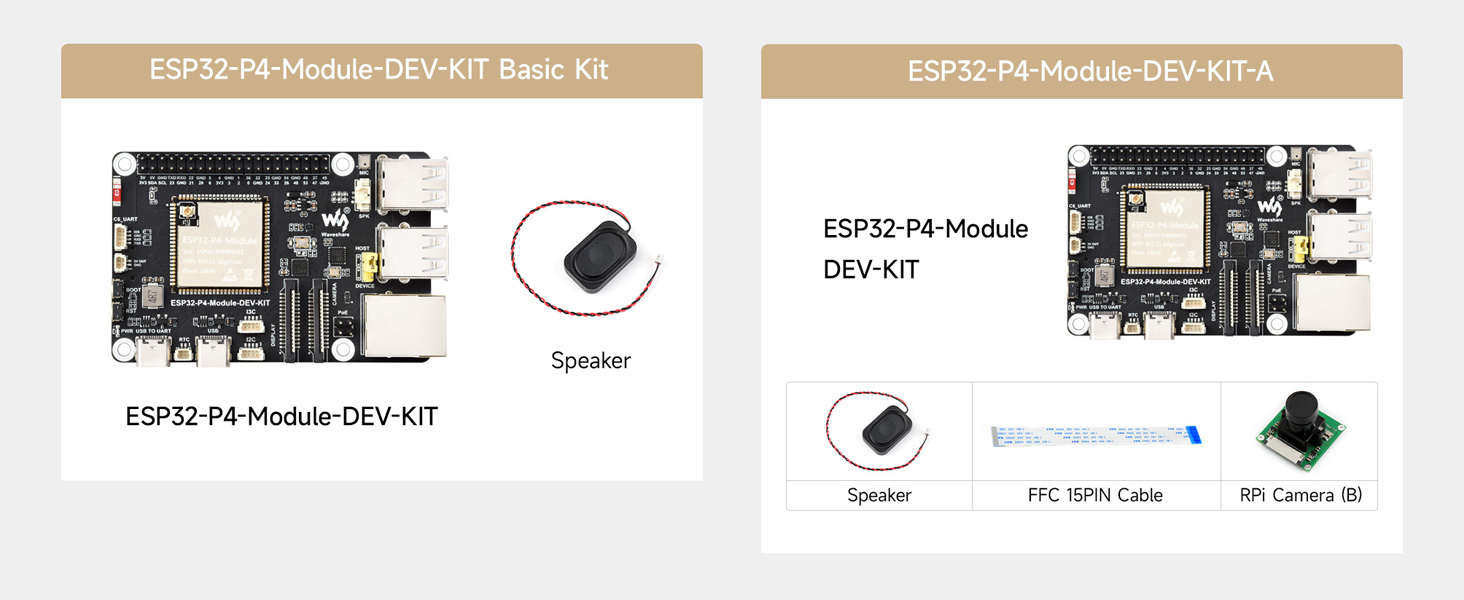
شکل 5.1: ختمview of available kit configurations.
5.2 کنکشن Examples
Follow these general steps for connecting the display and camera to the development board:
- Connect the DSI Display: Carefully connect the DSI cable from the 10.1-DSI-TOUCH-A display to the MIPI-DSI interface on the ESP32-P4 board. Ensure the cable is inserted correctly and secured.
- Connect the RPi Camera: Attach the RPi Camera (B) to the MIPI-CSI interface on the development board using the provided FFC cable.
- پاور کنکشن: Connect the USB Type-A to Type-C cable to the Type-C UART connector on the board for power and programming.
- اسپیکر کنکشن: Connect the 8Ω 2W speaker to the designated speaker header.

شکل 5.2: سابقample connections for the development kit.
6. آپریٹنگ ہدایات
After connecting all components, you can begin operating your ESP32-P4 Development Board. The board typically runs a Linux operating system and supports various development environments.
- پاور آن: Connect the Type-C USB cable to a power source. The power supply indicator LED should illuminate.
- سافٹ ویئر ڈویلپمنٹ: For detailed programming guides and examples, refer to the official Waveshare Wiki resources. This includes information on using ESP-IDF and potentially Arduino IDE for development.
- Entering Download Mode: Press and hold the BOOT button, then press the RST Reset button to enter download mode for flashing firmware.
- USB OTG: The USB OTG 2.0 high-speed ports can be switched between host and device via a jumper for expanded USB functionalities.
It is recommended to consult the Waveshare Wiki for the latest software, drivers, and specific programming instructions relevant to the ESP32-P4 and ESP32-C6 modules.
7 دیکھ بھال
Proper maintenance ensures the longevity and reliable operation of your ESP32-P4 Development Board.
- ہینڈلنگ: Always handle the board by its edges to avoid touching sensitive components. Use anti-static precautions when possible.
- صفائی: Keep the board free from dust and debris. Use a soft, dry brush or compressed air for cleaning. Avoid liquid cleaners.
- ذخیرہ: بورڈ کو خشک، ٹھنڈے ماحول میں، براہ راست سورج کی روشنی اور انتہائی درجہ حرارت سے دور رکھیں۔
- بجلی کی فراہمی: Use a stable and appropriate power supply (5V via Type-C or 5V header) to prevent damage.
- RTC بیٹری: If using a rechargeable RTC battery, ensure it is compatible and correctly installed.
8 خرابیوں کا سراغ لگانا
This section addresses common issues you might encounter with the ESP32-P4 Development Board.
- بورڈ آن نہیں ہو رہا ہے:
- Ensure the USB Type-C cable is securely connected to both the board and a functional power source.
- تصدیق کریں کہ طاقت کا منبع مناسب والیوم فراہم کرتا ہے۔tage (5V)۔
- Display Not Showing Image:
- Check the DSI cable connection between the board and the display. Ensure it is fully seated and oriented correctly.
- Confirm that the software or firmware running on the ESP32-P4 is configured to output to the DSI display.
- کیمرہ کام نہیں کر رہا:
- Inspect the FFC cable connection for the RPi Camera (B) to the MIPI-CSI interface.
- Ensure the camera module is properly seated.
- Verify that the software includes the necessary drivers and configurations for the camera.
- وائی فائی/بلوٹوتھ کنیکٹیویٹی کے مسائل:
- Check that the ESP32-C6 SMD Antenna is not obstructed.
- Ensure your software has correctly initialized the Wi-Fi or Bluetooth modules and is attempting to connect to valid networks/devices.
- Software/Firmware Upload Failure:
- Ensure the board is in download mode (press and hold BOOT, then press RST).
- Verify that the correct drivers for the USB-UART bridge are installed on your computer.
- Check your development environment settings for correct port selection and baud rate.
For more specific troubleshooting or advanced issues, refer to the Waveshare Wiki or community forums.
9. وضاحتیں
Detailed technical specifications for the Waveshare ESP32-P4 Development Board and included components.
| فیچر | تفصیلات |
|---|---|
| برانڈ | ویو شیئر |
| ماڈل کا نام | ESP32-P4-Module-DEV-KIT-C |
| پروسیسر | 400MHz RISC-V Dual-Core (Espressif) |
| رام | 32MB PSRAM |
| فلیش میموری | 16MB نہ ہی فلیش |
| وائرلیس کنیکٹیویٹی | Wi-Fi 6, Bluetooth 5/BLE (via ESP32-C6) |
| آپریٹنگ سسٹم | لینکس |
| انٹرفیس | MIPI-CSI, MIPI-DSI, I2S, SPI, I2C, UART, USB 2.0 OTG, RJ45 Ethernet (PoE) |
| جی پی آئی او | 40-pin header (Raspberry Pi HAT compatible) |
| ایس ڈی کارڈ سلاٹ | SDIO 3.0 TF card slot |
| شے کا وزن | 1.69 پاؤنڈ (تقریباً 0.77 کلوگرام) |
| پیکیج کے طول و عرض | 11.89 x 8.5 x 2.05 انچ (تقریباً 30.2 x 21.6 x 5.2 سینٹی میٹر) |
9.1 DSI Capacitive Touch Display (10.1-DSI-TOUCH-A)
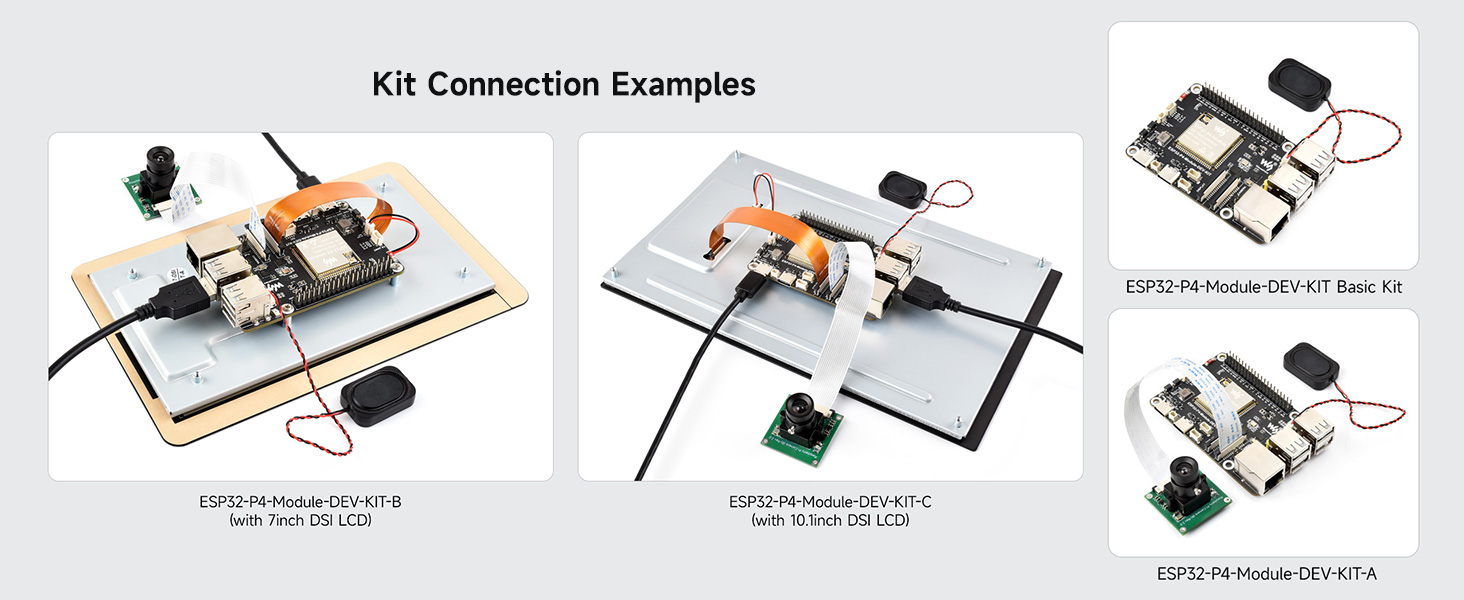
Figure 9.1: DSI Capacitive Touch Display specifications.
9.2 RPi Camera (B)

Figure 9.2: RPi Camera (B) specifications.
10 سپورٹ اور وسائل
For further technical documentation, software examples, and community support, please visit the official Waveshare Wiki. The Wiki provides comprehensive resources to assist with your development projects.
ویو شیئر وکی: https://www.waveshare.com/wiki