تعارف
This manual provides detailed instructions for the installation, operation, and maintenance of your be quiet! Pure Loop 3 280mm Black CPU Liquid Cooler. This all-in-one (AIO) liquid cooling system is designed to deliver high cooling performance for all consumer CPUs, including heavily overclocked systems, while maintaining quiet operation.
The Pure Loop 3 features a state-of-the-art PWM pump with a 6-pole motor to minimize vibrations, two Pure Wings 3 140mm PWM high-speed fans for high static pressure and quiet operation, and flexible sleeved tubes for easy handling. Please read these instructions carefully before proceeding with installation.

Image: The be quiet! Pure Loop 3 280mm Black CPU Liquid Cooler, showcasing the radiator, fans, pump, and product packaging.
باکس میں کیا ہے۔
تنصیب شروع کرنے سے پہلے، براہ کرم تصدیق کریں کہ ذیل میں درج تمام اجزاء آپ کے پیکیج میں موجود ہیں:
- Pure Loop 3 280mm AIO Liquid Cooler (Radiator, Pump, and Tubes pre-assembled)
- 2x Pure Wings 3 140mm PWM High-Speed Fans
- تھرمل پیسٹ۔
- Mounting kit for Intel sockets (LGA 1954/1851/1700/1200/1151/1150/1155)
- Mounting kit for AMD sockets (AM5/AM4)
- اڈاپٹر کیبلز۔
- صارف دستی (یہ دستاویز)

Image: All included components of the Pure Loop 3 280mm cooler, including the radiator, fans, pump, mounting hardware, thermal paste, and cables.
سیٹ اپ اور انسٹالیشن
Proper installation is crucial for optimal cooling performance. Follow these general steps. Refer to the detailed diagrams in the included printed manual for specific socket instructions.
1. Prepare the Radiator and Fans
- Attach the two Pure Wings 3 140mm PWM fans to the radiator using the provided screws. Ensure the fan airflow direction is appropriate for your case's ventilation.
- Connect the daisy-chained PWM fan cables to a single PWM header on your motherboard or to the included adapter cable.
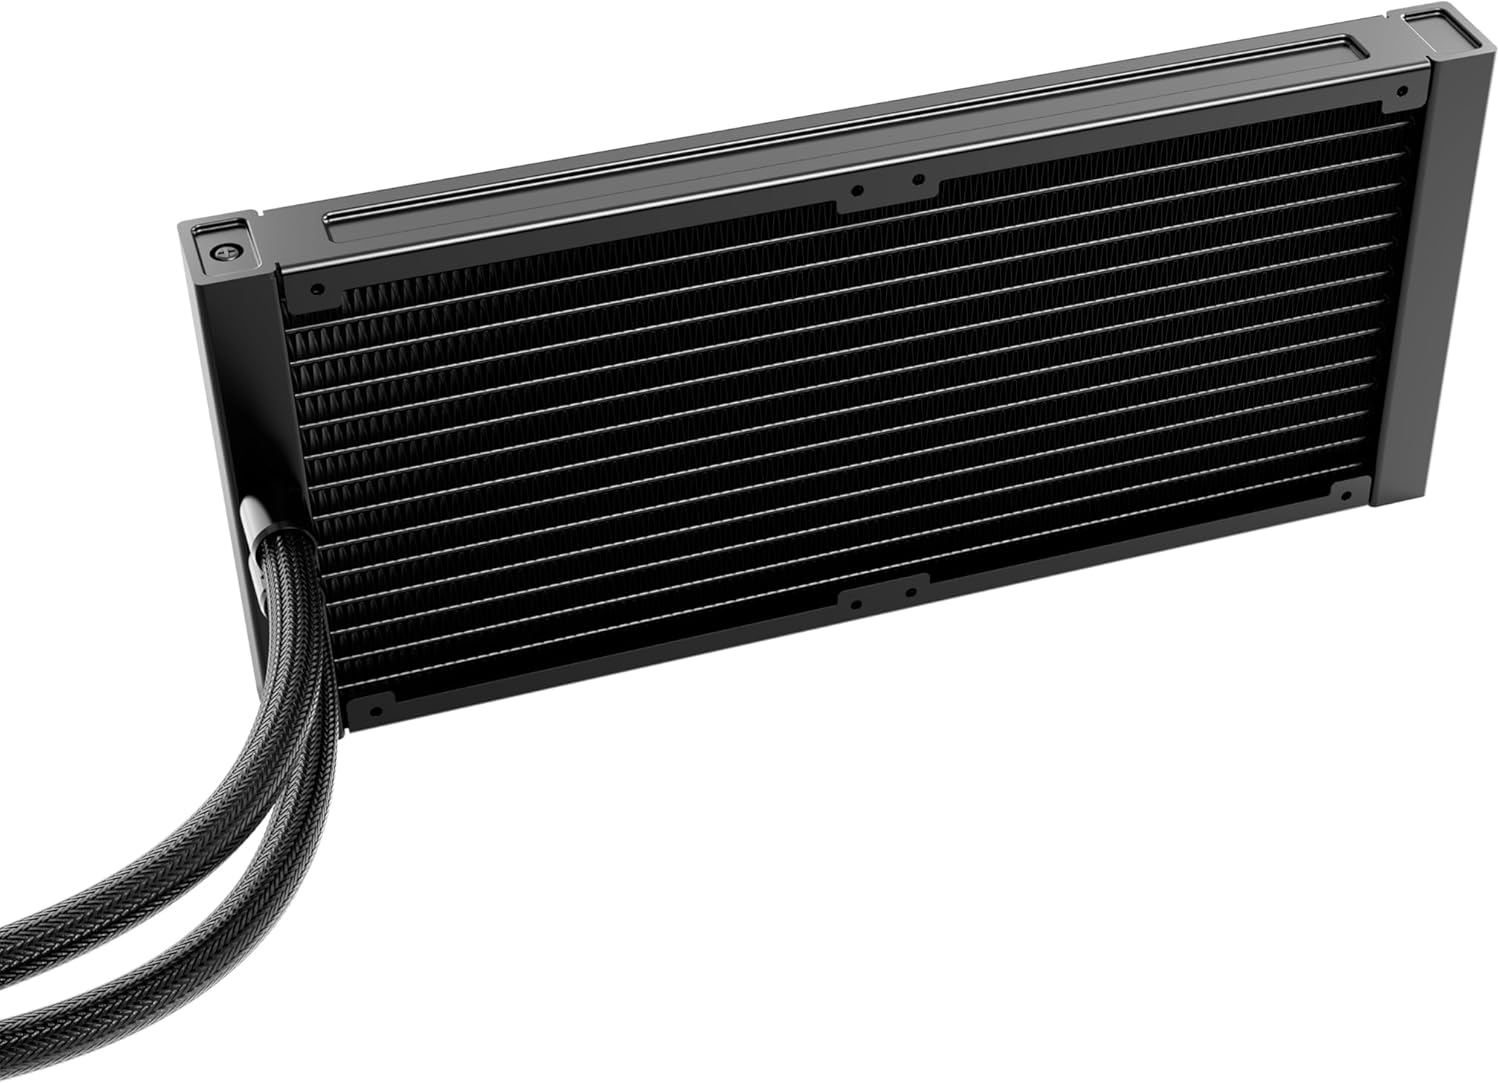
تصویر: ایک تفصیلی view of the radiator, showing its fin structure and connection points for the tubes.
2. Install the Radiator in Your PC Case
Mount the radiator assembly to an available fan mounting location in your PC case (e.g., top, front, or rear). Use the appropriate screws for your case. Ensure there is sufficient clearance for the radiator and fans.
3. CPU ساکٹ تیار کریں۔
- Identify your CPU socket type (Intel LGA or AMD AM).
- Install the correct backplate (if required) and mounting brackets for your socket type onto the motherboard.
- Clean the CPU surface with isopropyl alcohol to remove any dust or old thermal paste.
- فراہم کردہ تھرمل پیسٹ کی تھوڑی سی مقدار CPU کے مربوط ہیٹ اسپریڈر (IHS) کے مرکز میں لگائیں۔
4. پمپ/کولڈ پلیٹ کو ماؤنٹ کریں۔
- Carefully place the pump/cold plate assembly onto the CPU, aligning it with the mounting holes on the brackets.
- Secure the pump/cold plate with the appropriate screws, tightening them in a diagonal pattern until snug. Do not overtighten.
- Connect the pump's 4-pin power cable to the designated CPU_FAN or AIO_PUMP header on your motherboard.
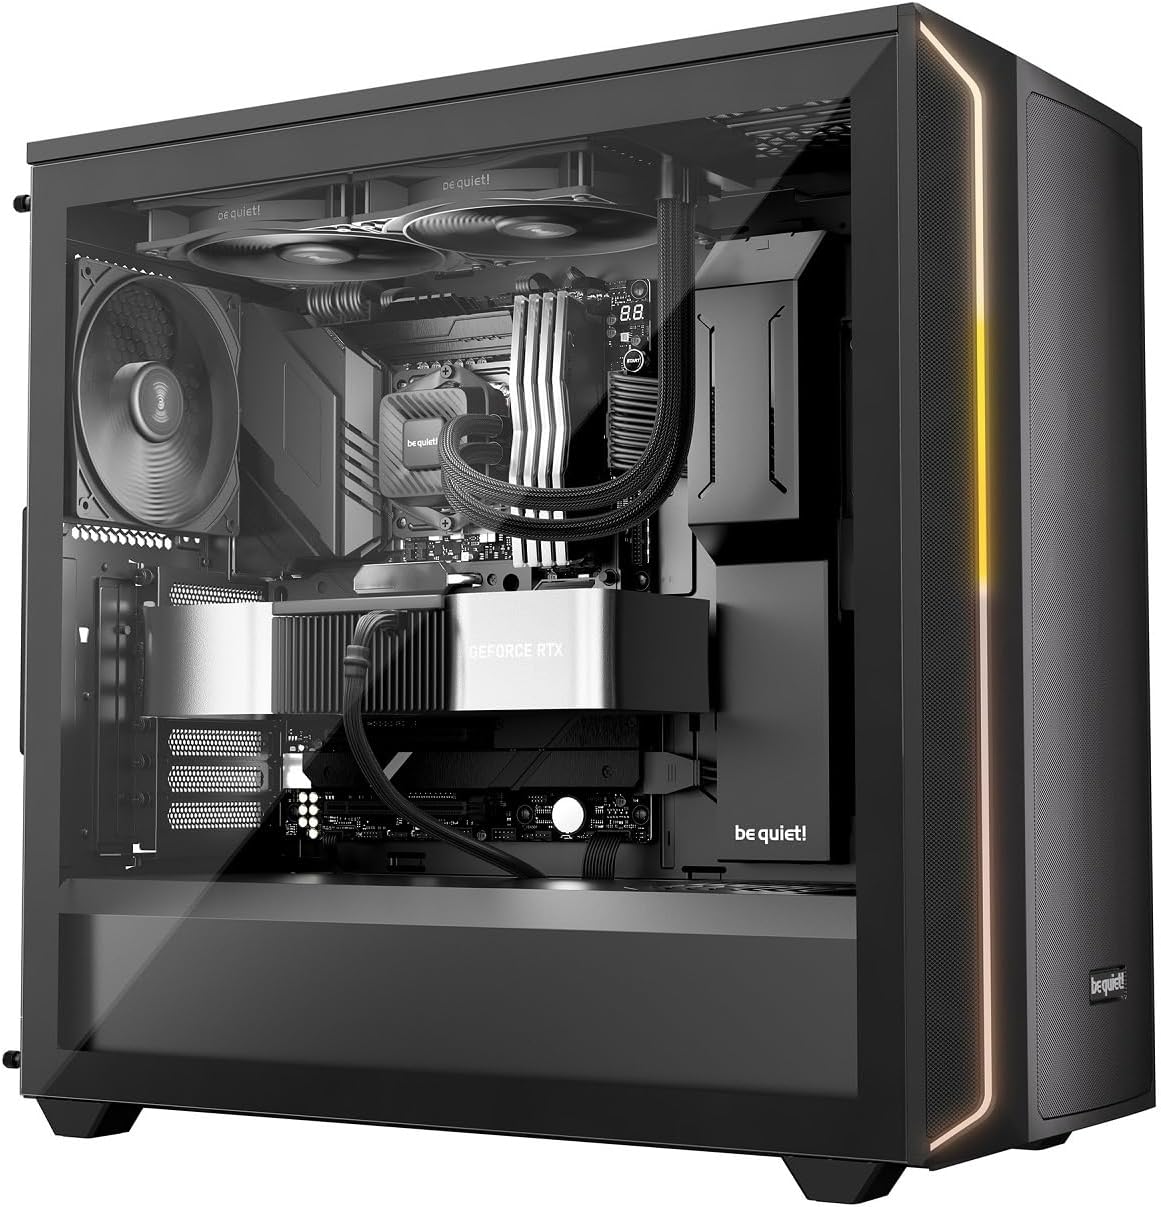
Image: The Pure Loop 3 liquid cooler installed within a computer case, demonstrating its placement and integration with other components.
آپریٹنگ ہدایات
Once installed, the Pure Loop 3 liquid cooler operates automatically based on your motherboard's fan and pump control settings. For optimal performance and acoustics, it is recommended to configure these settings in your motherboard's BIOS/UEFI.
- پمپ آپریشن: The PWM pump features a 6-pole motor designed for quiet and efficient operation. Ensure the pump is connected to a dedicated AIO_PUMP or CPU_FAN header that provides continuous power or is configured for PWM control based on CPU temperature.
- فین آپریشن: The two Pure Wings 3 140mm PWM high-speed fans are daisy-chained for simplified cable management. Connect them to a single PWM fan header. Configure a fan curve in your BIOS/UEFI to balance cooling performance and noise levels according to your preferences.
- ابتدائی آغاز: After installation, power on your system and monitor CPU temperatures using monitoring software. Ensure the pump is running and fans are spinning. A slight gurgling sound may be heard initially as air bubbles are purged from the loop; this should subside quickly.
دیکھ بھال
The be quiet! Pure Loop 3 is designed for low maintenance. However, periodic checks can help ensure long-term performance.
- دھول کی صفائی: کمپریسڈ ہوا یا نرم برش کا استعمال کرتے ہوئے ریڈی ایٹر کے پنکھوں اور پنکھے کے بلیڈ سے وقتاً فوقتاً دھول صاف کریں۔ اس بات کو یقینی بنائیں کہ صفائی کے دوران پنکھے نہیں گھوم رہے ہیں۔
- ریفل پورٹ: The Pure Loop 3 features an easy-to-access refill port on the pump unit. Over time, a small amount of coolant may evaporate. If you notice a significant increase in CPU temperatures or hear unusual pump noises, you may need to top up the coolant. Use only high-quality, non-conductive liquid cooling fluid specifically designed for AIO systems. Refer to the be quiet! website for recommended coolant types and detailed refill instructions.
- ٹیوب معائنہ: Occasionally inspect the flexible sleeved tubes for any signs of kinks, leaks, or damage.
خرابی کا سراغ لگانا
If you encounter issues with your Pure Loop 3 liquid cooler, consider the following common troubleshooting steps:
- اعلی CPU درجہ حرارت:
- Ensure the pump is running and connected correctly to a motherboard header.
- Verify that the fans are spinning and installed with the correct airflow direction.
- Check if the cold plate is making proper contact with the CPU. Re-seat if necessary, ensuring thermal paste is applied correctly.
- Inspect the radiator for dust buildup and clean if necessary.
- Check coolant levels via the refill port if temperatures remain high after other checks.
- Unusual Noises (Gurgling, Whining):
- A slight gurgling sound during initial startup is normal as air purges. If it persists, gently tilt your PC case to help trapped air move to the radiator.
- Ensure the pump is not running at excessively high RPMs if controllable.
- Check fan blades for obstructions or damage.
- پرستار نہیں گھومتے:
- Verify fan cables are securely connected to the motherboard header or adapter.
- Check BIOS/UEFI settings to ensure fan control is enabled and not set to a very low RPM curve at idle temperatures.
- پمپ نہیں چل رہا ہے:
- Ensure the pump's 4-pin cable is securely connected to the correct motherboard header (AIO_PUMP or CPU_FAN).
- Check BIOS/UEFI settings to ensure the pump header is enabled and receiving power.
If these steps do not resolve your issue, please contact be quiet! customer support for further assistance.
وضاحتیں
| فیچر | تفصیل |
|---|---|
| ماڈل نمبر | BW028EU |
| ریڈی ایٹر کا سائز | 280 ملی میٹر |
| پنکھے کا سائز | 2x 140 mm Pure Wings 3 PWM High-Speed |
| ہم آہنگ انٹیل ساکٹ | LGA 1954, 1851, 1700, 1200, 1151, 1150, 1155 |
| ہم آہنگ AMD ساکٹ | AM5، AM4 |
| کولنگ کا طریقہ | مائع (آل ان ون) |
| پمپ موٹر | 6-pole PWM motor |
| شور کی سطح | Up to 36.6 Decibels (dB) |
| پاور کنیکٹر کی قسم | 4-Pin (for pump and fans) |
| مصنوعات کے طول و عرض | 11.02"L x 11.02"W x 11.02"H (Overall, approximate) |
| ری فل پورٹ | Yes, easy-to-access |
وارنٹی اور سپورٹ
be quiet! products are manufactured to the highest quality standards. This product comes with a manufacturer's warranty. For specific warranty terms and conditions, please refer to the warranty card included in your product packaging or visit the official be quiet! webسائٹ
For technical support, troubleshooting assistance, or to inquire about replacement parts, please contact be quiet! customer service. You can find contact information and frequently asked questions on the official be quiet! webسائٹ: www.bequiet.com.