
Caroma D1 (B0FSZZL7PR)
Caroma Electric Scooter D1 User Manual
Model: D1 (B0FSZZL7PR) | Brand: Caroma
1. تعارف
Welcome to the Caroma Electric Scooter D1 user manual. This manual provides essential information for the safe operation, maintenance, and troubleshooting of your new electric scooter. Please read this manual thoroughly before using the scooter to ensure optimal performance and safety.

Figure 1: Caroma Electric Scooter D1 - General View (Animated)
2. اہم حفاظتی انتباہات
ان حفاظتی ہدایات پر عمل کرنے میں ناکامی کے نتیجے میں سنگین چوٹ یا موت واقع ہو سکتی ہے۔
- سواری کرتے وقت ہمیشہ ہیلمٹ اور مناسب حفاظتی گیئر (گھٹنے کے پیڈ، کہنی کے پیڈ) پہنیں۔
- گیلے حالات، تیز بارش، یا کھڈوں میں سواری نہ کریں۔
- Avoid riding on uneven surfaces, loose gravel, or slippery terrain.
- اس بات کو یقینی بنائیں کہ ہر سواری سے پہلے تمام بولٹ اور فاسٹنرز سخت ہیں۔
- 300 پونڈ (136 کلوگرام) کی زیادہ سے زیادہ بوجھ کی گنجائش سے تجاوز نہ کریں۔
- سواری کے دوران دونوں ہاتھ ہینڈل بار پر رکھیں۔
- الیکٹرک سکوٹر کے استعمال سے متعلق مقامی قوانین اور ضوابط سے اپنے آپ کو واقف کریں۔
- بچوں کو صرف بالغوں کی نگرانی میں سکوٹر چلانا چاہیے۔
3. سیٹ اپ اور اسمبلی
Your Caroma Electric Scooter D1 comes partially assembled. Follow these steps for final assembly and initial setup:
- پیک کھولنا: پیکیجنگ سے تمام اجزاء کو احتیاط سے ہٹا دیں۔ ٹرانزٹ کے دوران کسی بھی نقصان کی جانچ کریں۔
- ہینڈل بار کی تنصیب: Attach the handlebar to the main stem. Ensure it is securely fastened with the provided bolts. The handlebar is designed to fold for transport; ensure it is locked in the upright position before riding.
- سیٹ ایڈجسٹمنٹ: Adjust the seat height to a comfortable riding position. Ensure the quick-release lever or bolts are securely tightened.
- ٹوکری اٹیچمنٹ: Secure the rear carry basket to the designated mounting points using the provided hardware.
- ٹائر مہنگائی: Inflate the 14-inch fat tires to the recommended pressure (check tire sidewall for PSI). The tires are air-filled for better shock absorption.
- بریک چیک: Test both front and rear disc brakes to ensure they are functioning correctly. Adjust brake tension if necessary.
- ابتدائی چارج: Fully charge the scooter before its first use. Refer to the "Charging" section for detailed instructions.
ویڈیو 1: ختمview of the Caroma D1 Electric Scooter, demonstrating its features and design. This video is provided by the seller and offers a visual guide to the product.
4. آپریٹنگ ہدایات
To operate your Caroma Electric Scooter D1, follow these steps:
- پاور آن: Insert the key into the ignition located near the battery compartment and turn it to the "ON" position. The battery level indicator on the handlebar will light up.
- تھروٹل کنٹرول: The scooter features a twist-grip throttle on the right handlebar. Gently twist the throttle towards you to accelerate.
- بریک لگانا: Use the brake levers on both handlebars to slow down or stop. The scooter is equipped with dual mechanical disc brakes for effective stopping power. The rear tail light will illuminate brighter when brakes are applied.
- لائٹس: Press the headlight button on the left handlebar to turn the front headlight and rear tail light on/off.
- گھنٹی: Use the bell on the left handlebar to alert pedestrians or other riders.
- فولڈنگ میکانزم: To fold the handlebar for transport, locate the folding latch near the base of the handlebar stem. Disengage the latch and fold the handlebar down. Ensure it is securely latched when unfolded for riding.
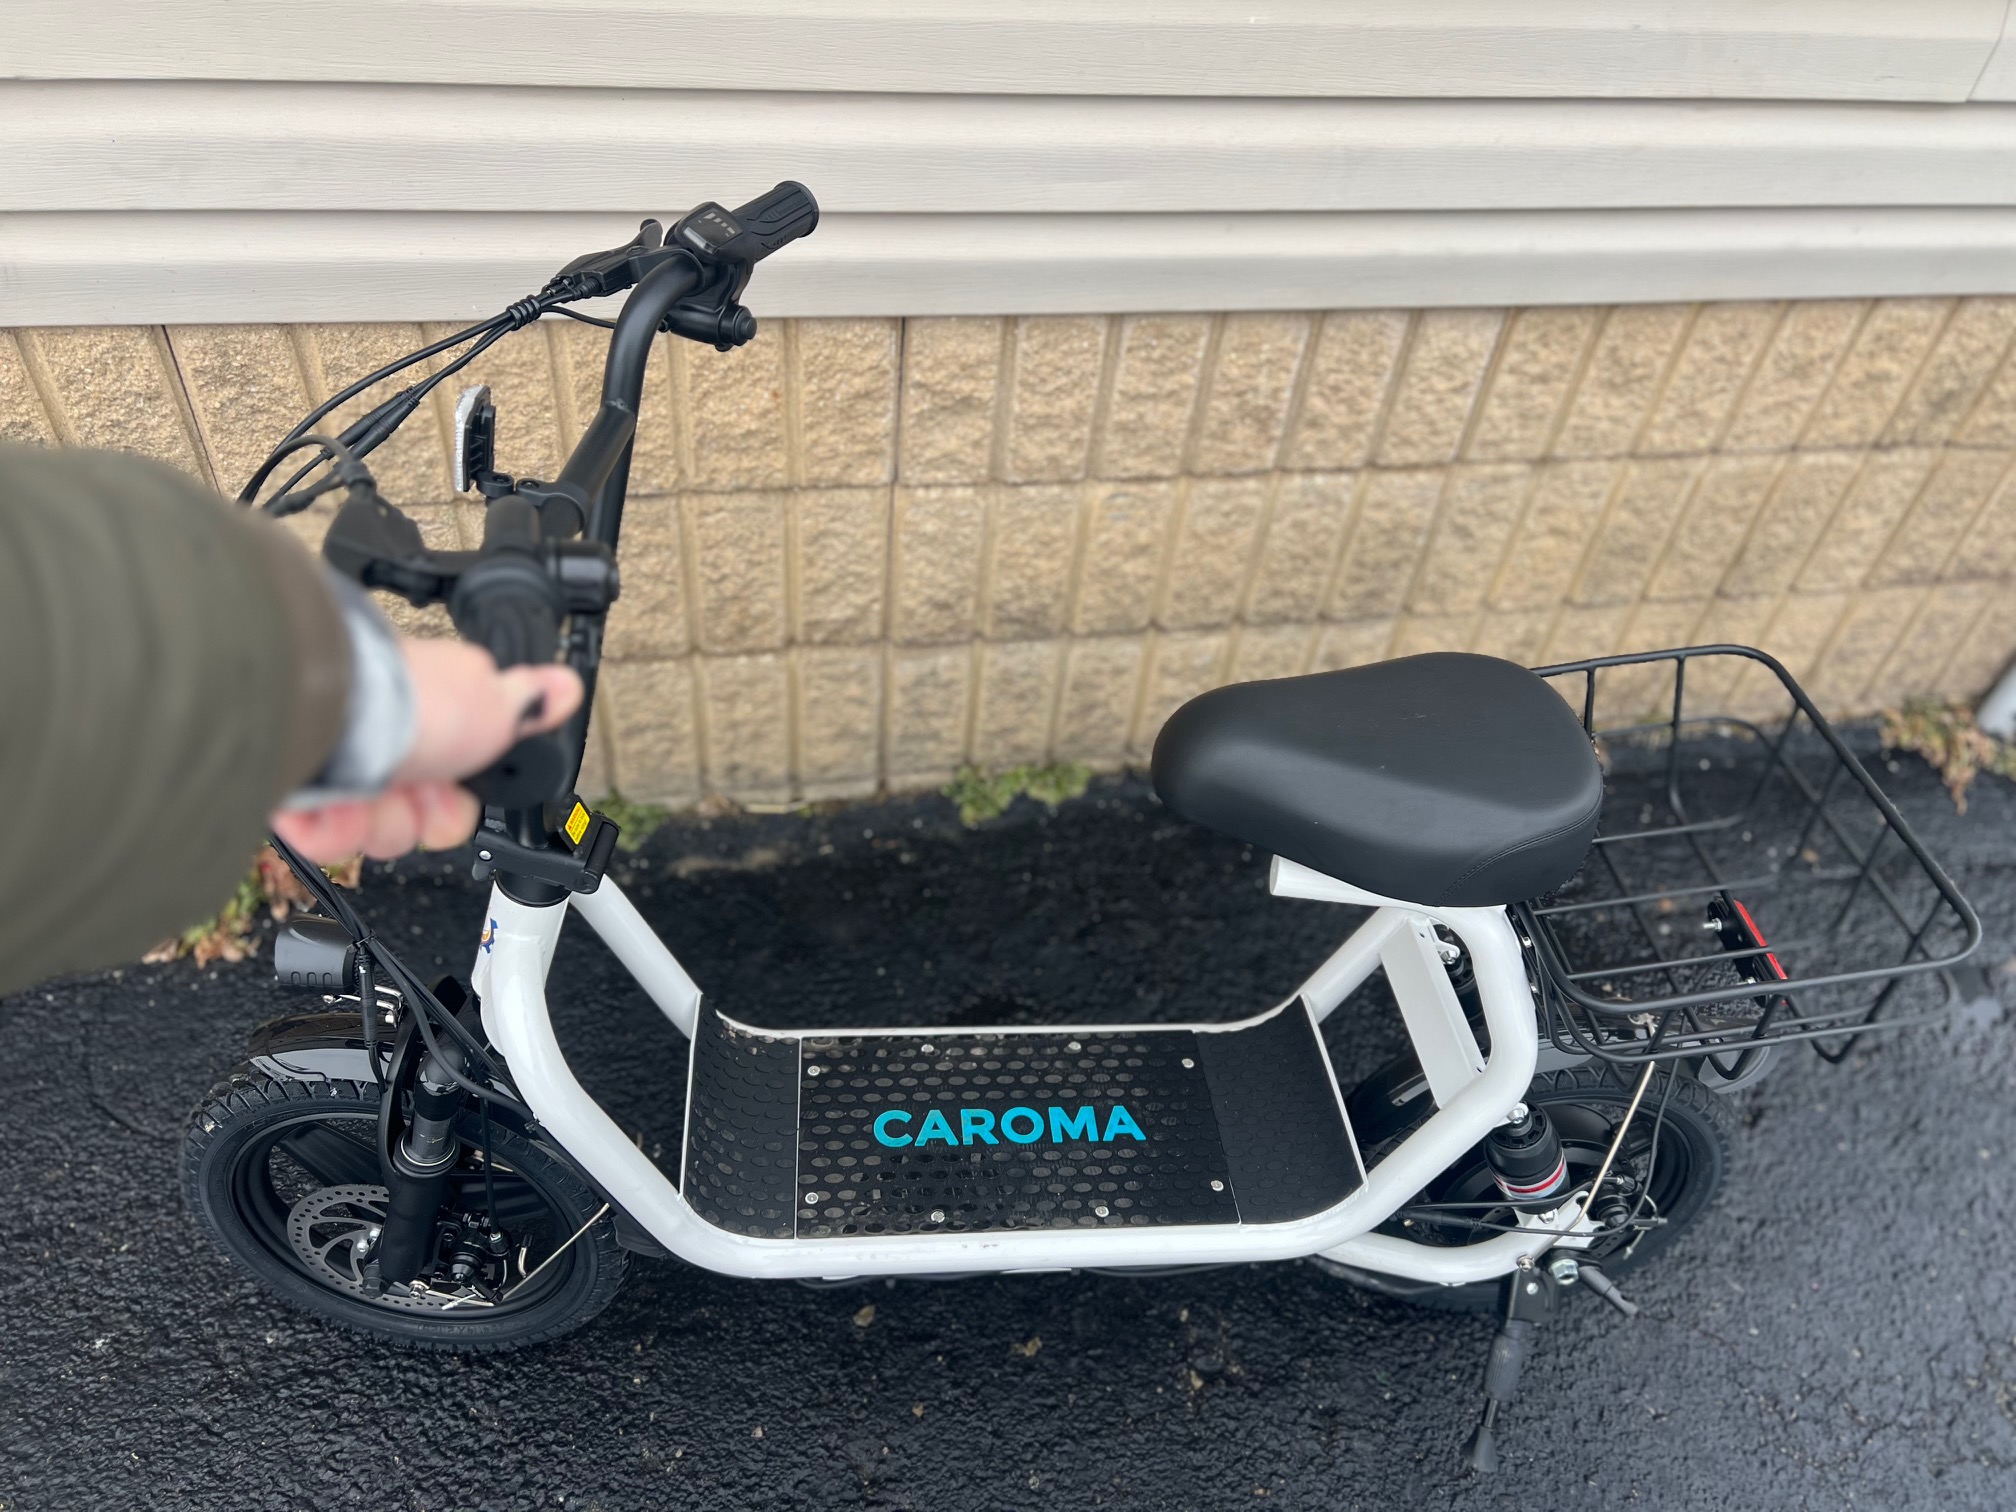
Figure 2: Handlebar Controls and Battery Indicator (Illustrative)
5. بیٹری چارج کرنا
To charge your Caroma Electric Scooter D1:
- یقینی بنائیں کہ سکوٹر بند ہے۔
- Locate the charging port on the side of the battery compartment, near the ignition key.
- چارجر کو چارجنگ پورٹ سے جوڑیں، پھر چارجر کو ایک معیاری وال آؤٹ لیٹ میں لگائیں۔
- چارجر پر اشارے کی روشنی عام طور پر چارجنگ کے دوران سرخ اور مکمل چارج ہونے پر سبز ہو جائے گی۔
- مکمل چارج کے لیے چارج کرنے کا وقت تقریباً 7-8 گھنٹے ہے۔
- ہمیشہ اپنے سکوٹر کے ساتھ فراہم کردہ اصل چارجر کا استعمال کریں۔
Figure 3: Charging Port and Ignition Key (Illustrative)
6 دیکھ بھال
- صفائی: اشتہار کے ساتھ سکوٹر کو صاف کریں۔amp کپڑا ہائی پریشر والے پانی کا استعمال نہ کریں اور نہ ہی اسکوٹر کو پانی میں ڈبو دیں۔
- ٹائر: ٹائر کا پریشر باقاعدگی سے چیک کریں اور ضرورت کے مطابق فلیٹ کریں۔ ٹوٹ پھوٹ کے لیے ٹائر کا معائنہ کریں۔
- بریک: Periodically check brake pads and cables for wear. Adjust brake tension to ensure responsive braking.
- بیٹری کی دیکھ بھال: Store the scooter in a cool, dry place. If storing for extended periods, charge the battery to 50-70% and recharge every 2-3 months.
- بندھن: وقتاً فوقتاً تمام پیچ، بولٹ، اور فوری ریلیز کے طریقہ کار کو چیک کریں تاکہ یہ یقینی بنایا جا سکے کہ وہ سخت اور محفوظ ہیں۔
7 خرابیوں کا سراغ لگانا
| مسئلہ | ممکنہ وجہ | حل |
|---|---|---|
| سکوٹر آن نہیں ہے۔ | Battery is low or dead; Ignition key not in ON position | Charge the battery; Turn the ignition key to ON |
| موٹر مشغول نہیں ہے۔ | Throttle issue; Loose connection | Check throttle for obstruction; Inspect all cable connections |
| بریک ڈھیلے محسوس ہوتے ہیں۔ | Brake cable tension is low; Worn brake pads | Adjust brake cable tension; Replace brake pads |
| کم رینج/رفتار | Low tire pressure; Battery degradation; Heavy load | Inflate tires to recommended PSI; Consult support for battery check; Reduce load |
8. وضاحتیں
| فیچر | تفصیل |
|---|---|
| برانڈ | کیرما |
| ماڈل | D1 (B0FSZZL7PR) |
| موٹر پاور | 800W (Rated) / 1200W (Peak) |
| زیادہ سے زیادہ حد | 30 میل تک |
| زیادہ سے زیادہ رفتار | 20 میل فی گھنٹہ تک |
| ٹائر کا سائز | 14 انچ موٹے ٹائر |
| بریکنگ سسٹم | ڈوئل مکینیکل ڈسک بریک |
| معطلی | دوہری معطلی |
| زیادہ سے زیادہ لوڈ | 300 پونڈ (136 کلوگرام) |
| خصوصیات | Foldable, Seat, Carry Basket, Headlight, Tail Light |
9. وارنٹی اور سپورٹ
For warranty information, technical support, or service inquiries, please refer to the warranty card included with your product or visit the official Caroma webسائٹ خریداری کے ثبوت کے طور پر اپنی خریداری کی رسید اپنے پاس رکھیں۔
Caroma Store: Visit the Caroma Store on Amazon
Ask a question about this manual
Ask about setup, troubleshooting, compatibility, parts, safety, or missing instructions. Manuals+ will review the question and use this page’s manual context to help answer it.