
1. تعارف
This manual provides detailed instructions for the installation, operation, and maintenance of your Jennov K4-P52-V18 Wireless Solar Video Surveillance Camera Kit. Please read this manual thoroughly before using the product to ensure proper setup and functionality. Keep this manual for future reference.
2. پیکیج کے مشمولات
Carefully unpack the box and verify that all the following items are included:
- 1 x NVR (V18) with Built-in 10-inch Touchscreen Monitor
- 4 x Wireless Solar Cameras
- 1 x 500GB HDD (Built-in)
- 1 ایکس ماؤس
- 1 x NVR پاور اڈاپٹر
- 1 x 9V Battery (for NVR, included)
- 1 ایکس یوزر مینوئل (یہ دستاویز)
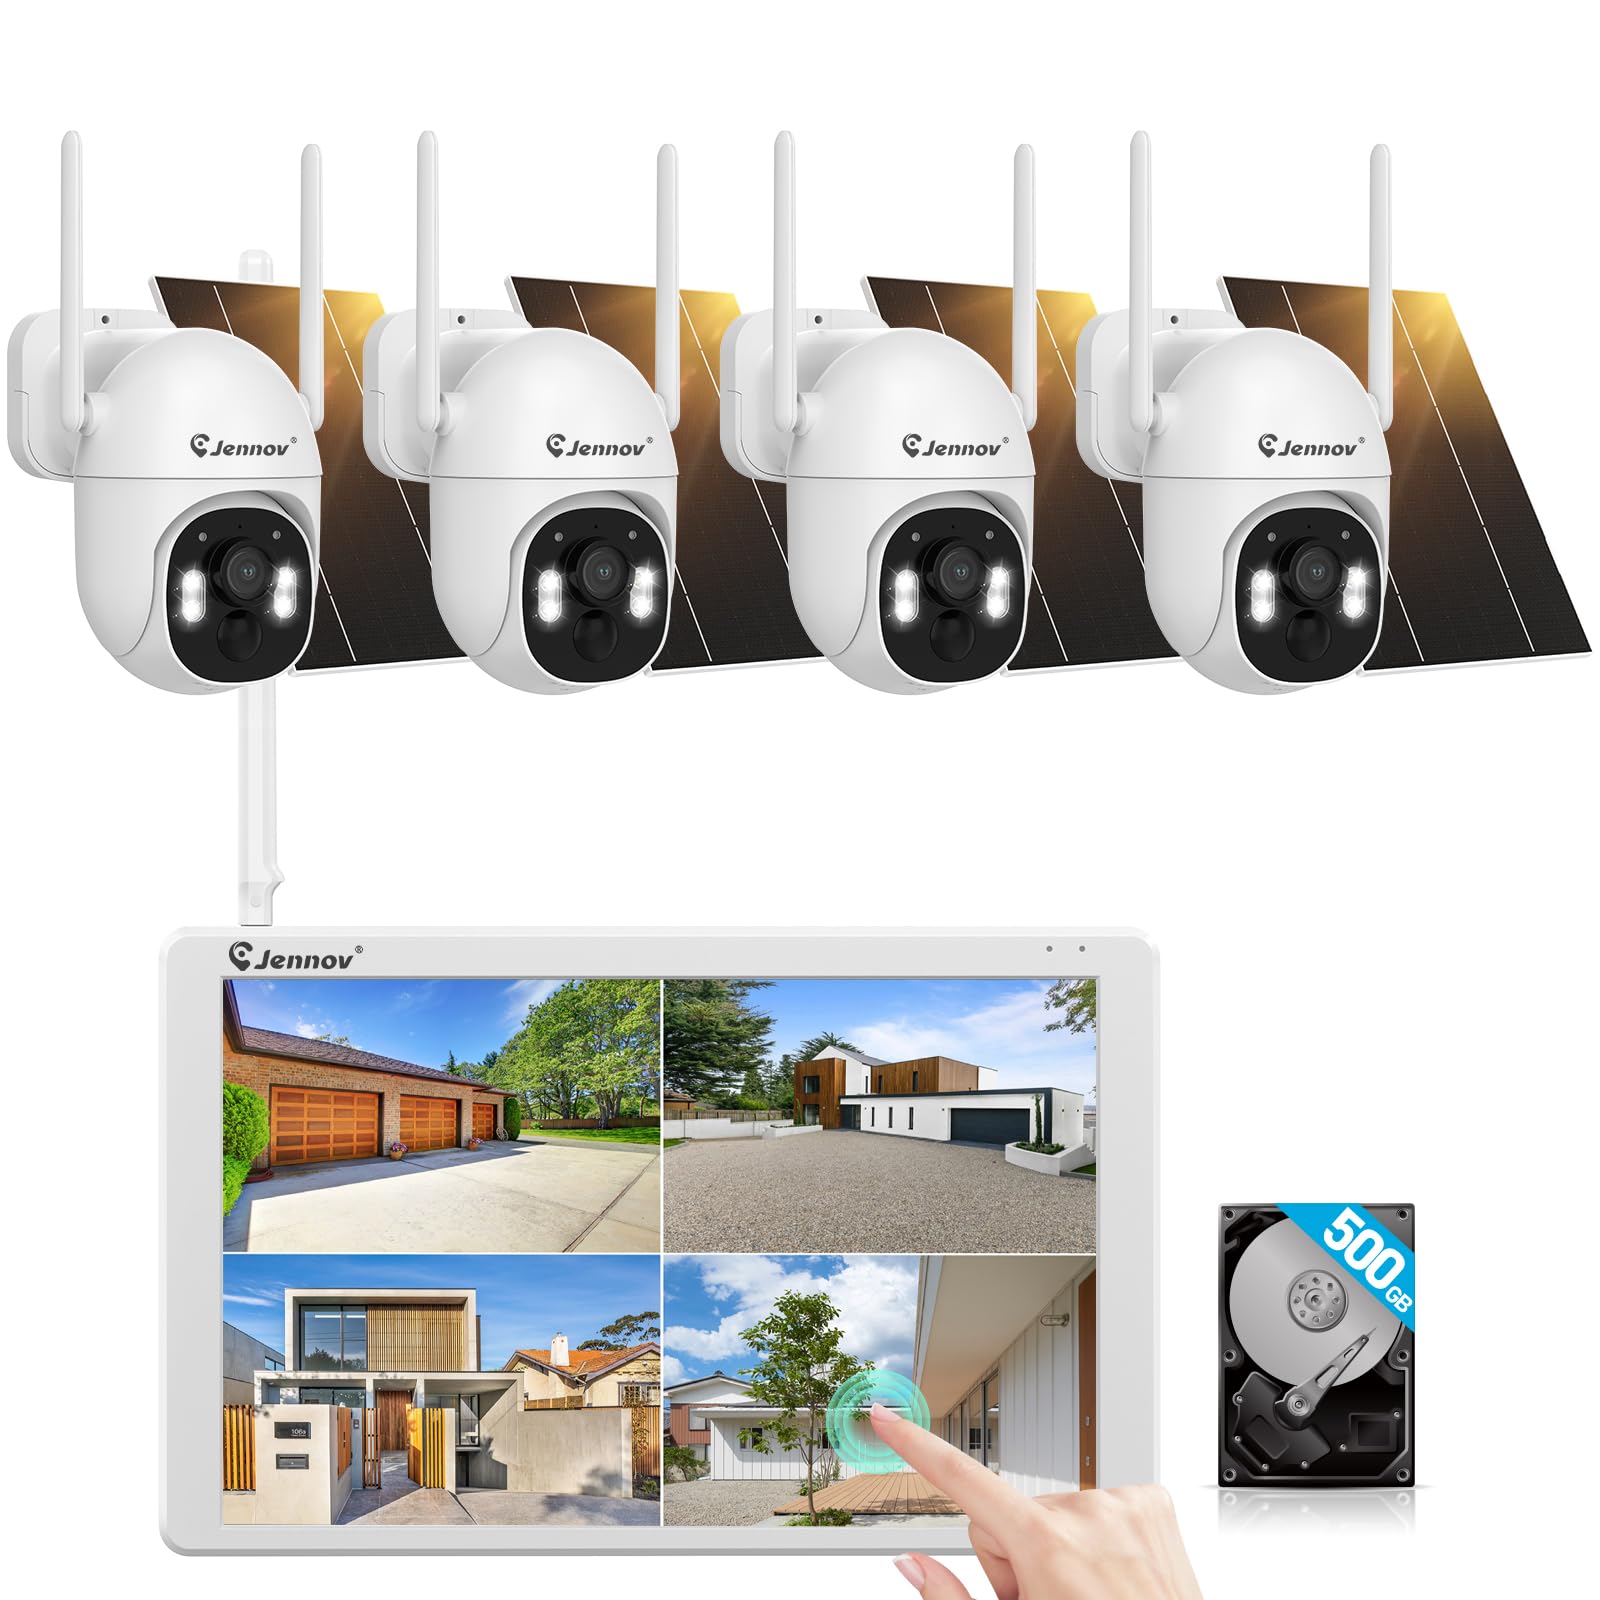
تصویر: ختمview of the Jennov K4-P52-V18 Wireless Solar Video Surveillance Camera Kit, showing the NVR with monitor and multiple cameras.
3. پروڈکٹ ختمview
The Jennov K4-P52-V18 is a comprehensive wireless video surveillance system designed for outdoor security. It features a 10-channel NVR with an integrated 10-inch touchscreen monitor for direct viewing and control. The system includes four 1920p resolution cameras, each powered by a solar panel, offering wireless connectivity and PTZ (Pan-Tilt-Zoom) functionality for flexible monitoring. A 500GB hard disk drive (HDD) is pre-installed for local video storage.
4. سیٹ اپ
4.1 NVR Setup
- جگہ کا تعین: Place the NVR in a secure, central location within your property, ensuring it is within Wi-Fi range of the cameras.
- پاور کنکشن: Connect the NVR power adapter to the NVR's power input and then to a power outlet. The NVR will power on automatically.
- ماؤس کنکشن: Connect the included USB mouse to a USB port on the NVR for navigation.
- ابتدائی بوٹ: The NVR will boot up and display the initial setup wizard on the 10-inch touchscreen. Follow the on-screen prompts to configure basic settings such as language, time zone, and password.
4.2 کیمرہ تنصیب
- مقام کا انتخاب: Choose suitable outdoor locations for each camera, ensuring a clear line of sight to the monitoring area and sufficient sunlight exposure for the solar panel. The cameras are designed for wall mounting.
- چڑھنا: Use the provided mounting hardware to securely attach each camera to a wall or other stable surface. Adjust the camera angle for optimal coverage.
- سولر پینل کنکشن: Ensure the solar panel is securely connected to the camera and positioned to receive maximum direct sunlight throughout the day.
- جوڑا بنانا (اگر ضروری ہو): کیمرے عام طور پر NVR کے ساتھ پہلے سے جوڑے ہوتے ہیں۔ اگر کیمرہ خود بخود منسلک نہیں ہوتا ہے تو دستی جوڑا بنانے کی ہدایات کے لیے NVR کے آن اسکرین مینو سے رجوع کریں۔
4.3 نیٹ ورک کی تشکیل
ریموٹ کو فعال کرنے کے لیے viewing and software updates, connect the NVR to your home Wi-Fi network:
- On the NVR touchscreen, navigate to سسٹم کی ترتیبات > نیٹ ورک.
- منتخب کریں۔ وائی فائی and choose your network from the list of available networks.
- اپنا Wi-Fi پاس ورڈ درج کریں اور کنکشن کی تصدیق کریں۔
5. آپریٹنگ ہدایات
5.1 لائیو View
After successful setup, the NVR will display the live feed from all connected cameras on the 10-inch monitor. You can tap on a specific camera feed to view یہ پوری سکرین میں ہے.
5.2 PTZ کنٹرول
For cameras with PTZ functionality:
- In full-screen live view, look for PTZ control icons on the screen.
- Tap the directional arrows to pan (left/right) and tilt (up/down) the camera.
- Use the zoom in/out icons to adjust the optical or digital zoom.
5.3 ریکارڈنگ اور پلے بیک
The system automatically records video to the built-in 500GB HDD based on motion detection or continuous recording settings. To access recorded footage:
- مین مینو سے، منتخب کریں۔ پلے بیک.
- Choose the desired camera and date/time range.
- Use the timeline to navigate through recordings and play back events.
5.4 ریموٹ رسائی
Download the official Jennov mobile application (available on iOS and Android) to view live feeds, playback recordings, and receive alerts remotely. Follow the app's instructions to add your NVR system using its unique ID or QR code.
6 دیکھ بھال
- صفائی: Regularly clean the camera lenses and solar panels with a soft, damp واضح تصاویر اور موثر شمسی چارجنگ کو یقینی بنانے کے لیے کپڑا۔ سخت کیمیکل استعمال نہ کریں۔
- سافٹ ویئر اپ ڈیٹس: Periodically check for firmware updates for the NVR and cameras through the system settings or the mobile app to ensure optimal performance and security.
- ایچ ڈی ڈی مینجمنٹ: The 500GB HDD will overwrite older footage once full. If you need to retain specific recordings, back them up to an external USB drive.
- بیٹری چیک: Ensure the 9V battery in the NVR is functioning correctly, especially if experiencing power interruptions.
7 خرابیوں کا سراغ لگانا
| مسئلہ | ممکنہ وجہ | حل |
|---|---|---|
| No image on NVR monitor | NVR not powered on; Camera not connected/powered; Loose cable | Check NVR power adapter; Ensure cameras are charged and within range; Reconnect all cables securely. |
| Cameras not recording | Recording settings incorrect; HDD full or faulty | Verify recording schedules in NVR settings; Check HDD status and free space; Format HDD if necessary (this will erase all data). |
| ریموٹ رسائی کام نہیں کر رہی ہے۔ | NVR not connected to internet; Incorrect app settings | Check NVR Wi-Fi connection; Ensure NVR is online; Re-add NVR to the mobile app. |
| PTZ control unresponsive | Camera power issue; Software glitch | Check camera power and solar charging; Restart the camera and NVR. |
8. وضاحتیں
| فیچر | تفصیل |
|---|---|
| ماڈل نمبر | K4-P52-V18 |
| برانڈ | جینوف |
| کنیکٹوٹی ٹیکنالوجی | وائرلیس، وائی فائی |
| طاقت کا منبع | شمسی توانائی سے چلنے والا |
| خصوصی خصوصیات | PTZ Technology, 10-inch Touchscreen Monitor |
| ویڈیو کیپچر ریزولوشن | 1920ص |
| چڑھنے کی قسم | وال ماؤنٹ |
| شامل اجزاء | NVR (V18), 4 Cameras, 500GB HDD (Built-in), Mouse, NVR Adapter, 9V Battery |
| مصنوعات کے طول و عرض | 18 x 39 x 27 سینٹی میٹر |
| شے کا وزن | 4.16 کلوگرام |
| کارخانہ دار | Shenzhen Dianchen Industrial Co.,Ltd |
9. وارنٹی اور سپورٹ
For warranty information and technical support, please refer to the documentation provided with your purchase or contact Jennov customer service directly. Contact details can typically be found on the manufacturer's official webسائٹ یا مصنوعات کی پیکیجنگ پر۔