
1. حفاظتی معلومات
Before operating your TS TST GRP LLC R9 Electric Bike, please read this manual thoroughly. Adhere to all local traffic laws and regulations. Always wear a helmet and appropriate safety gear. Regular maintenance is crucial for safe operation.
- یقینی بنائیں کہ ہر سواری سے پہلے تمام اجزاء کو محفوظ طریقے سے باندھ دیا گیا ہے۔
- Check tire pressure, brake function, and battery level before use.
- موٹر سائیکل کو شراب یا منشیات کے زیر اثر نہ چلائیں۔
- اپنے اردگرد کے ماحول سے آگاہ رہیں اور دفاعی طور پر سواری کریں۔
2. پیکیج کے مشمولات
تصدیق کریں کہ تمام اشیاء پیکیج میں موجود ہیں:
- TS TST GRP LLC R9 Electric Bike (partially assembled)
- 48V 15Ah ہٹنے والی بیٹری
- بیٹری چارجر
- اسمبلی ٹول کٹ
- ہدایات دستی (یہ دستاویز)

Image: All components of the TS TST GRP LLC R9 Electric Bike laid out for assembly, including the frame, wheels, battery, and accessories.
3. سیٹ اپ اور اسمبلی
The R9 Electric Bike arrives approximately 90% assembled. The following steps detail the completion of the assembly process.
3.1 ہینڈل بار کی تنصیب
- موٹر سائیکل کو اس کی پیکنگ سے احتیاط سے ہٹا دیں۔
- Attach the handlebars to the stem using the provided bolts and Allen key from the assembly tool kit. Ensure the handlebars are centered and tightened securely.
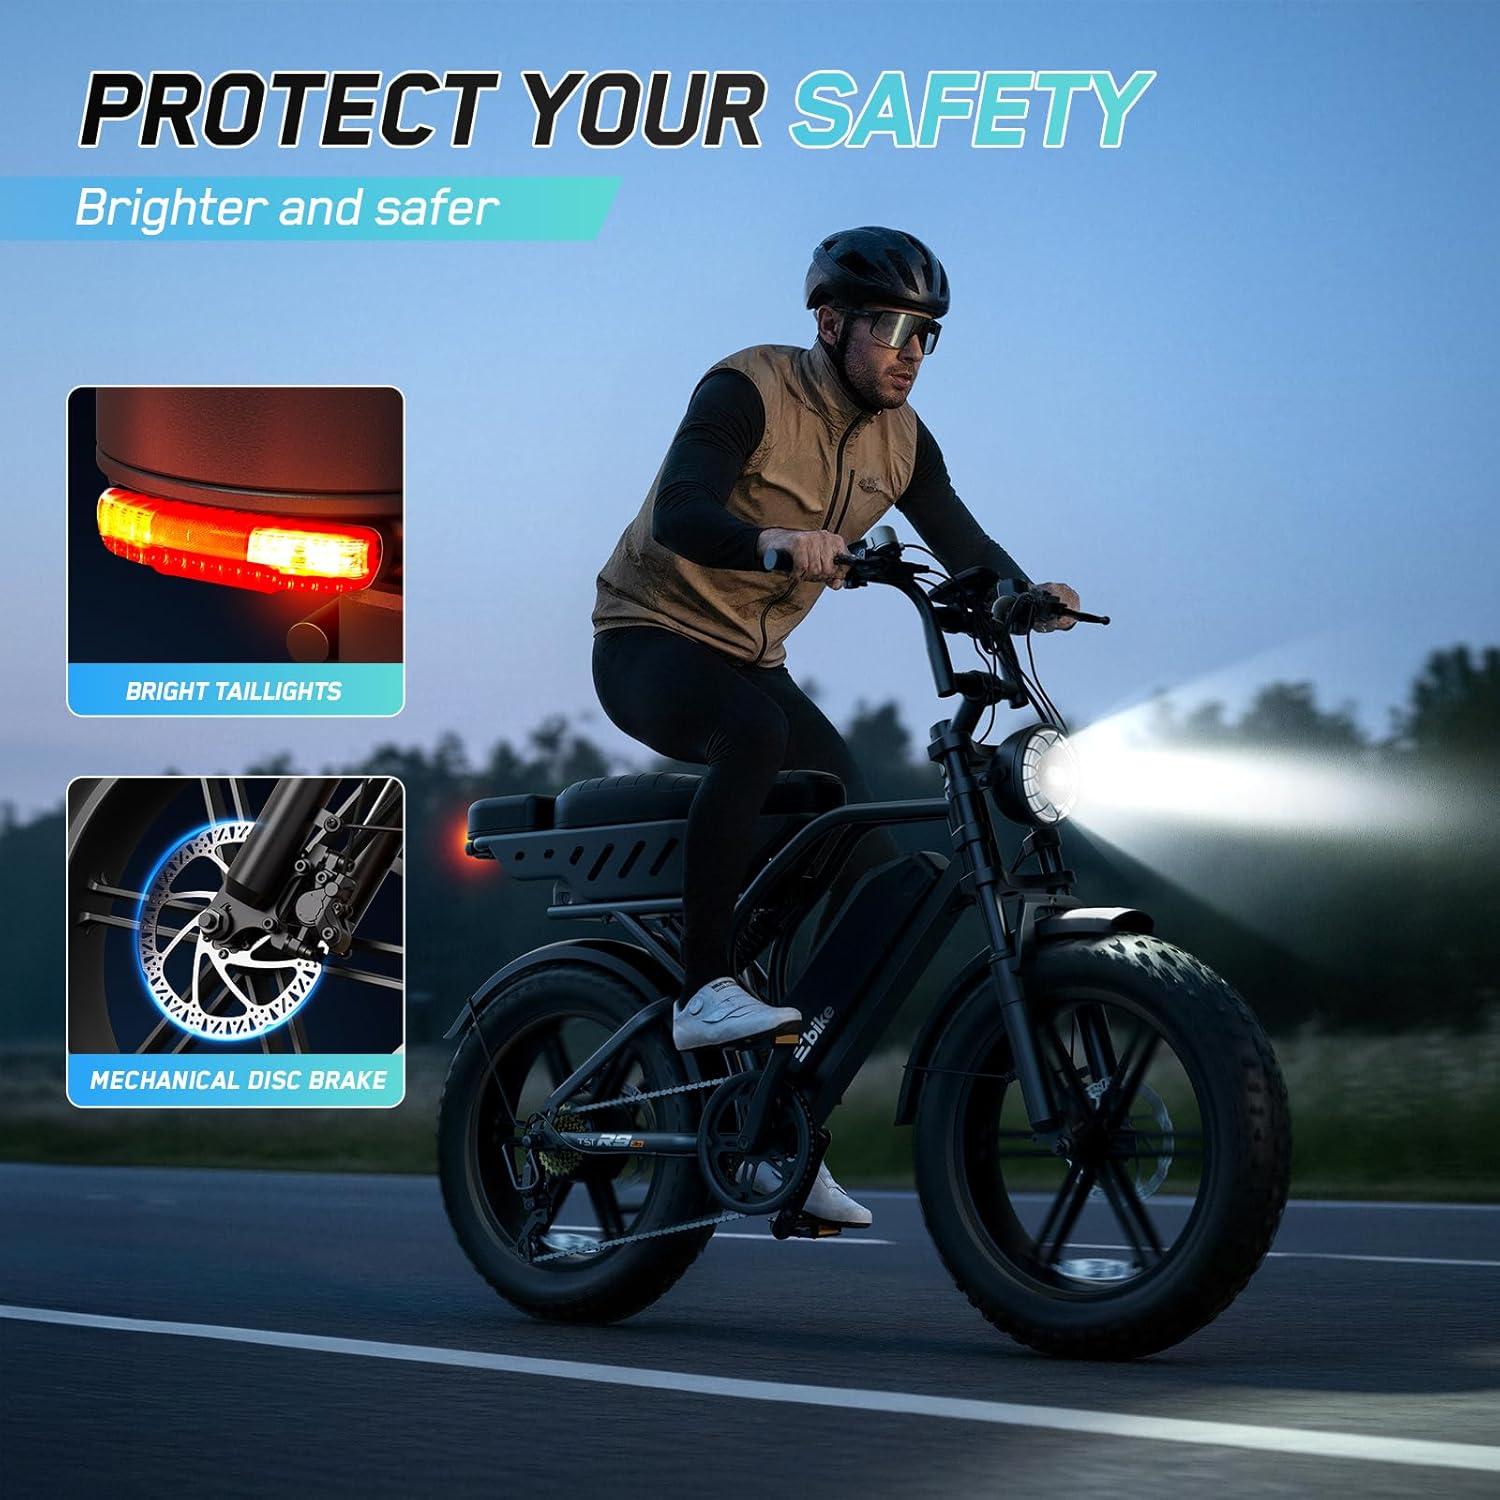
Image: A person installing the handlebars onto the bike's stem, securing them with bolts.
3.2 فرنٹ وہیل کی تنصیب
- Align the front wheel with the fork. Ensure the brake rotor slides correctly into the brake caliper.
- Insert the quick-release skewer or axle through the wheel hub and secure it according to the instructions provided with the skewer/axle.

Image: A person attaching the front wheel to the bike's front fork, ensuring proper alignment with the brake caliper.
3.3 پیڈل کی تنصیب
- بائیں (L) اور دائیں (R) پیڈل کی شناخت کریں۔
- Thread the right pedal (R) clockwise into the right crank arm.
- Thread the left pedal (L) counter-clockwise into the left crank arm.
- رینچ کے ساتھ دونوں پیڈل کو مضبوطی سے سخت کریں۔
3.4 بیٹری کی تنصیب اور ابتدائی چارج
- Insert the removable 48V 15Ah battery into its designated compartment on the bike frame. Ensure it clicks securely into place.
- Use the provided charger to fully charge the battery before the first ride. A full charge typically takes 7-8 hours.

تصویر: ایک قریبی اپ view of the removable battery securely housed within the electric bike's frame.
3.5 پری رائیڈ چیکس
- Confirm all bolts and quick releases are tight.
- Check tire pressure (recommended pressure is usually indicated on the tire sidewall).
- مناسب کام کے لیے سامنے اور پیچھے دونوں بریکوں کی جانچ کریں۔
- Ensure the battery is fully charged and securely locked.
3.6 اسمبلی ویڈیو گائیڈ
اسمبلی کے عمل کے بارے میں بصری رہنمائی کے لیے، براہ کرم درج ذیل ویڈیو کو دیکھیں:
Video: A detailed installation guide for the TST Electric Bike, demonstrating each step of the assembly process.
4. آپریٹنگ ہدایات
Familiarize yourself with the bike's controls and modes for an optimal riding experience.
4.1 پاور آن/آف اور ڈسپلے
- To power on the bike, press and hold the power button on the LCD display. The display will illuminate, showing speed, battery level, and distance.
- پاور آف کرنے کے لیے، ڈسپلے آف ہونے تک پاور بٹن کو دوبارہ دبائے رکھیں۔

Image: The LCD display mounted on the handlebars, providing real-time information such as speed, battery level, and distance.
4.2 Riding Modes and Pedal Assist System (PAS)
The R9 Electric Bike offers three riding modes:
- الیکٹرک موڈ: Pure electric power, driven solely by the motor.
- Assisted Mode: Combines pedal power with motor assistance (5 levels). Adjust assistance levels using the '+' and '-' buttons on the display.
- Ordinary Cycling Mode: Traditional pedal power without motor assistance.
4.3 تھروٹل آپریشن
The throttle provides instant power from the motor. Gently twist the throttle on the right handlebar to engage the motor. Be mindful of the throttle's sensitivity, especially at lower speeds.
4.4 گیئر شفٹنگ
The bike features a 7-speed gear system. Use the thumb shifter on the right handlebar to change gears, adapting to different terrains and riding conditions.
4.5 بریکنگ سسٹم
The R9 is equipped with mechanical disc brakes for reliable stopping power. The left lever controls the rear brake, and the right lever controls the front brake. Apply both brakes smoothly and simultaneously for effective stopping.
4.6 Headlights and Taillights
Activate the large LED headlight and bright taillights for improved visibility, especially during low-light conditions or night riding. The taillights also enhance safety by making you more visible to others.

Image: The electric bike illuminated by its bright LED headlight and taillights, demonstrating enhanced visibility for night riding.
4.7 ایپ کنیکٹیویٹی
The bike supports smartphone app integration for monitoring ride data and accessing advanced settings. Refer to the app's specific instructions for pairing and usage.
4.8 Unlocking Speed Limit
The R9 Electric Bike may have a default speed limit. To manually unlock the speed limit to 28mph, follow the steps shown in this video:
Video: Instructions on how to manually unlock the speed limit of the electric bike to reach 28mph.
5 دیکھ بھال
باقاعدگی سے دیکھ بھال آپ کی الیکٹرک بائیک کی لمبی عمر اور محفوظ آپریشن کو یقینی بناتی ہے۔
5.1 بیٹری کی دیکھ بھال
- بیٹری کو باقاعدگی سے چارج کریں، چاہے استعمال میں نہ ہو، اس کی صحت برقرار رکھنے کے لیے۔
- بیٹری کو بار بار مکمل طور پر خارج کرنے سے گریز کریں۔
- بیٹری کو ٹھنڈی، خشک جگہ پر براہ راست سورج کی روشنی اور انتہائی درجہ حرارت سے دور رکھیں۔
5.2 ٹائر کی دیکھ بھال
- Check tire pressure before each ride. Maintain pressure within the recommended range (typically 5-30 PSI for fat tires).
- پہننے، کٹنے یا پنکچر کے لیے ٹائروں کا معائنہ کریں۔
5.3 Brake System Maintenance
- Regularly check brake pads for wear and replace them if necessary.
- Ensure brake levers have proper tension and respond effectively.
- Keep brake rotors clean and free from oil or grease.
5.4 سلسلہ اور ڈرائیو ٹرین
- Clean and lubricate the chain regularly, especially after riding in wet or dusty conditions.
- Inspect the chain for rust or excessive wear.
5.5 معطلی کا نظام
The R9 features a dual suspension system for a comfortable ride. Periodically inspect the front and rear suspension components for any damage or leaks. Keep the suspension clean.

تصویر: ایک تفصیلی view of the bike's rear suspension, designed to absorb shocks and provide a smoother ride.
Video: Demonstrates the electric bike's suspension system in action, highlighting its ability to handle varied terrain.
6 خرابیوں کا سراغ لگانا
This section addresses common issues you might encounter with your R9 Electric Bike.
6.1 موٹر سائیکل آن نہیں ہو رہی ہے۔
- چیک کریں کہ آیا بیٹری پوری طرح سے چارج اور صحیح طریقے سے انسٹال ہے۔
- Ensure the battery is locked into place.
- Verify that the power button on the display is pressed correctly.
6.2 Motor Not Engaging
- Confirm the bike is powered on and the battery has sufficient charge.
- Check the pedal assist level; ensure it is not set to '0' if using PAS.
- ڈھیلے پن یا نقصان کے لیے تمام برقی کنکشن کا معائنہ کریں۔
6.3 Display Errors
- If an error code appears, try turning the bike off and on again.
- Consult the app or contact customer support with the specific error code.
6.4 Brake Issues
- If brakes feel spongy, they may need adjustment or bleeding.
- If braking is weak, inspect brake pads for wear and replace if necessary.
6.5 عمومی مسائل
For any issues not covered here, or if troubleshooting steps do not resolve the problem, please contact customer support.
7. وضاحتیں
Detailed technical specifications for the TS TST GRP LLC R9 Electric Bike:
| فیچر | تفصیلات |
|---|---|
| ماڈل کا نام | R9 الیکٹرک بائیک |
| برانڈ | TS TST GRP LLC |
| موٹر | 1500W Peak (750W Rated) |
| ٹارک | 90 این ایم |
| بیٹری | 48V 15Ah Removable |
| چارج کرنے کا وقت | 7-8 گھنٹے |
| زیادہ سے زیادہ حد | 65 میل تک (پیڈل اسسٹ) |
| ٹائر | 20" x 4" موٹے ٹائر |
| معطلی کی قسم | Dual (Front & Rear) |
| رفتار کی تعداد | 7-رفتار |
| بریک اسٹائل | مکینیکل ڈسک بریک |
| فریم کا مواد | لوہا |
| سائیکل کا وزن | 96.56 پونڈ |
| لوڈ کی صلاحیت | 450 پونڈ |
| تجویز کردہ رائڈر اونچائی | 4'5" - 6'3" |
| واٹر پروف ریٹنگ | IPX4 |

Image: A visual representation of the electric bike's dimensions, including height, length, and seat height, along with its weight and load capacity.
8. وارنٹی اور سپورٹ
Your TS TST GRP LLC R9 Electric Bike is covered by a comprehensive warranty and dedicated customer support.
8.1 وارنٹی کی معلومات
The electric bike comes with a 180 دن کی وارنٹی covering manufacturing defects. This warranty ensures peace of mind and reflects our commitment to product quality.
8.2 Returns and Exchanges
ہم پیش کرتے ہیں۔ 15-day free returns/exchanges for quality issues. Free replacement parts are also provided during this period for manufacturing defects.
8.3 کسٹمر سپورٹ
For any questions, assistance with assembly, troubleshooting, or warranty claims, our 24/7 کسٹمر سروس team is available to help. Please refer to the contact information provided with your purchase or visit the official TS TST GRP LLC webسپورٹ کی تفصیلات کے لیے سائٹ۔

تصویر: ایک اوورview of the support services, including safer shipping, 180-day coverage for manufacturing defects, and dedicated customer support for returns and replacement parts.