1. تعارف
The ECHOGEAR Outlet Shelf is designed to provide a convenient, space-saving solution for organizing small electronics and other items up to 10 lbs. It easily installs onto existing wall outlets, offering a sturdy platform and integrated cable management to keep your space tidy and functional. This manual provides detailed instructions for installation, operation, and maintenance of your ECHOGEAR Outlet Shelf.
2. باکس میں کیا ہے۔
تصدیق کریں کہ تمام اجزاء آپ کے پیکیج میں شامل ہیں:
- ECHOGEAR Outlet Shelf Unit
- Standard Wall Plate Cover
- Decora Wall Plate Cover
- بڑھتے ہوئے ہارڈ ویئر (پیچ)

Figure 2.1: Included components of the ECHOGEAR Outlet Shelf.
3. وضاحتیں
| برانڈ | ECHOGEAR |
| ماڈل نمبر | EGOS1 (6543850200) |
| مواد | پلاسٹک |
| رنگ | سفید |
| پروڈکٹ کے طول و عرض (D x W x H) | 5.32"D x 4.77"W x 6.84"H (13.51 cm D x 12.12 cm W x 17.37 cm H) |
| شے کا وزن | 13.6 اونس |
| وزن کی حد | 10 پاؤنڈ (4.5 کلوگرام) |
| تنصیب کی قسم | Wall Mount (over existing outlet) |
| اسمبلی کی ضرورت ہے۔ | جی ہاں |

Figure 3.1: ECHOGEAR Outlet Shelf dimensions and weight capacity.
4. حفاظتی معلومات
Please read and understand all safety information before installation and use.
- Do not exceed the weight limit of 10 lbs (4.5 kg). Overloading the shelf can cause damage to the product, the outlet, or personal injury.
- Ensure proper installation to avoid hazards. If you are unsure about any step, consult a qualified electrician.
- Always turn off power at the circuit breaker before working with electrical outlets.
- چھوٹے بچوں اور پالتو جانوروں کو تنصیب کے علاقے سے دور رکھیں۔
- Do not use the shelf in wet or damp locations unless the outlet is specifically rated for such environments.
5. سیٹ اپ اور انسٹالیشن
The ECHOGEAR Outlet Shelf is designed for easy installation on most standard and Decora style outlets. A flathead screwdriver is typically the only tool required.
- پاور آف کریں: For safety, turn off the power to the outlet at your home's circuit breaker before beginning installation.
- Remove Existing Wall Plate: Unscrew and remove the existing wall plate from your electrical outlet.
- Select New Wall Plate: Choose between the included Standard or Decora style wall plate cover that matches your existing outlet type.
- پوزیشن شیلف: Align the ECHOGEAR Outlet Shelf unit over the exposed outlet. The shelf is designed to fit snugly around the outlet.
- Secure Shelf: Use the provided screws to secure the new wall plate and the shelf unit to the outlet. Ensure it is firmly attached and does not wobble.
- Route Cables (Optional): If using the cable management feature, lift the top cover of the shelf to reveal the built-in cable channel. Route your device's power cable through this channel to keep it tidy. You may coil excess cable within the compartment.
- بجلی کی بحالی: Once the shelf is securely installed, restore power at the circuit breaker.

Figure 5.1: Simple installation process.
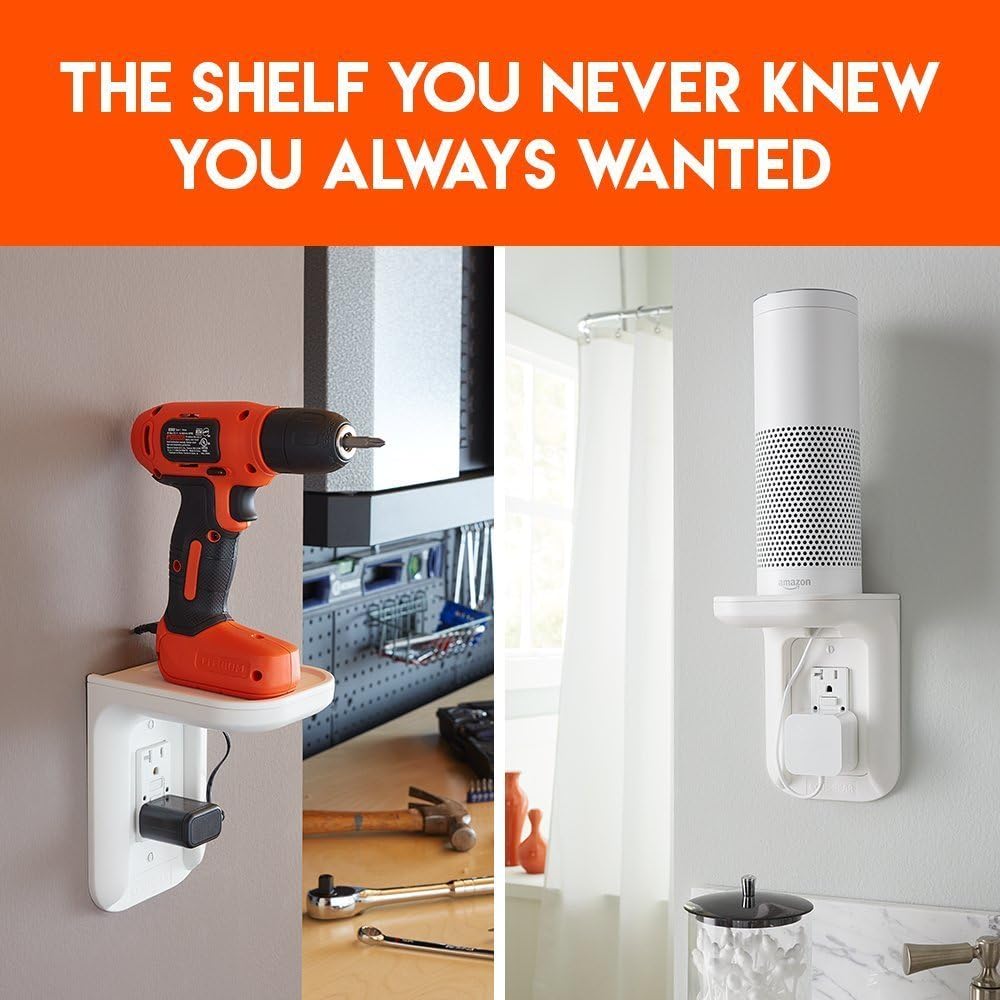
Figure 5.2: Choose the correct wall plate for your outlet type.
انسٹالیشن ویڈیو
Video 5.1: Official ECHOGEAR installation guide for the Outlet Shelf, demonstrating space-saving and cable management features.
Video 5.2: Installation demonstration of an outlet shelf with Decora style outlets, showing how to secure the shelf and manage cables.
6. آپریٹنگ ہدایات
The ECHOGEAR Outlet Shelf provides a versatile platform for various devices.
- ڈیوائس کی جگہ کا تعین: Place small electronics such as smart speakers (e.g., Sonos, Amazon Echo, Google Home), electric toothbrushes, or other items weighing up to 10 lbs directly on the shelf.
- کیبل مینجمنٹ: Utilize the built-in cable channel by lifting the top cover. This allows you to neatly coil and hide excess power cables, providing a clean and streamlined look. For best results, consider using shorter cables for your devices.
- Outlet Access: The shelf design ensures that the lower outlet remains accessible for other plugs, even with a device on the shelf.
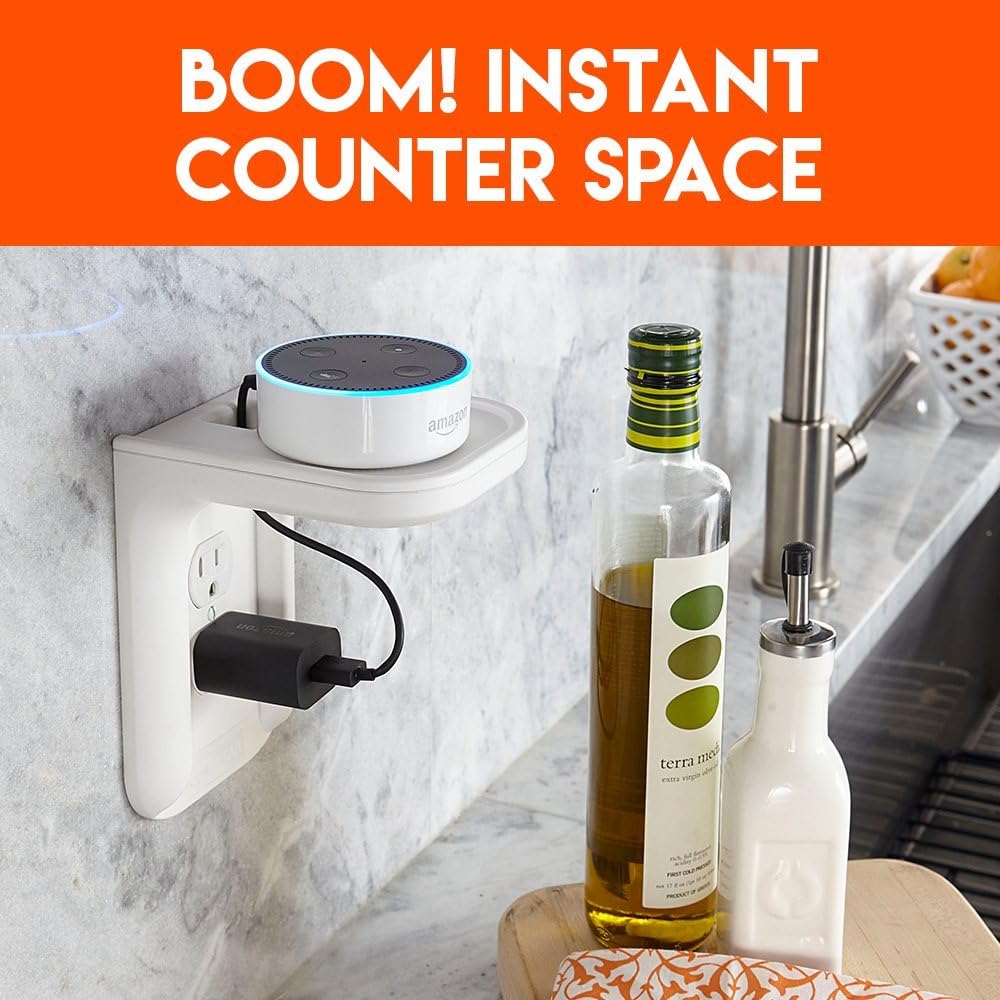
Figure 6.1: Shelf providing instant counter space for devices.

Figure 6.2: Built-in cable management for a tidy setup.
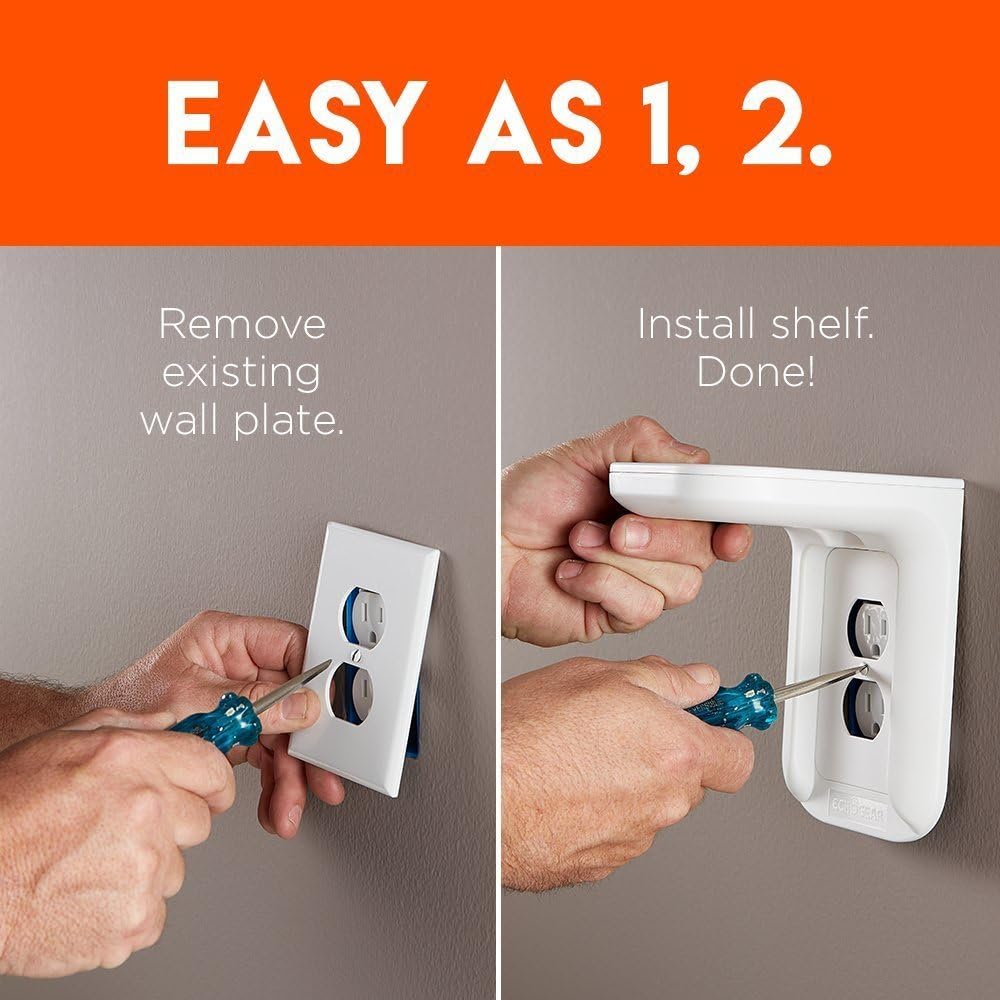
Figure 6.3: Versatile use for various small electronics.
7 دیکھ بھال
To keep your ECHOGEAR Outlet Shelf in optimal condition:
- صفائی: Wipe the shelf with a dry cloth as needed to remove dust and debris. Avoid using abrasive cleaners or harsh chemicals that could damage the finish.
- معائنہ: Periodically check the mounting screws to ensure they remain tight and the shelf is securely attached to the outlet.
8 خرابیوں کا سراغ لگانا
If you encounter any issues with your ECHOGEAR Outlet Shelf, refer to the following common solutions:
- Shelf is Loose/Wobbly: Ensure the mounting screws are fully tightened. If the issue persists, re-check that the correct wall plate was used and properly aligned during installation.
- ڈیوائس فٹ نہیں ہے: Verify that your device's dimensions and weight are within the specified limits (max 10 lbs).
- Cables are Not Tidy: Ensure excess cable is properly coiled within the cable management compartment. Consider using a shorter power cable for your device if the existing one is too long.
For further assistance, please contact ECHOGEAR customer support.
9. وارنٹی اور سپورٹ
ECHOGEAR products are designed for durability and performance. For specific warranty details and customer support, please refer to the warranty card included with your product or visit the official ECHOGEAR website. Our support team is available to assist with any questions or concerns regarding your Outlet Shelf.
رابطہ کی معلومات:
- Webسائٹ: www.echogear.com
- Support: Refer to website for contact options (phone, email, chat).


