1. تعارف
خریداری کے لیے آپ کا شکریہasing the IRRADIO VDP-4600HDW LCD/LED Projector. This manual provides essential information for the safe and efficient operation of your device. Please read it thoroughly before use and retain it for future reference.
2. حفاظتی ہدایات
- وینٹیلیشن کے سوراخوں کو مسدود نہ کریں۔ زیادہ گرم ہونے سے بچنے کے لیے پروجیکٹر کے ارد گرد مناسب ہوا کا بہاؤ یقینی بنائیں۔
- براہ راست پروجیکٹر کے لینس میں مت دیکھیں جب ایلamp آن ہے، کیونکہ تیز روشنی آنکھ کو نقصان پہنچا سکتی ہے۔
- Keep the projector away from water or other liquids. Do not operate in damp یا گیلے حالات.
- پروجیکٹر کے ساتھ فراہم کردہ پاور اڈاپٹر ہی استعمال کریں۔
- پروجیکٹر کو خود ٹھیک کرنے کی کوشش نہ کریں۔ تمام خدمات کو اہل اہلکاروں سے رجوع کریں۔
- پروجیکٹر کو ایک مستحکم سطح پر رکھیں تاکہ اسے گرنے سے روکا جا سکے۔
3. پیکیج کے مشمولات
براہ کرم چیک کریں کہ تمام اشیاء آپ کے پیکیج میں موجود ہیں:
- IRRADIO VDP-4600HDW Projector
- ریموٹ کنٹرول
- پاور کیبل
- HDMI کیبل
- اے وی کیبل
- صارف دستی
4. پروڈکٹ ختمview
4.1 پروجیکٹر کے اجزاء

تصویر 4.1: مجموعی طور پر view of the IRRADIO VDP-4600HDW Projector. This image displays the projector from an angled perspective, highlighting its compact design and the lens on the front left side, with ventilation grilles and control buttons visible on the top and sides.

تصویر 4.2: سامنے والا view of the projector. This image focuses on the large projection lens on the left, with the IRRADIO logo and ventilation grilles on the right side of the front panel.

تصویر 4.3: پیچھے view of the projector. This image shows the VGA port, focus adjustment knob, and keystone correction knob on the rear panel, along with additional ventilation.
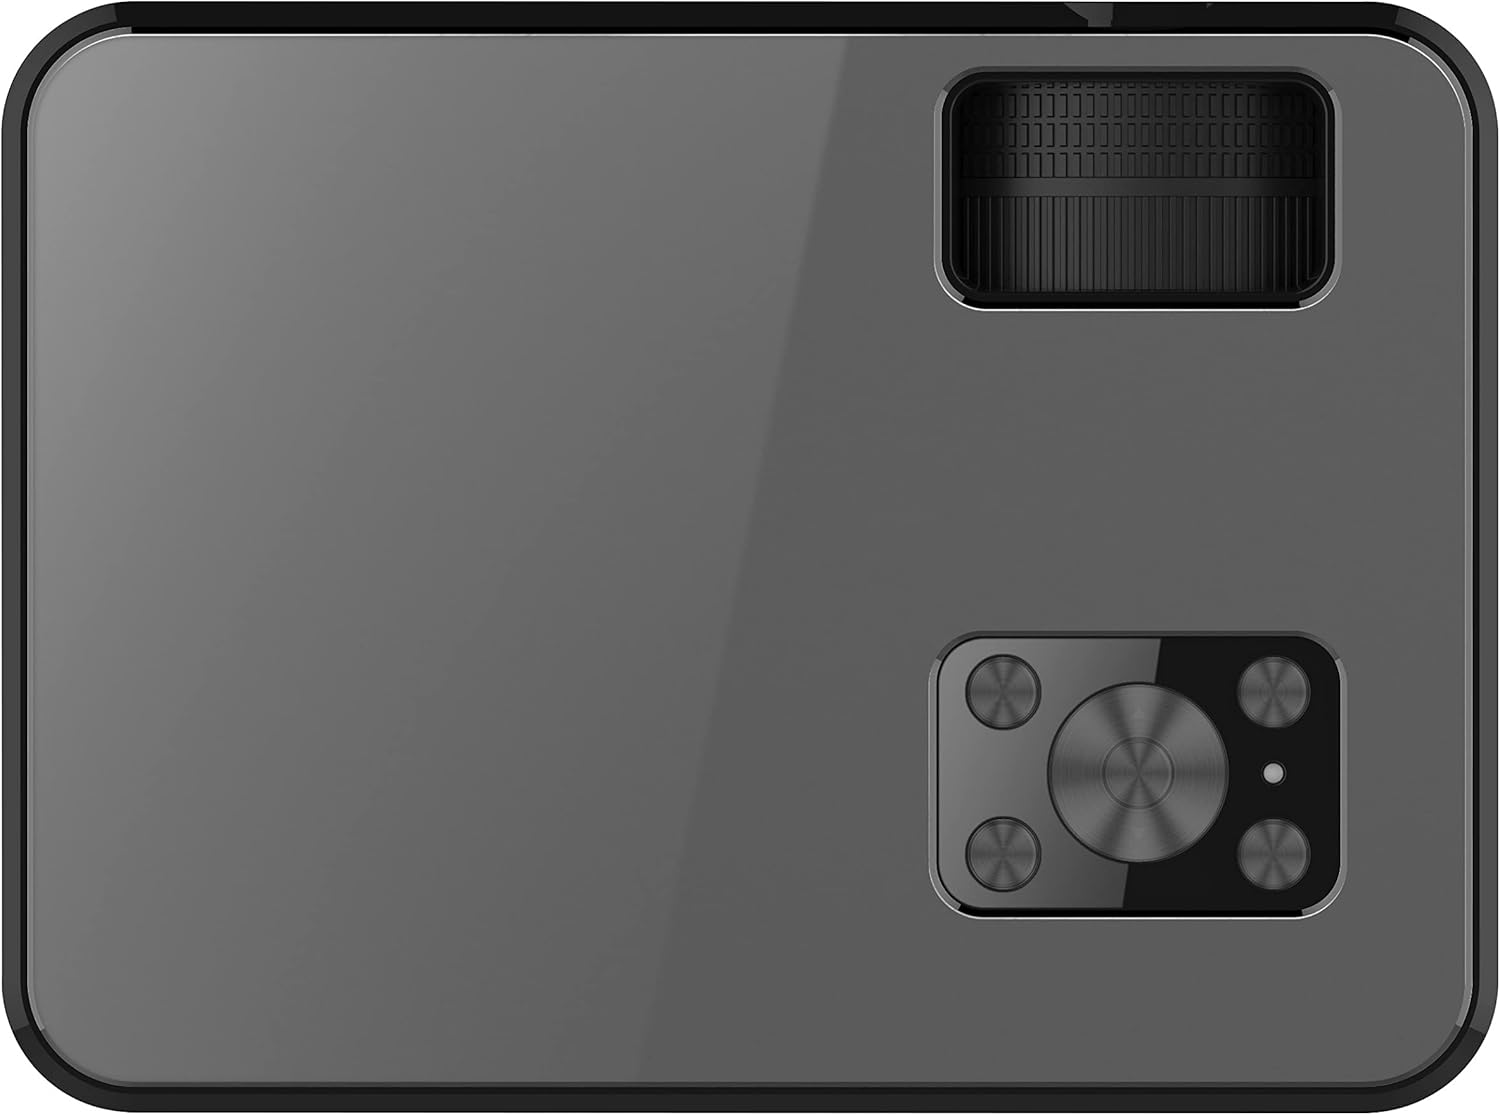
تصویر 4.4: اوپر view of the projector. This image displays the control panel with navigation buttons (up, down, left, right, OK), source, menu, and exit buttons, along with the power button and volume controls.

تصویر 4.5: طرف view of the projector showing input/output ports. This image highlights two HDMI ports, AV input, two USB ports, and a 3.5mm headphone jack (audio out).

تصویر 4.6: مخالف طرف view of the projector. This image shows the power input port and additional ventilation grilles.

تصویر 4.7: نیچے view of the projector. This image displays the mounting points for ceiling installation and rubber feet for stable placement on a flat surface.
4.2. ریموٹ کنٹرول
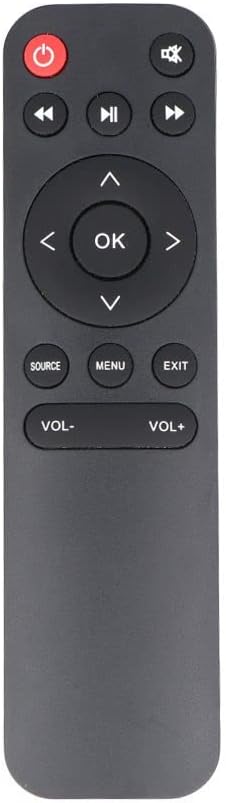
تصویر 4.8: The remote control for the IRRADIO VDP-4600HDW Projector. It features buttons for power, mute, navigation (up, down, left, right, OK), source selection, menu, exit, and volume control.
4.3. Ports and Controls Overview
- پاور بٹن: پروجیکٹر کو آن/آف کرتا ہے۔
- لینس: تصویر کو پروجیکٹ کرتا ہے۔
- فوکس رنگ: تصویر کی وضاحت کو ایڈجسٹ کرتا ہے۔
- کلیدی پتھر کی اصلاح: تصویر کی مسخ کو ایڈجسٹ کرتا ہے۔
- HDMI پورٹس (x2): Connect to HDMI-enabled devices (laptops, gaming consoles, Blu-ray players).
- USB پورٹس (x2): میڈیا پلے بیک کے لیے USB ڈرائیوز کو جوڑیں۔
- VGA پورٹ: Connect to computers with VGA output.
- اے وی پورٹ: Connect to older devices using composite video.
- 3.5 ملی میٹر آڈیو آؤٹ: بیرونی اسپیکر یا ہیڈ فون کو جوڑیں۔
- IR وصول کنندہ: ریموٹ کنٹرول سگنلز کے لیے۔
5. سیٹ اپ
5.1. مقام
Place the projector on a stable, flat surface or mount it to the ceiling. Ensure the projector is positioned directly in front of the projection screen or wall. The optimal projection distance ranges from 1.52 meters to 3.48 meters, yielding a screen size between 50 and 120 inches.
- فرنٹ پروجیکشن: Place the projector in front of the screen.
- پیچھے پروجیکشن: Place the projector behind a translucent screen.
- چھت کا پہاڑ: The projector can be inverted and mounted to the ceiling. Adjust settings in the OSD menu for inverted projection.
5.2. پاور کنکشن
- پاور کیبل کو پروجیکٹر کے پاور ان پٹ پورٹ سے جوڑیں۔
- Plug the other end of the power cable into a standard electrical outlet (220V AC, 50Hz).
- اسے آن کرنے کے لیے پروجیکٹر یا ریموٹ کنٹرول پر پاور بٹن دبائیں۔
5.3 فوکس اور کی اسٹون ایڈجسٹمنٹ
- پروجیکٹر کو آن کریں اور ایک تصویر دکھائیں۔
- گھمائیں۔ فوکس رنگ (located near the lens) until the image appears sharp and clear.
- کو ایڈجسٹ کریں۔ کلیدی پتھر کی اصلاح knob (located on the rear panel) to correct any trapezoidal distortion, making the image rectangular.
6. آپریٹنگ
6.1. پاور آن/آف
یونٹ کو آن یا آف کرنے کے لیے پروجیکٹر یا ریموٹ کنٹرول پر پاور بٹن دبائیں۔
6.2. ان پٹ ماخذ کا انتخاب
پاور آن کرنے کے بعد، دبائیں۔ ذریعہ button on the remote control or the projector's control panel to cycle through available input sources (HDMI1, HDMI2, USB1, USB2, VGA, AV).
6.3. بیرونی آلات کو جوڑنا
- HDMI: Connect an HDMI cable from your device (e.g., laptop, game console) to one of the projector's HDMI ports. Select the corresponding HDMI input.
- وی جی اے: Connect a VGA cable from your computer to the projector's VGA port. Select the VGA input.
- اے وی: Use the provided AV cable to connect to devices with composite video output. Select the AV input.
- USB: Insert a USB flash drive into a USB port. The projector's media player interface will appear automatically or can be accessed via the source menu.
6.4. میڈیا پلے بیک (USB)
The integrated media player supports various formats:
- تصویری فارمیٹس: JPEG, BMP, PNG, MPO
- ویڈیو فارمیٹس: MPEG1, MPEG2, H.263, H.264, AVS, MJPEG, RV30, RV40, HEVC
- آڈیو فارمیٹس: MPEG1 ، MPEG2 ، LPCM ، MP3
کے ذریعے نیویگیٹ کریں۔ files using the remote control's arrow keys and press OK منتخب کرنے کے لئے.
6.5. Wireless Audio Connection
The projector features an integrated wireless audio function for connecting to external audio devices. Refer to the on-screen display (OSD) menu for specific pairing instructions. Typically, you will need to enable the wireless audio feature in the projector's settings and then pair it with your desired external speaker or headphone.
7 دیکھ بھال
7.1. لینس کی صفائی
Use a soft, lint-free cloth and a specialized lens cleaning solution to gently wipe the lens. Avoid abrasive materials or excessive pressure.
7.2 ڈسٹ فلٹر کی صفائی
Regularly check and clean the dust filters to ensure optimal airflow and prevent overheating. Use a soft brush or a vacuum cleaner with a brush attachment to remove dust from the ventilation grilles.
7.3. ذخیرہ
When not in use for extended periods, store the projector in a cool, dry place, protected from dust and direct sunlight. Use the original packaging or a protective case.
8 خرابیوں کا سراغ لگانا
- کوئی طاقت نہیں: یقینی بنائیں کہ پاور کیبل محفوظ طریقے سے منسلک ہے اور پاور آؤٹ لیٹ کام کر رہا ہے۔
- کوئی تصویرنہیں: Check the input source selection. Ensure the connected device is powered on and sending a signal. Verify cable connections.
- دھندلی تصویر: Adjust the focus ring. Ensure the projection distance is within the optimal range.
- تصویر مسخ شدہ: کلیدی پتھر کی اصلاح کو ایڈجسٹ کریں۔
- کوئی آواز نہیں: Check the volume settings on both the projector and the connected device. If using external speakers, ensure they are properly connected or paired via wireless audio.
- ریموٹ کنٹرول کام نہیں کر رہا: Replace the batteries. Ensure there are no obstructions between the remote and the projector's IR receiver.
9. وضاحتیں
| فیچر | تفصیلات |
|---|---|
| پروجیکشن سسٹم | LCD panel with LED light source |
| مقامی قرارداد | 1920x1080 (Full HD 1080p) |
| ڈائنامک کنٹراسٹ ریشو | 2000:1 |
| روشنی کا ذریعہ چمک | 3000 Lumens |
| ایل ای ڈیamp زندگی | 50,000 گھنٹے |
| لینس | دستی فوکس |
| وائرلیس آڈیو فنکشن | مربوط |
| کنیکٹوٹی | 2x HDMI, 2x USB, VGA, AV Composite, 3.5mm Headphone Jack (output) |
| پہلو کا تناسب | 16:9 Native / 4:3 Compatible |
| بہترین پروجیکشن سائز | 50" - 120" |
| بہترین پروجیکشن فاصلہ | 1.52 میٹر سے 3.48 میٹر |
| پروجیکشن موڈز | Front, Rear, Ceiling (Front/Rear) |
| آڈیو | 1x 3W Hi-Fi Speaker |
| کولنگ سسٹم | دوہری کولنگ سسٹم |
| OSD زبان | 23 زبانیں |
| بجلی کی فراہمی | 220V AC 50Hz (single phase) |
| وزن | 1.4 کلوگرام |
| طول و عرض (W x H x D) | 222 x 91 x 173 ملی میٹر |
10. وارنٹی اور سپورٹ
Information regarding specific warranty terms and support contacts is not available in the provided product data. Please refer to the product packaging or the retailer's webوارنٹی کی تفصیلات اور کسٹمر سپورٹ کی معلومات کے لیے سائٹ۔


