تعارف
This manual provides comprehensive instructions for the installation, operation, and maintenance of your ECLIPSE Solar Modern Cordless Light Filtering Privacy Window Roller Shade. Please read these instructions carefully before beginning installation to ensure proper setup and safe operation. This shade is designed to block 95% of Ultra-Violet light, minimize glares, protect skin and furniture, and contribute to energy savings, all while allowing you to enjoy the view outdoors. Its cordless lift system ensures child and pet safety and ease of use.
پیکیج کے مشمولات
تنصیب شروع کرنے سے پہلے، تصدیق کریں کہ تمام اجزاء موجود ہیں:
- 1 x Roller Shade (with integrated headrail)
- 2 ایکس بڑھتے ہوئے خط وحدانی
- 4 ایکس بریکٹ سکرو
- 4 x Wall Anchors (for drywall installation)
- 1 x Shade Handle

Image: All components included with the Eclipse Roller Shade, laid out for inspection.
مطلوبہ ٹولز
تنصیب کے لیے درج ذیل ٹولز کی سفارش کی جاتی ہے۔
- Drill with 13/64" drill bit
- پنسل
- ٹیپ کی پیمائش
- چھوٹی سطح
- ہلکا پھلکا ہتھوڑا
- فلپس سکریو ڈرایور
- Step Ladder (if needed for height)
تنصیب
Your Eclipse Roller Shade can be mounted in two ways: inside the window frame (ceiling mount) or outside the window frame (wall mount). Ensure to leave no more than 2 inches of space from the ends of the headrail to properly mount the brackets. Always use the provided wall anchors if mounting onto drywall.
Mounting Outside the Window Frame (Wall Mount)
- Measure 1 to 2 inches from the edge of where the shade will be mounted and mark the position for the brackets with your pencil.
- Use a small level to verify the alignment of your marks.
- Using a drill with a 13/64" drill bit, drill a hole at each marked position for the bracket screws.
- Insert a wall anchor into each drilled hole. Lightly tap them with a hammer until they are flush with the wall surface.
- Position the mounting bracket over the wall anchors and insert the bracket screws through the holes on the back plate of the bracket.
- Tighten the screws with a Phillips screwdriver until the bracket is securely fastened to the wall. Repeat for the second wall bracket.
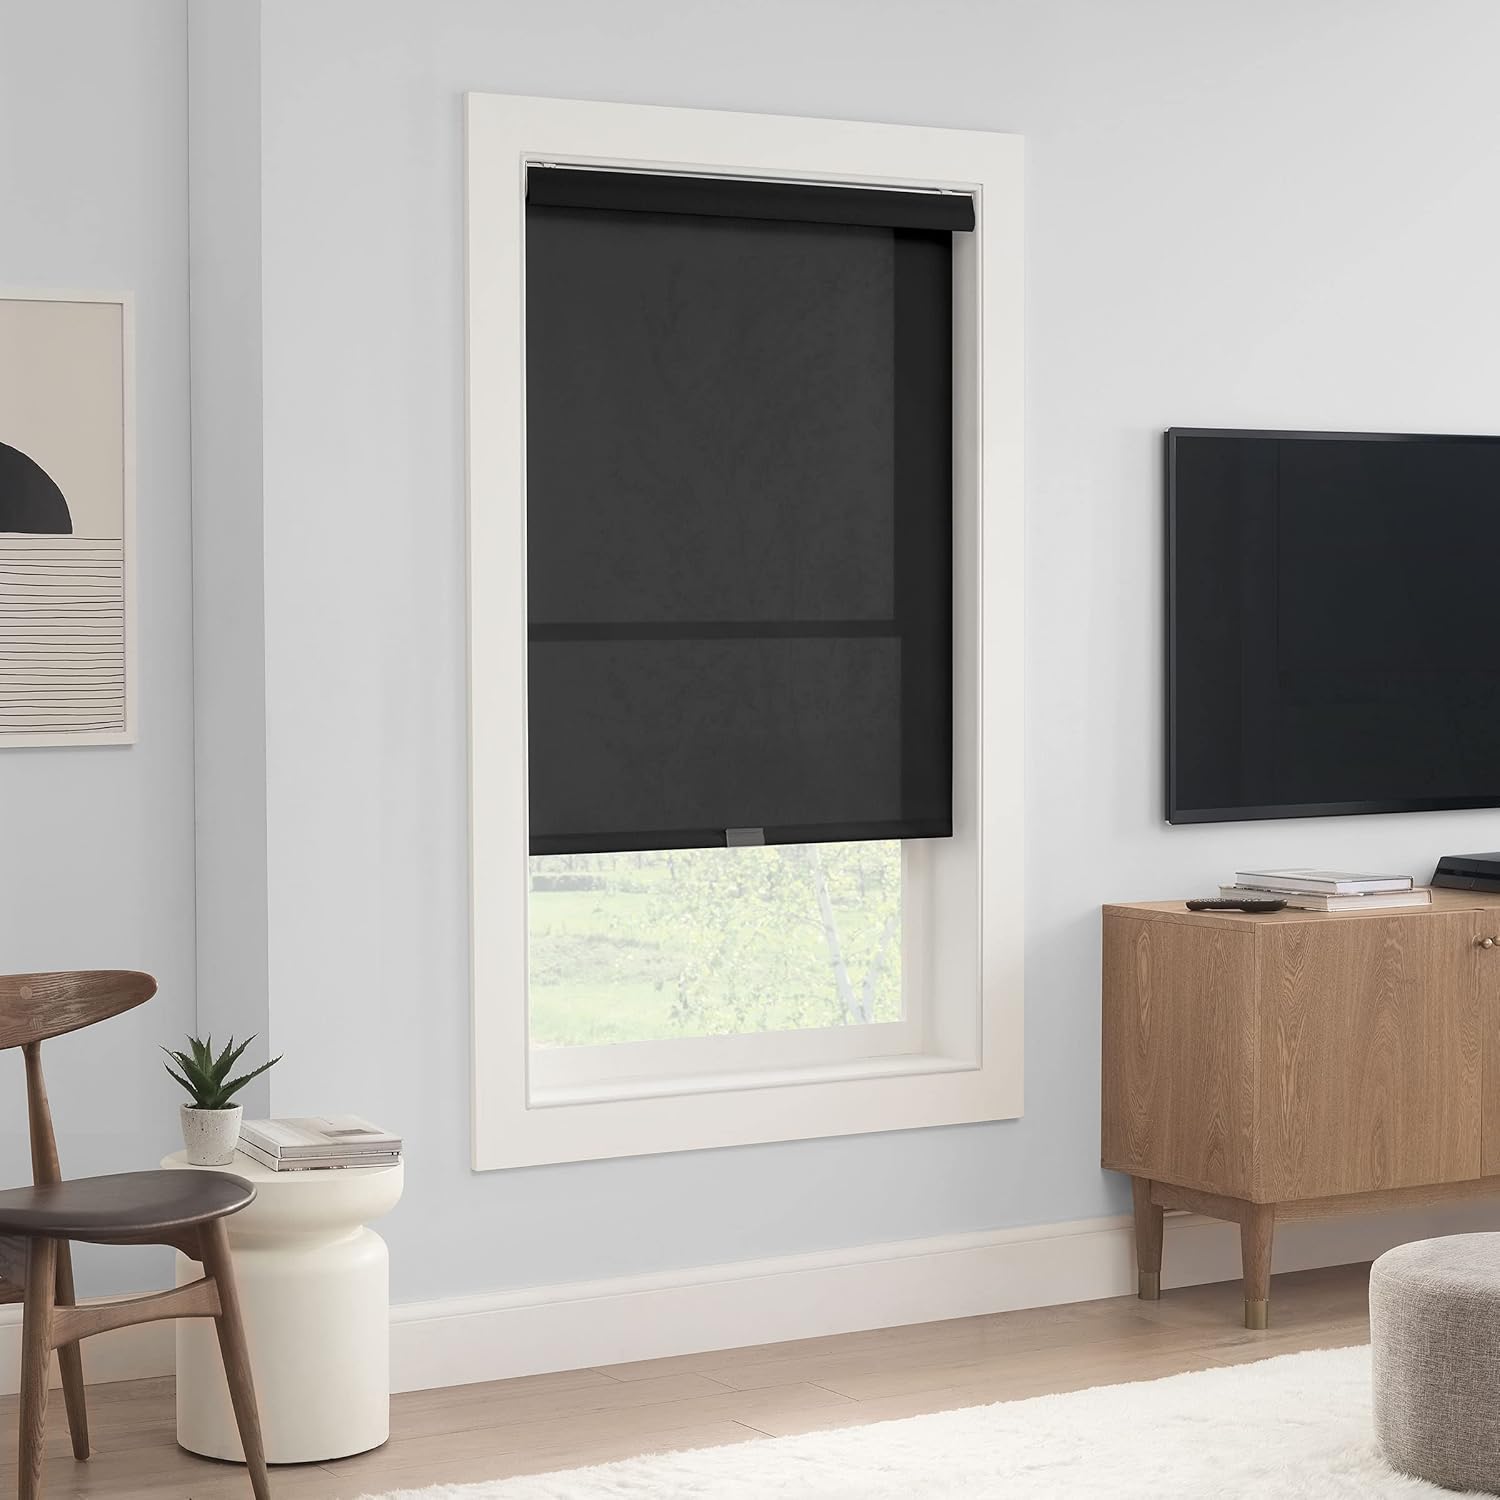
Image: An Eclipse Roller Shade mounted outside a window frame, providing privacy and light filtering in a living room setting.
Mounting Inside the Window Frame (Ceiling Mount)
- Measure 1 to 2 inches from the inside top edge of the window frame and mark the position for the brackets with your pencil.
- Use a small level to verify the alignment of your marks.
- Using a drill with a 13/64" drill bit, drill a hole at each marked position in the top of the window frame for the bracket screws.
- Insert a wall anchor into each drilled hole. Lightly tap them with a hammer until they are flush with the frame surface.
- Position the mounting bracket over the wall anchors and insert the bracket screws through the holes on the top plate of the bracket.
- Tighten the screws with a Phillips screwdriver until the bracket is securely fastened to the frame. Repeat for the second bracket.

Image: An Eclipse Roller Shade mounted inside a window frame, showcasing its sleek design and light filtering capability.
Fitting the Shade and Securing the Headrail
- Carefully lift the roller shade and align the headrail with the installed mounting brackets.
- Insert the backside of the headrail onto the brackets first.
- Then, push the front side of the headrail upward until it snaps securely into place. You should hear an audible click when the headrail is properly secured.
- Once the headrail is secured, attach the clear shade handle to the bottom bar of the shade and slide it to the center for easy access.

تصویر: ایک قریبی اپ view of the bottom bar of the Eclipse Roller Shade, highlighting the clear handle for operation.
آپریشن
The Eclipse Roller Shade features a cordless lift system for smooth and safe operation.
- سایہ نیچے کرنے کے لیے: Gently pull down on the shade handle located at the bottom bar. Continue pulling until the shade reaches your desired height.
- سایہ بڑھانے کے لیے: Gently pull the shade handle down twice to release the locking mechanism. The shade will then smoothly retract upwards. Guide it to your desired raised position.
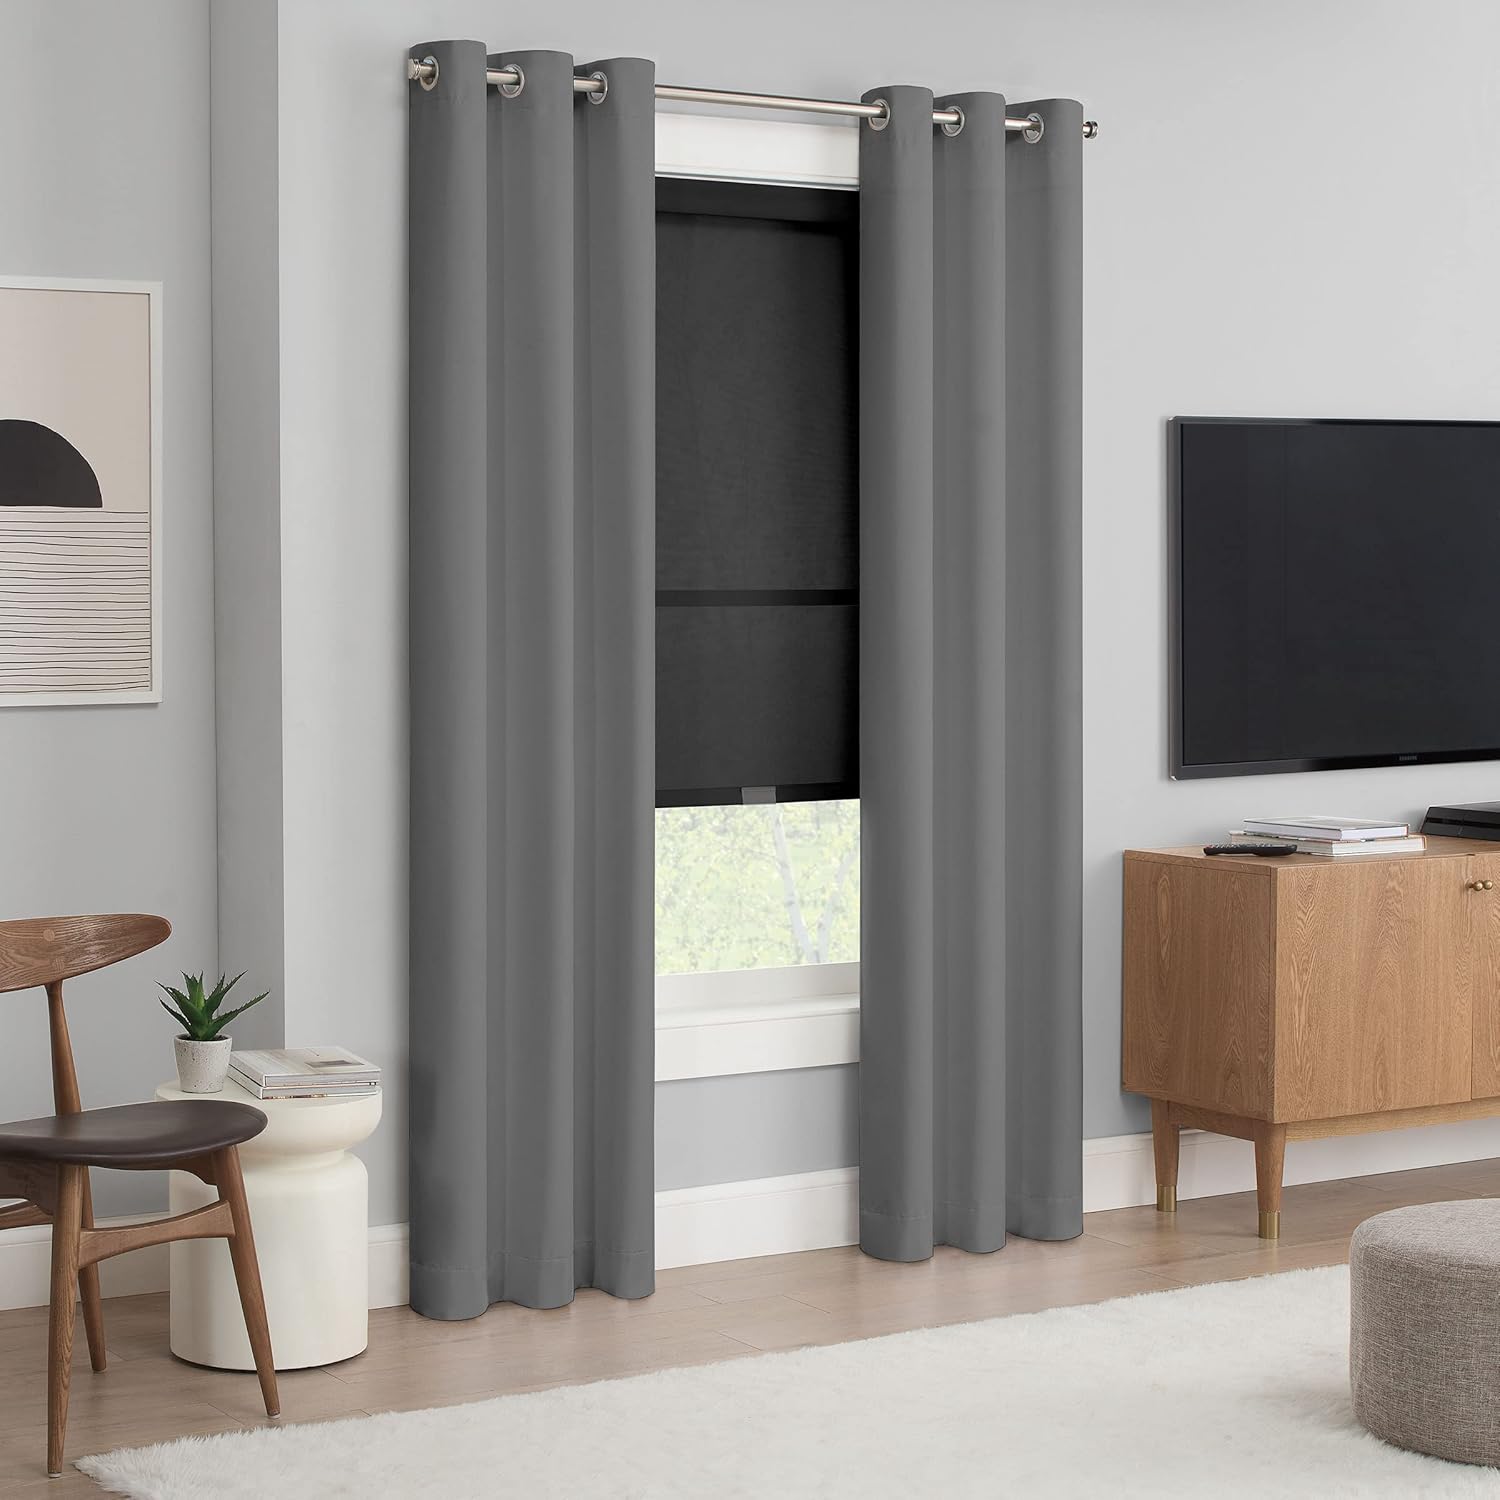
Image: The Eclipse Roller Shade complementing existing curtains, illustrating its light filtering effect in a room.
دیکھ بھال
To maintain the appearance and functionality of your Eclipse Roller Shade:
- صفائی: The light filtering fabric is made of 100% Polyester and the cassette cover is 100% Polyvinyl Chloride. Spot clean only. Use a soft, damp cloth with mild soap and water for any spills or marks. Do not immerse in water or use harsh chemicals.
- آپریشن: Ensure the cordless lift system operates smoothly. If it becomes stiff, gently raise and lower the shade a few times to redistribute the tension.
- معائنہ: Periodically check the mounting brackets and screws to ensure they remain securely fastened.
خرابی کا سراغ لگانا
If you encounter issues with your Eclipse Roller Shade, consider the following common solutions:
- Shade not lowering/raising smoothly:
- Ensure there are no obstructions in the path of the shade.
- Gently pull the shade all the way down and then all the way up a few times to reset the spring mechanism.
- Shade is crooked:
- Check if the headrail is securely snapped into both mounting brackets. Re-seat if necessary.
- Verify that the mounting brackets are level and securely installed. Adjust if needed.
- Shade handle is loose:
- Re-attach the shade handle firmly to the bottom bar.
وضاحتیں
| فیچر | تفصیل |
|---|---|
| ماڈل نمبر | 2511،XNUMXSR |
| طول و عرض | 36"W x 72"H (Product Dimensions: 72"L x 36"W) |
| مواد | Fabric: 100% Polyester, Cover: 100% Polyvinyl Chloride |
| رنگ | سیاہ |
| دھندلاپن | Semi-Sheer |
| آپریشن موڈ | Manual, Cordless |
| خصوصی خصوصیات | Light Filtering, UV Blocking (95%), Child & Pet Safe |
| چڑھنے کی قسم | Inside Mount (also supports Outside Mount) |
| شے کا وزن | 4.69 پاؤنڈ |
| کارخانہ دار | Keeco LLC |
| اصل ملک | چین |
وارنٹی اور سپورٹ
For warranty information or technical support, please refer to the product packaging or contact Eclipse customer service directly. Keep your purchase receipt for warranty claims.


