تعارف
This manual provides detailed instructions for the safe installation, operation, and maintenance of your UFESA CFNP Ceiling Fan with Light. Please read this manual thoroughly before installation and use, and keep it for future reference.
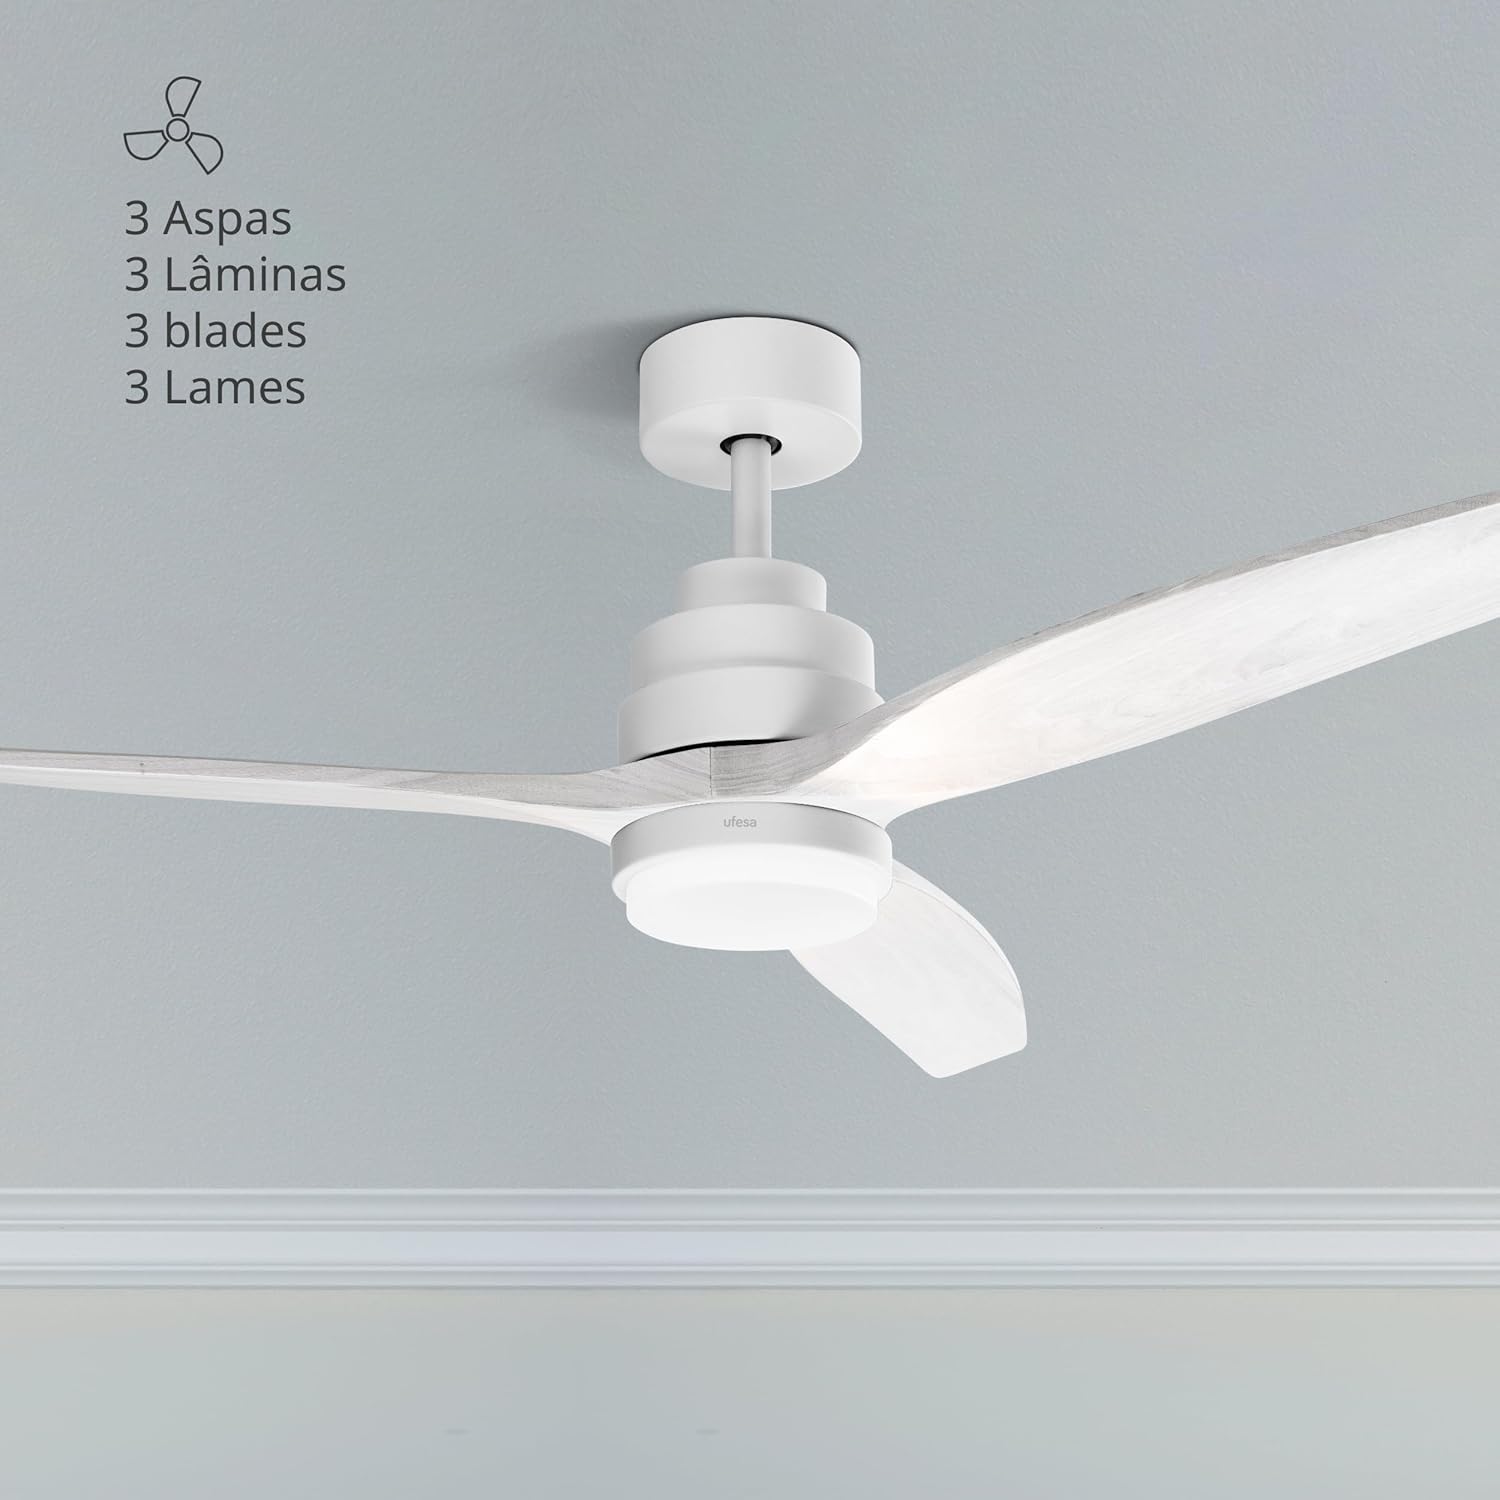
The UFESA CFNP Ceiling Fan with Light installed in a room, showcasing its three natural wood blades and integrated light.
حفاظتی ہدایات
آگ، برقی جھٹکا، اور ذاتی چوٹ کے خطرے کو کم کرنے کے لیے برقی آلات استعمال کرتے وقت ہمیشہ بنیادی حفاظتی احتیاطی تدابیر پر عمل کریں۔
جنرل سیفٹی
- Ensure the ceiling fan is installed by a qualified electrician in accordance with local electrical codes.
- Disconnect power at the main circuit breaker before installation, cleaning, or any maintenance.
- Do not operate the fan with damaged blades or housing. Inspect regularly for any signs of wear or damage.
- Keep hands, hair, and clothing away from moving fan blades during operation.
- یہ آلات کم جسمانی، حسی، یا دماغی صلاحیتوں، یا تجربے اور علم کی کمی والے افراد (بشمول بچوں) کے استعمال کے لیے نہیں ہے، جب تک کہ ان کی حفاظت کے لیے ذمہ دار کسی شخص کی طرف سے آلات کے استعمال سے متعلق نگرانی یا ہدایات نہ دی گئی ہوں۔ .
- اس بات کو یقینی بنانے کے لیے بچوں کی نگرانی کی جانی چاہیے کہ وہ آلات سے نہ کھیلیں۔
الیکٹریکل سیفٹی
- تصدیق کریں کہ والیومtage indicated on the fan matches your local power supply before connecting.
- تمام وائرنگ قومی اور مقامی برقی کوڈز کے مطابق ہونی چاہیے۔
- بجلی کے جھٹکے سے بچنے کے لیے مناسب گراؤنڈنگ کو یقینی بنائیں۔
- ڈی میں پنکھا استعمال نہ کریں۔amp or wet locations, or where it may be exposed to water.
پیکیج کے مشمولات
Carefully unpack all components and ensure all items are present and undamaged. If any parts are missing or damaged, contact Ufesa customer service.

A close-up of the fan's motor housing and a blade, representing the main components.
The package should typically include:
- 3 Natural Wood Blades
- موٹر اسمبلی
- Downrod (typically 15cm and 25cm options)
- Mounting Bracket + Canopy
- Integrated LED Light Kit / Lampسایہ
- کنٹرولر اسمبلی
- جوئے کا احاطہ
- ریموٹ کنٹرول
- بڑھتے ہوئے ہارڈ ویئر (پیچ، اینکرز)
سیٹ اپ اور انسٹالیشن
Important: Disconnect power at the circuit breaker before beginning any installation work.
مرحلہ 1: بریکٹ کو ماؤنٹ کریں۔
Fix the fan's mounting bracket to the ceiling. Use a pencil to mark the drilling points. Ensure the bracket is securely fastened to a structural beam or a suitable ceiling electrical box capable of supporting the fan's weight.
مرحلہ 2: سوراخ ڈرل
Drill holes at the marked points using an appropriate drill bit for your ceiling material.
مرحلہ 3: اینکرز داخل کریں۔
Insert the provided ceiling anchors into the drilled holes. Tap gently with a hammer if necessary to ensure they are flush with the ceiling surface.
مرحلہ 4: محفوظ بریکٹ
Align the mounting bracket with the anchors and secure it firmly with the provided screws. Ensure it is stable and does not wobble.
Step 5: Connect Light Wiring
Connect the light wires from the fan to the terminal block on the mounting bracket. Match colors (e.g., blue to blue, brown to brown, etc.) according to the wiring diagram in the full manual.
Step 6: Connect Controller Wiring
Connect the wiring from the light kit to the fan's controller. Ensure all connections are tight and secure.
Step 7: Assemble Fan Base
Assemble the fan base by attaching the chosen downrod (15cm or 25cm) to the motor assembly. Secure it with the provided pin and screw.
Step 8: Hang Fan Base
Carefully lift the assembled fan base and hang it onto the hook or support provided on the ceiling mounting bracket. This allows you to work on wiring with the fan temporarily supported.
Step 9: Connect Base Wiring to Controller
Connect the main power wiring from the ceiling to the fan's controller, and then connect the controller to the fan motor wiring. Ensure all connections are correct and secure.
Step 10: Position Controller and Cables
Carefully tuck the controller and all excess cables into the opening of the ceiling support bracket, ensuring no wires are pinched.
مرحلہ 11: گراؤنڈ وائر کو جوڑیں۔
Connect the ground wire (usually green/yellow) from the fan base to the ground terminal on the mounting bracket or ceiling wiring.
Step 12: Install Canopy
Slide the canopy up to the ceiling and secure it to the mounting bracket with the provided screws. Ensure it covers all wiring connections.
Step 13: Attach Blades
Attach the three natural wood blades to the fan motor assembly using the provided screws. Ensure they are tightened evenly to prevent wobbling.
Step 14: Install Light Kit
Remove the small screws from the base of the fan's light housing. Place the LED light support, screw it into place, and then attach the light cover (lampshade) by twisting or securing it as per the design.
آپریٹنگ ہدایات
Your UFESA CFNP ceiling fan is controlled by the included remote control. Ensure batteries are installed correctly in the remote.

The remote control allows easy access to all fan and light functions.
پاور آن/آف
پاور بٹن دبائیں (⏻) on the remote control to turn the fan and light on or off.
پنکھے کی رفتار کنٹرول
The fan offers 6 adjustable speeds. Use the numbered speed buttons (1-6) on the remote to select your desired airflow intensity. Speed 1 is the lowest, and Speed 6 is the highest.

The fan features 6 speeds and an 8-hour timer function.
لائٹ کنٹرول
The integrated LED light has 3 selectable color temperatures: natural light, cold light, and warm light. Use the light button (💡) on the remote to cycle through these settings to create the desired ambiance.

The fan light offers natural, warm, and cold light options.
موسم گرما / موسم سرما کی تقریب
This fan features a reversible motor for year-round comfort. Use the summer/winter button (⟳) on the remote to switch between modes.
- سمر موڈ (نیچے کی طرف ہوا کا بہاؤ): Blades rotate counter-clockwise, creating a downward breeze that cools the room.
- ونٹر موڈ (اوپر کی طرف ہوا کا بہاؤ): Blades rotate clockwise, circulating warm air trapped near the ceiling downwards without creating a direct draft, helping to distribute heat more evenly.

Visual representation of the summer and winter airflow directions.
ٹائمر فنکشن
Set the fan to automatically turn off after a specified period using the timer buttons (1H, 4H, 8H) on the remote control. This is useful for energy saving or for use during sleep.
دیکھ بھال
باقاعدگی سے دیکھ بھال بہترین کارکردگی کو یقینی بناتی ہے اور آپ کے چھت کے پنکھے کی عمر میں توسیع کرتی ہے۔
صفائی
- صفائی سے پہلے ہمیشہ بجلی منقطع کریں۔
- Regularly clean the fan blades and motor housing with a soft, damp کپڑا کھرچنے والے کلینر، سالوینٹس یا سخت کیمیکل استعمال نہ کریں، کیونکہ یہ ختم کو نقصان پہنچا سکتے ہیں۔
- Ensure the fan is completely dry before restoring power and operating.
بلیڈ کا معائنہ
- Periodically check that all blade screws are tight. Over time, they may loosen, causing the fan to wobble or create noise.
- Ensure blades are free from cracks or damage. Replace damaged blades immediately.
خرابی کا سراغ لگانا
If you encounter any issues with your fan, refer to the following common problems and solutions:
پنکھا شروع نہیں ہوتا
- Check if the main power supply to the fan is connected and turned on.
- Ensure the circuit breaker for the fan is in the 'ON' position.
- تصدیق کریں کہ تمام برقی کنکشن محفوظ ہیں اور درست طریقے سے وائرڈ ہیں۔
- ریموٹ کنٹرول بیٹری چیک کریں اور اگر ضروری ہو تو بدل دیں۔
فین ووبلز
- Ensure all blade screws are tightened evenly. Loose screws can cause imbalance.
- Check that the mounting bracket is securely fastened to the ceiling and that the downrod is properly seated.
- Verify that the blades are not bent or damaged.
روشنی کام نہیں کرتی
- Check the light wiring connections within the fan housing.
- Ensure the light kit is properly installed and connected to the fan's electrical system.
- If the light is LED and not replaceable by the user, a faulty LED module may require professional service.
ریموٹ کنٹرول کام نہیں کر رہا ہے۔
- ریموٹ کنٹرول میں بیٹریوں کو نئی سے تبدیل کریں۔
- Ensure there are no obstructions between the remote control and the fan's receiver.
- Confirm the remote control is paired with the fan (refer to specific pairing instructions if available in the full manual).
وضاحتیں

The fan has a diameter of 132 cm, suitable for various room sizes.
| فیچر | تفصیلات |
|---|---|
| ماڈل نمبر | CFNP |
| طاقت | 40W |
| رفتار | 6 |
| بلیڈ کا مواد | قدرتی لکڑی |
| فین قطر | 132 سینٹی میٹر |
| روشنی کی سطح | 3 (Natural, Cold, Warm) |
| ٹائمر | 8 گھنٹے تک |
| خصوصی خصوصیات | Ultra-silent DC motor, Summer/Winter function, Remote control |
| طول و عرض (L x W x H) | 25.5 x 68.5 x 32.5 سینٹی میٹر |
| وزن | 5.63 کلوگرام |
| طاقت کا منبع | الیکٹرک کیبل |
| سرٹیفیکیشنز | عیسوی، یو ایل |
وارنٹی اور سپورٹ
For detailed warranty information, including terms, conditions, and duration, please refer to the warranty card included with your product. You can also find this information on the official Ufesa webسائٹ
For customer support, technical assistance, or to inquire about replacement parts, please visit the Ufesa website or contact their customer service department directly. Have your product model number (CFNP) and purchase date ready when contacting support.
Official Ufesa Webسائٹ: www.ufesa.es


