1. تعارف
This user manual provides detailed instructions for the proper installation, operation, and maintenance of your RAVEMEN FR500 Front Bike Light and TR250 Tail Bike Light Set. Please read this manual thoroughly before using the product to ensure safe and optimal performance. Keep this manual for future reference.
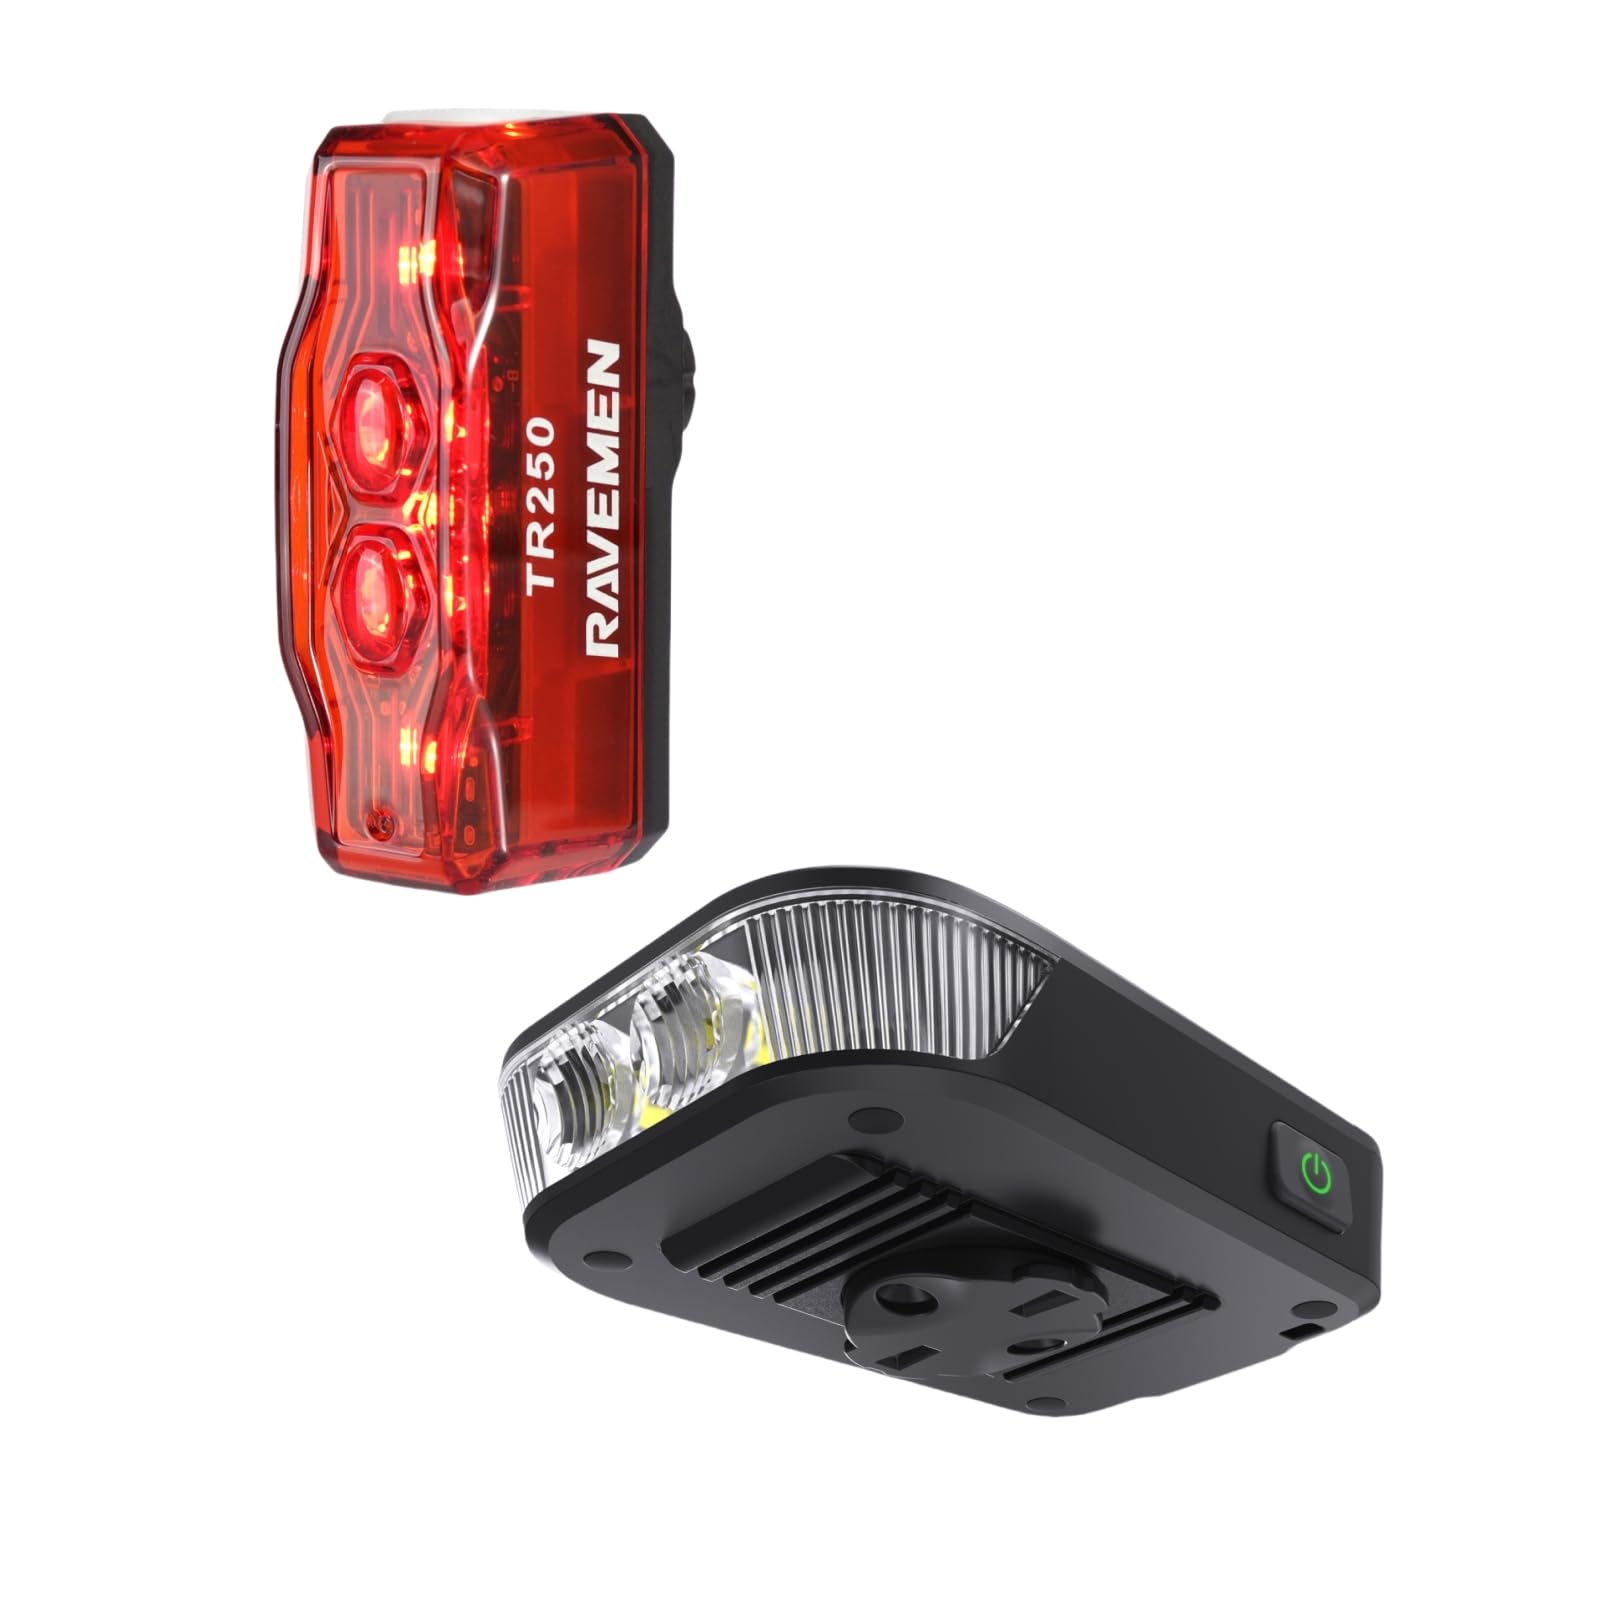
تصویر 1: RAVEMEN FR500 Front Light and TR250 Tail Light Bundle. This image displays both the FR500 front light and the TR250 tail light, along with their respective mounting brackets and charging cables, as they appear in the product packaging.
2. حفاظتی معلومات
- لائٹ بیم میں براہ راست مت دیکھو when the front light is on, as it can cause temporary vision impairment or eye damage.
- Ensure the lights are securely mounted before each ride to prevent detachment.
- لائٹس کو بچوں سے دور رکھیں۔
- Do not disassemble or modify the lights. This will void the warranty and may cause damage or injury.
- صرف فراہم کردہ چارجنگ کیبلز یا مصدقہ مساوی استعمال کریں۔
- Operating temperature range: -10°C to 40°C (14°F to 104°F).
- جب استعمال میں نہ ہوں تو روشنی کو ٹھنڈی، خشک جگہ پر رکھیں۔
3. پیکیج کے مشمولات
تصدیق کریں کہ تمام اشیاء آپ کے پیکیج میں موجود ہیں:
- 1 x RAVEMEN FR500 Front Bike Light
- 1 x RAVEMEN TR250 Tail Bike Light
- 1 x Handlebar Mount for FR500
- 1 x Seatpost Mount for TR250
- 2 x USB Charging Cables (Type-C for FR500, Micro-USB for TR250)
- 1 ایکس یوزر مینوئل (یہ دستاویز)
4. سیٹ اپ اور انسٹالیشن
4.1. FR500 Front Light Installation
- Select a suitable position on your handlebar, ensuring the light beam is unobstructed and points forward.
- Attach the handlebar mount to your handlebar using the provided strap. Ensure it is tight and stable.
- Slide the FR500 front light onto the mount until it clicks securely into place.
- Adjust the angle of the light to illuminate the path ahead without blinding oncoming traffic.
تصویر 2: FR500 Front Light mounted on a bicycle handlebar. This image illustrates the FR500 front light securely attached to a bicycle handlebar, demonstrating the correct orientation and positioning for optimal visibility.
4.2. TR250 Tail Light Installation
- Choose a position on your seatpost that provides maximum rear visibility.
- Attach the seatpost mount to your seatpost using the rubber strap. Ensure it is firm and does not rotate.
- Slide the TR250 tail light onto the mount until it locks securely.
- Verify the tail light is facing directly backward.
تصویر 3: TR250 Tail Light mounted on a bicycle seatpost. This image shows the TR250 tail light attached to a bicycle seatpost, highlighting its rear-facing orientation for enhanced safety.
5. آپریٹنگ ہدایات
5.1. FR500 Front Light Operation
- پاور آن/آف: 1 سیکنڈ کے لیے پاور بٹن دبائیں اور تھامیں۔
- Change Brightness Mode: With the light on, short press the power button to cycle through High, Medium, Low, and Eco modes.
- فلیش موڈ: Double-press the power button to activate flash mode. Short press to cycle through different flash patterns. Double-press again to return to constant mode.
- موڈ میموری: The light will remember the last used constant mode when turned off and on again.
- بیٹری اشارے: The power button illuminates to indicate battery level:
- Green: 100% - 75%
- Blue: 75% - 50%
- Yellow: 50% - 25%
- Red: 25% - 10%
- Flashing Red: Below 10% (Charge immediately)
5.2. TR250 Tail Light Operation
- پاور آن/آف: 1 سیکنڈ کے لیے پاور بٹن دبائیں اور تھامیں۔
- موڈ تبدیل کریں: With the light on, short press the power button to cycle through various constant and flashing modes.
- موڈ میموری: The light will remember the last used mode.
- بیٹری اشارے: The power button illuminates to indicate battery level:
- Green: 100% - 75%
- Blue: 75% - 50%
- Yellow: 50% - 25%
- Red: 25% - 10%
- Flashing Red: Below 10% (Charge immediately)
6. Charging the Lights
It is recommended to fully charge both lights before first use.
- FR500 Front Light:
- Locate the USB Type-C charging port on the FR500.
- Connect the provided USB Type-C cable to the light and a USB power source (e.g., computer, wall adapter).
- The power button will flash red during charging and turn solid green when fully charged.
- TR250 Tail Light:
- Locate the Micro-USB charging port on the TR250.
- Connect the provided Micro-USB cable to the light and a USB power source.
- The power button will flash red during charging and turn solid green when fully charged.
- Charging time typically ranges from 2-4 hours depending on the power source.
7 دیکھ بھال
- صفائی: Wipe the light body and lens with a soft, damp کپڑا کھرچنے والے کلینر یا سالوینٹس کا استعمال نہ کریں۔
- ذخیرہ: If storing for an extended period, charge the lights to approximately 50% every 3 months to prolong battery life. Store in a cool, dry place.
- پانی کی مزاحمت: The lights are designed to be water-resistant. Avoid submerging them in water. Ensure charging port covers are securely closed.
8 خرابیوں کا سراغ لگانا
| مسئلہ | ممکنہ وجہ | حل |
|---|---|---|
| لائٹ آن نہیں ہوتی۔ | کم بیٹری یا مکمل طور پر ڈسچارج۔ | روشنی کو مکمل طور پر چارج کریں۔ |
| روشنی غیر متوقع طور پر بند ہوجاتی ہے۔ | کم بیٹری۔ | روشنی کو ری چارج کریں۔ |
| ہلکی چمکدار یا مدھم۔ | کم بیٹری یا ڈھیلا کنکشن۔ | Charge the light. Ensure the light is securely mounted. |
| Cannot change modes. | Button malfunction or light is in a specific locked mode. | Ensure the button is pressed correctly. If issue persists, contact customer support. |
| Mount is not secure. | Mounting strap not tightened sufficiently or incorrect size. | Re-tighten the strap. Ensure the correct mount is used for your handlebar/seatpost diameter. |
9. وضاحتیں
FR500 فرنٹ لائٹ
- زیادہ سے زیادہ آؤٹ پٹ: 500 Lumens
- بیٹری: ریچارج ایبل لی آئن
- چارجنگ پورٹ: USB ٹائپ سی
- چلانے کا وقت: موڈ کے لحاظ سے مختلف ہوتا ہے۔
- طول و عرض: (Specific dimensions not provided)
- وزن: (Specific weight not provided)
- پانی کی مزاحمت: IPX6
TR250 Tail Light
- زیادہ سے زیادہ آؤٹ پٹ: 250 Lumens
- بیٹری: ریچارج ایبل لی آئن
- چارجنگ پورٹ: مائیکرو یو ایس بی
- چلانے کا وقت: موڈ کے لحاظ سے مختلف ہوتا ہے۔
- طول و عرض: (Specific dimensions not provided)
- وزن: (Specific weight not provided)
- پانی کی مزاحمت: IPX4
Note: Specific run times, battery capacities, dimensions, and weights may vary slightly. Refer to product packaging or official Ravemen website for the most accurate details.
10. وارنٹی اور سپورٹ
RAVEMEN products are manufactured to high-quality standards. This product comes with a limited warranty against defects in materials and workmanship from the date of purchase. Please retain your proof of purchase for warranty claims.
For detailed warranty information, technical support, or service inquiries, please visit the official RAVEMEN website or contact your local distributor. Do not attempt to repair the product yourself, as this may void the warranty.
RAVEMEN Official Webسائٹ: www.ravemen.com


